Best Tire Pressure Snow: A Practical Winter Guide
Learn the best tire pressure snow guidelines with a practical, step-by-step approach. Discover cold-weather baselines, snow-specific adjustments, and trusted TPMS checks for safer winter driving.

You’ll learn how to set the best tire pressure snow using a winter-appropriate range, based on your vehicle and tire size. Start with the cold-weather baseline from your manufacturer, then adjust in small increments, check with a gauge, and re-check after a drive on cold days. Safety tips and TPMS guidance included.
Why Snow Conditions Change Tire Pressure
Tire pressure is not a constant; it changes with temperature. In cold weather, air contracts, which lowers the psi in your tires. When you drive, friction heats tires, which increases pressure. In winter, these opposing effects create a moving target, especially on long commutes or when your vehicle is heavily loaded. The result is a pressure reading that can change by several psi as the temperature swings. This is why you always measure tire pressure when the tires are cold and use the cold-inflation spec from your owner's manual or the door placard as your baseline. According to Tire Pressure Tips, this baseline protects tread contact and winter handling. For many drivers, the question becomes: what is the best tire pressure snow for my car? The honest answer is: start with the official baseline, then adjust within the manufacturer’s range to balance traction and fuel economy. Snow traction benefits from slightly higher pressure to keep the contact patch compact, but over-inflation can reduce grip on packed snow and ice. Also remember that tread depth, tire type, and weight distribution influence performance, so adjust per your situation.
Reading Your Baseline: Where to Find the Official Specs
Your vehicle’s official cold-inflation specifications are not guesses; they are printed for a reason. Look on the door jamb placard for the recommended cold pressures for front and rear tires, then confirm with the owner’s manual. If you’ve installed winter tires or altered wheel sizes, the spec may change—always use the numbers that correspond to the tire size currently mounted. Measure when tires are cold (not after a drive), as heat from driving can skew readings. Use a reliable gauge and record the numbers so you can compare them to your baseline over time. If your car has a TPMS, use its readings as a supplementary guide, but don’t rely on it alone—verify with a hand gauge for accuracy.
How Temperature Affects Tire Pressure
Temperature directly affects air density and pressure in tires. A common rule of thumb is that tire pressure changes by about 1 psi for roughly every 10°F temperature change, though actual results vary with tire volume, tread, and wheel design. In winter, outdoor temperatures can drop dramatically, causing a noticeable pressure drop overnight. Conversely, daytime warming can push readings higher. The key takeaway is to measure when cold and to interpret changes relative to the manufacturer’s spec. Keep a log of cold readings on chilly mornings to monitor trends and anticipate adjustments before a long trip.
How to Choose the Snow-Ready Baseline for Your Vehicle
Your baseline should come from the vehicle manufacturer’s cold-inflation spec, which accounts for typical loads and driving conditions. In winter, many drivers adjust within that same range to improve bite in snow, but you should avoid going beyond the max listed on the door placard. If you’re switching to winter tires with a different load index or size, consult the new spec for those tires. SUVs and light trucks often have different front/rear requirements due to weight distribution, so check both values. If you regularly drive with a heavy load or tow, you may need a more conservative baseline to prevent under-inflation when the tires heat up.
Measuring and Adjusting: A Practical In-Home Procedure
Measuring tire pressure accurately starts with a cold tire. Use a reliable gauge, then compare each reading to the official spec for that tire position. Inflate or deflate in small increments (1–2 psi at a time), rechecking after each adjustment. After adjustments, take a short, slow drive to bring tires to their normal operating temperature and recheck. If TPMS readings disagree with your gauge, trust the manual gauge and recalibrate as needed. Document any changes to help track seasonal shifts.
Common Mistakes and How to Avoid Them
Many drivers forget that temperature affects readings, especially in winter. Avoid measuring after a road trip; 2–3 hours of cooling is ideal. Don’t inflate to the maximum tire pressure on the placard; this can reduce traction on ice. Also, don’t ignore TPMS alarms or rely solely on the sensor lights—use a gauge for accuracy. Finally, remember that tire pressure is just one factor; tread depth, tire type, and vehicle load all influence winter traction.
Safety, TPMS, and Seasonal Maintenance
Safety first: under-inflated tires can overheat, wear unevenly, and reduce steering control, while over-inflated tires can lead to harsh handling on snow or ice. TPMS helps by signaling low pressure, but it does not replace manual checks. In very cold climates, check pressures weekly; if you notice persistent drops, inspect for leaks or damaged stems. For winter driving, consider checking pressures after long highway trips, and after significant temperature changes, to ensure you’re always within the recommended range.
Real-World Scenarios: Cars, SUVs, and Trucks in Snow
Different vehicle types respond differently to changes in pressure. Smaller cars with narrower tires may require slightly different adjustments than SUVs with larger contact patches. Heavier vehicles generally require pressures that maintain adequate contact patch without overloading the tires. The best tire pressure snow guidelines should be tailored to your specific vehicle, tire type, and typical winter load. Always prioritize manufacturer specs and owner guidance, then fine-tune within the safe range based on grip and steering feel in snow.
Tools & Materials
- Tire pressure gauge (digital or analog)(Ensure measuring range matches tire pressure; calibrate if needed.)
- Vehicle owner’s manual and door placard(Contains official cold-inflation specs for your tires.)
- Air compressor or gas station air pump(Helpful to adjust pressures on site; use with a gauge.)
- Notebook or mobile device for logging pressures(Helps track seasonal changes and trends over time.)
Steps
Estimated time: 15-25 minutes
- 1
Locate the baseline cold-Inflation pressure
Find the official cold-inflation spec for your vehicle and tire size on the door placard and in the owner's manual. Confirm separate front/rear values if provided. Record the numbers for reference before you touch the tires.
Tip: Always start with a cold measurement—do not rely on overnight warm readings. - 2
Check that tires are cold and clean the valve stem
Allow tires to sit for at least 3 hours after driving, or check in the morning before driving. Wipe the valve stem and cap to ensure a clean seal, which improves gauge accuracy.
Tip: Remove any dirt or dust that could affect the gauge seating. - 3
Measure current pressures on all tires
Use a reliable gauge and record each tire’s pressure. Compare with the baseline to determine if adjustments are needed for snow conditions.
Tip: Note differences between front and rear tires if your vehicle has separate specs. - 4
Adjust in small increments toward the snow baseline
If you’re targeting a snow-optimized range, add or remove 1–2 psi at a time, rechecking after each adjustment. Keep readings aligned with the manufacturer’s spec.
Tip: Avoid large jumps; incremental tweaks reduce over-correction. - 5
Drive briefly and recheck
Take a short drive on a cold morning to bring tires to typical operating temperature, then recheck all four tires. Adjust again if needed.
Tip: TPMS can drift after a temp change; verify with a hand gauge. - 6
Log results and establish a winter schedule
Document baseline, adjustments, and dates. Recheck weekly or after sharp temperature swings to maintain safe pressures.
Tip: Keep a winter log to anticipate when adjustments are needed.
Frequently Asked Questions
What is the best way to determine snow tire pressure?
Start with the manufacturer’s cold-inflation spec for your tires, measure when cold, and adjust gradually. Use TPMS as a guide but verify with a manual gauge.
Begin with the official cold specs, measure when tires are cold, and adjust a little at a time. Use TPMS as a guide, then confirm with a gauge.
Does cold weather lower tire pressure?
Yes. Cold temperatures reduce air pressure in tires, so pressures often drop overnight. Check in the morning and adjust before long trips.
Cold temps lower tire pressure, so check in the morning and adjust before driving far.
Should I adjust tire pressure for winter tires?
Yes, follow the tire-size–specific spec for winter tires. If you switch sizes, confirm the correct cold pressure for those tires.
Yes, use the winter-tire spec for the current tires and size.
How often should I check tire pressure in winter?
Check pressures at least weekly during extreme temperatures or after big temperature swings, and always before long trips.
Check weekly during winter, especially after big temperature drops.
Does TPMS replace manual pressure checks?
No. TPMS signals low pressure, but you should verify actual psi with a gauge to ensure accuracy.
TPMS helps, but you should still check the actual pressure with a gauge.
Can over-inflating in snow reduce traction?
Over-inflation can reduce the tire’s contact patch on snow and ice, decreasing traction. Stay within the spec.
Over-inflating can reduce traction on snow; stay within the recommended range.
Watch Video
What to Remember
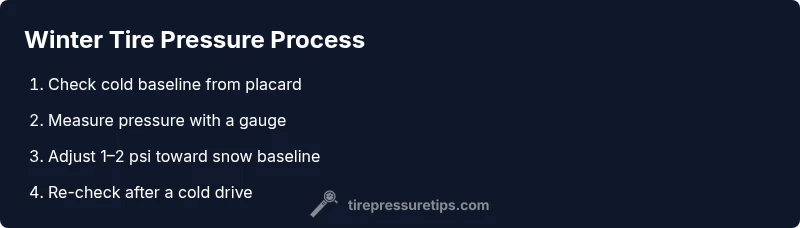
- Check cold baselines first from placard and manual
- Measure when tires are cold, and adjust in small steps
- Verify with a hand gauge after any adjustment
- Recheck pressures during winter as temps vary