TPMS Installation: A Complete Step-by-Step Sensor Setup
Learn how to install and calibrate TPMS sensors, verify compatibility, and validate readings for safer tires. This comprehensive guide covers tools, steps, safety, and maintenance for reliable tire pressure monitoring.

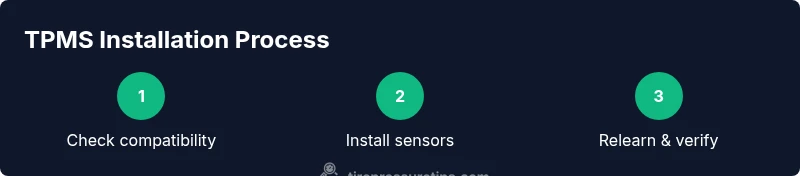
TPMS installation involves selecting a compatible sensor kit, preparing the vehicle, removing the old sensors, installing the new TPMS units in each wheel, and completing recalibration so the system accurately tracks tire pressure. After installation, you’ll verify readings with a meter, drive to relearn the system, and perform a quick safety check to ensure long-term reliability.
What TPMS installation entails and why it matters
TPMS installation is more than swapping sensors; it is about ensuring the car's onboard monitoring system accurately reads tire pressure to help prevent blowouts, improve fuel economy, and extend tire life. According to Tire Pressure Tips, the installation process begins by confirming compatibility, collecting the right sensors, and understanding each wheel's tire position. The job also requires handling wheel hardware safely and following vehicle-specific torque specs. Whether you replace a failed sensor or upgrade to a newer model, correct installation reduces nuisance warnings and ensures that the TPMS recalibrates properly after you drive. The Tire Pressure Tips team emphasizes that a careful start prevents repeat trips to the shop and leads to consistent, reliable readings on every road trip.
Compatibility and planning for tpms installation
Not every TPMS kit fits every vehicle. Direct TPMS sensors screw into the wheel and talk to the car via a wheel-mounted transmitter, while indirect systems rely on your existing ABS or wheel speed data. Before purchasing, verify your vehicle make, model, year, and whether you need round or square sensors, as well as the valve stems’ compatibility with your wheels. The Tire Pressure Tips analysis shows that planning for compatibility upfront minimizes reinstallations and calibration delays. Create a parts list, confirm your vehicle’s service manual guidelines, and note any unique wheel specifications (e.g., hub bore, center caps, or lug pattern) so you avoid surprises at installation time.
Understanding sensor types and parts maps
TPMS sensors comprise sensor bodies, valve stems, and sometimes battery assemblies integrated into the wheel rim. Direct sensors sit inside the tire and are more expensive but offer immediate feedback; indirect sensors rely on wheel speed data and may require different learning steps. It’s essential to map each sensor to its wheel position (LF, RF, LR, RR) so the vehicle can relearn correctly. Some kits include sensors with interchangeable stems, while others require specific stems per wheel size. Reading the kit instructions carefully ensures you don’t mismatch parts, which can otherwise produce false pressure alerts.
Tools and materials you’ll need
A successful tpms installation requires the right tools and materials in addition to the sensors themselves. You’ll need a torque wrench to meet manufacturer specs, a valve core tool, a digital tire pressure gauge, a jack and stands, wheel chocks, and a suitable screwdriver or socket set. Have thread sealant or grease, anti-seize lubricant, and replacement valve caps on hand. A service manual for your vehicle will serve as the ultimate reference, and some jobs benefit from a TPMS relearn tool or a Scan tool to force relearn quickly. Assemble everything before you start to keep the workflow smooth and safe.
Step-by-step overview of the TPMS installation process
This section provides a high-level roadmap of the installation flow. Begin by verifying compatibility and gathering the kit. Remove the wheel from the vehicle and access the TPMS area. If replacing, remove the old sensor and nut carefully, then install the new TPMS sensor with the correct stem and seal. Reinstall the wheel, torque the lug nuts to vehicle specs, and lower the car. Finally, initiate a relearn sequence using the vehicle’s onboard controls or a relearn tool, and verify each sensor’s data with a tire pressure gauge. Each step should be performed in order to prevent confusion or cross-wiring.
Relearning and calibration: how TPMS becomes accurate
Relearning aligns the vehicle’s computer with the new sensor data. Most vehicles support automatic relearn after a short test drive, but some require a dedicated tool or a sequence of actions (e.g., turning the ignition, cycling the ignition, and driving a specific distance). It’s important to perform a full road test after relearn so you can confirm that each wheel’s pressure reading updates correctly and that the dashboard warning light behaves as expected. The Tire Pressure Tips team notes that documenting the sensor IDs and positions helps during future maintenance and possible sensor swaps.
Safety, common mistakes, and troubleshooting
Common mistakes include overtightening valve stems, using incorrect torque values, and failing to seal the stem properly, which can cause slow leaks. Always wear safety gloves and eye protection when working near the wheel and tire bead. If a warning light remains after relearn, recheck all sensor connections and confirm that the tire pressures match the vehicle’s recommended range. In some cases, a driveline recalibration may be required, or a new sensor may be defective. Troubleshooting steps should be methodical and documented to avoid repeating issues.
Testing, verification, and battery considerations for sensors
After installation, test each wheel’s sensor by inflating to the recommended pressure and verifying the value shown on the dashboard or scan tool. If the sensor contains a battery, ensure there is no corrosion at the valve area and that the battery orientation is correct. Battery life varies by sensor model; consider replacing aging units to prevent future failures. Consistent testing helps detect leaks, weak seals, or sticky valve cores early, saving time and money.
Maintenance and long-term care after tpms installation
Keep sensors and stems clean from dirt and road grime, and periodically inspect for corrosion, damaged seals, or loose connections. Use a reliable gauge to track tire pressures weekly, especially during seasonal temperature changes, since pressure fluctuates with ambient temperature. Perform a visual check after hitting potholes or curbs, as impacts can misalign valves or damage stems. Maintaining a simple log of sensor replacements and calibration dates will extend the life of your TPMS installation.
How TPMS installation impacts safety and tire life
Accurate TPMS readings help prevent underinflation and overinflation, both of which reduce tire life and fuel efficiency. A precise TPMS installation ensures warnings trigger at the correct thresholds, supporting safer driving and better grip in adverse conditions. Regular checks and timely maintenance minimise the risk of blowouts and improve overall vehicle handling.
Final checklist before hitting the road
Before setting off, confirm every wheel reports the correct pressure, verify no warning lights remain after relearn, and ensure tires are inflated to the recommended range. Recheck lug nut torque after the first 50-100 miles, and keep a spare sensor or two on hand for future replacements. A quick post-installation drive test helps catch any issues early and provides peace of mind.
Tools & Materials
- Torque wrench(to verify lug bolts and sensor hardware torque)
- Valve core removal tool(for removing valve cores without damaging stems)
- TPMS sensor kit (direct sensors)(sensors and stems compatible with your wheels)
- Valve stem tool(for proper stem seating and installation)
- Thread sealant or grease(as specified by sensor manufacturer)
- Digital tire pressure gauge(for initial checks and verification)
- Car jack and jack stands(safe wheel removal and reinstallation)
- Lug wrench or impact wrench(to secure wheel with proper torque)
- Wheel chocks(prevent vehicle movement during work)
- Anti-seize lubricant(optional, for stubborn threads)
- Vehicle service manual or TPMS kit instructions(vehicle-specific torque and relearn steps)
- Safety gloves(protect hands during tire work)
Steps
Estimated time: 2-3 hours
- 1
Confirm compatibility and kit readiness
Review your vehicle’s make, model, and year to choose the correct TPMS kit. Read the sensor and stem specifications and ensure you have all required components before starting.
Tip: Double-check wheel position labeling (LF, RF, LR, RR) to map sensors correctly. - 2
Park, chock, and prep tools
Park on a flat surface, engage the parking brake, and place wheel chocks. Gather tools and set up a clean workspace around the vehicle so you aren’t scrambling mid-work.
Tip: Position the jack and stands on solid ground; never rely on a jack alone. - 3
Loosen lug nuts and lift the vehicle
Loosen the lug nuts while the tire is on the ground, then raise the car with a jack and secure with stands. Remove the wheel carefully to access the TPMS area.
Tip: Loosen nuts in a star pattern to avoid warping the wheel hub. - 4
Access the TPMS area and remove old sensor
If you’re replacing an old sensor, locate the valve stem, detach any clips, and unscrew the old unit. Keep the hardware organized to match new components.
Tip: Note any signs of corrosion or damaged stems; replace as needed. - 5
Install new TPMS sensor and seal
Install the new sensor into the valve stem, attach with the correct nut or clip, and seal per the manufacturer’s instructions. Ensure the sensor sits flush and the stem is properly seated.
Tip: Avoid overtightening; secure to the recommended torque to prevent leaks. - 6
Reinstall the wheel and secure hardware
Mount the wheel back on the hub, hand-tighten the lug nuts, then lower the car and finish with a controlled torque pattern to spec.
Tip: Return to the same position sequence as when removing to ensure even seating. - 7
Power up and prepare relearner sequence
Reconnect the battery if disconnected and prepare the vehicle’s TPMS relearn tool or onboard controls according to the manual. Ensure power is stable before starting the relearn.
Tip: Have the vehicle in a low-traffic area for a safe relearn drive. - 8
Initiate relearn and drive for calibration
Start the relearn process as directed and drive the vehicle for the required distance or time. Sensors should begin communicating and the dashboard light should turn off.
Tip: If the light stays on, repeat the relearn or try a different relearn method for your model. - 9
Verify readings with a gauge
Use a digital gauge to confirm each wheel’s pressure matches the vehicle’s recommended range. Cross-check against the TPMS display for consistency.
Tip: Record each sensor reading for future reference and maintenance. - 10
Document changes and plan maintenance
Log sensor part numbers, wheel positions, and relearn results. Schedule periodic checks and note replacement intervals based on sensor lifespan.
Tip: Keep a short maintenance calendar to avoid missed checks.
Frequently Asked Questions
What does TPMS installation involve?
TPMS installation involves selecting compatible sensors, removing old hardware, installing new sensors, and calibrating the system so it reports accurate tire pressure. You’ll verify readings after installation and test-drive to ensure the system relearns properly.
TPMS installation means fitting new sensors, calibrating the system, and verifying accurate tire pressure readings after installation.
Do I need to replace all sensors at once?
Not always. If only one sensor is faulty, you can replace just that sensor, but ensure you recalibrate and verify readings across all wheels to maintain balanced data.
You can replace just the failed sensor, but you’ll still need to recalibrate all sensors afterward.
Can I install TPMS myself or should I visit a shop?
Do-it-yourself installation is possible with direct-sensor kits and basic mechanical skills, but some vehicles require specialized relearn tools or shop-level calibration to ensure proper sensor communication.
You can do it at home if you’re comfortable with car work, but some cars need a relearn tool.
How long does relearning take?
Relearning typically takes a few minutes to an hour, depending on the vehicle and method. A successful relearn results in all four wheels reporting new sensor data without warnings.
Relearn usually takes minutes to an hour, depending on the car.
Will TPMS installation affect tire warranty?
Installing TPMS sensors generally does not void warranties, but improper installation or damaged components could. Always follow the vehicle’s warranty guidance and keep receipts for parts and service.
It usually doesn’t void warranties, but follow official guidance and keep receipts.
What if the TPMS warning light stays on after installation?
If the warning light stays on, recheck sensor connections, verify correct tire pressures, and confirm the relearn progress. If needed, use a relearn tool or diagnostic scan to identify potential sensor faults.
If the light stays on, recheck everything and try relearn again; seek help if needed.
Watch Video
What to Remember
- Verify sensor compatibility before purchase.
- Follow vehicle-specific torque specs for all fasteners.
- Perform a complete relearn and verify readings after installation.
- Document sensor details for easier future maintenance.
- Regularly check tire pressures to maximize safety and efficiency.