Install Tire Pressure Sensor: A Step-by-Step Guide
Learn how to install a tire pressure sensor with practical steps, tools, safety tips, and a reliable relearn process. This guide covers direct TPMS sensors, calibration, and post-install verification to ensure accurate readings.

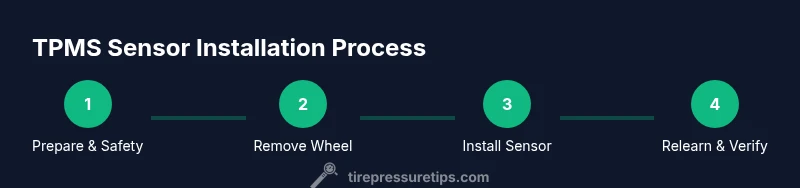
Installing a tire pressure sensor involves selecting the right sensor, removing the wheel, fitting the sensor, and performing a relearn. This guide covers direct TPMS sensors, programming needs, torque specs, and calibration steps to ensure accurate readings and safety. It also highlights safety checks and when professional help is advised for a reliable installation.
Why installing a tire pressure sensor matters
Directly installing a tire pressure sensor is a task that impacts safety and fuel economy. It starts with choosing a sensor compatible with your vehicle, the wheel, and the tire size. According to Tire Pressure Tips, every installation should begin with verifying the sensor type (direct TPMS versus indirect system) and the vehicle's relearn requirements. The Tire Pressure Tips team found that most readout problems come from mismatched sensor IDs, improper relearn, or leaky valve stems. A methodical approach reduces calls to a mechanic and prevents repeated tire dismounts. In this section, you'll learn what to prepare, how to remove and fit the sensor, and how to verify readings after installation. This knowledge helps you maintain accurate tire pressure data for safety, tire wear, and fuel efficiency.
Sensor types and compatibility
TPMS systems come in two broad categories: direct TPMS sensors, which measure pressure directly inside each tire, and indirect systems, which infer pressure from wheel speed data. For most modern vehicles, direct sensors with a replaceable valve stem are the most reliable option for accuracy and long-term maintenance. Compatibility hinges on sensor IDs, vehicle make/model, and wheel size. Some cars require OEM sensors to ensure correct data communication with the ECU, while others may accept widely used aftermarket sensors with proper relearn. The Tire Pressure Tips analysis shows that compatibility and proper relearn are the two biggest hurdles for DIY installations. Always confirm your vehicle’s approved sensor types before purchasing.
Tools, parts, and safety preparation
Before you begin, gather the essential tools and safety gear to minimize risks. You’ll need a jack, jack stands, lug wrench, torque wrench, tire pressure gauge, and a bead-seat lubricant to ease reseating the tire bead. For direct TPMS sensors, have the replacement sensor, valve stem, set of valve cores, and an appropriate sensor programming or relearn tool if your car requires it. Wear eye protection and gloves to protect hands from sharp metal edges and to avoid pinching. This phase also includes inspecting the wheel for damage, ensuring the tire is in good condition, and verifying that the car is on a flat, stable surface with wheels chocked. Keep the owner’s manual handy for vehicle-specific relearn steps.
Preparing the wheel and tire for sensor installation
Begin by parking on a flat surface, applying the parking brake, and placing wheel chocks on the opposite side. Loosen the lug nuts slightly before jacking up the vehicle. Remove the wheel to access the TPMS valve stem. If you’re replacing a direct TPMS sensor, carefully deflate the tire, break the bead, and detach the tire from the wheel. Inspect the valve stem for wear, corrosion, or damage and replace it if necessary. Lubricate the bead seating area to reduce friction and prevent bead damage during reinstallation. Ensure the rim is clean and free of debris that could compromise sealing. This step sets the stage for a secure, leak-free sensor installation.
Installing the sensor and sealing the tire bead
Install the new TPMS sensor into the valve stem hole and thread it by hand to avoid cross-threading. Tighten to the manufacturer’s specified torque, then reseat the tire bead with a bead-seat lubricant to prevent leaks. Reinflate the tire to the recommended pressure and verify that the bead is properly seated all the way around the wheel. If you’re using a torque wrench, confirm the lug nuts are tightened in a star pattern to the vehicle specification. Take care not to pinch the sensor with tire mounting equipment. This stage ensures the sensor is engaged and ready for relearn procedures.
Relearn, programming, and calibration
Many vehicles require a relearn procedure to teach the ECU the new sensor’s ID. This can be done through the car’s onboard menus, or with an OBDII tool or dedicated TPMS programming device. If your vehicle has a built-in relearn sequence, follow the exact steps from the owner’s manual. The Tire Pressure Tips analysis shows that improper relearn timing is a common cause of incorrect readings, so take time to complete the steps exactly as directed. After relearn, verify the sensor IDs in the TPMS menu and confirm that each wheel reports its correct pressure. If you’re installing aftermarket sensors, ensure they are programmed to your vehicle’s specifications.
Leak testing and final checks
With the sensor installed and relearn completed, inspect for air leaks by applying soapy water to the valve stem and watching for bubbles. If bubbles form, tighten the valve core slightly or replace the valve stem. Recheck the tire pressure against the recommended level and ensure the readings stabilize within a few minutes. Reinstall the wheel, torque the lug nuts to the vehicle’s specification, and lower the car. A short test drive helps confirm a stable TPMS signal and consistent readings. Keep the manual handy for any vehicle-specific leak testing procedures.
Verifying readings and taking a test drive
After installation, recheck the tire pressures with a gauge to confirm they match the recommended values. Drive for 5–15 minutes at a safe speed to allow the TPMS to communicate with the ECU and update the readings. If a repeat relearn is necessary, perform it again following the vehicle’s guidelines. Record the sensors’ performance and note any discrepancies between the dashboard readings and the gauge. This verification step ensures you’ve achieved accurate data for safe driving and optimal tire wear.
Common mistakes and troubleshooting
Common mistakes include choosing an incompatible sensor, forgetting to relearn, over- or under-tightening the valve stem, and failing to clean the rim bore. When a sensor isn’t read correctly, double-check IDs and the relearn procedure, then inspect for valve stem leaks. If a sensor intermittently reports, recheck the mounting seal and bead seating. For stubborn leaks, consider replacing the valve stem or sensor to restore reliability. Troubleshooting also includes verifying that the wheel alignment and balance aren’t contributing to abnormal tire wear or sensor arming issues.
Maintenance and long-term considerations
Periodically inspect TPMS sensors for corrosion, battery condition (if the sensor is battery-powered), and valve stem wear. Keep the wheel and bead area clean of debris to prevent seal damage. Document the sensor’s ID and installation date for future maintenance, such as tire rotations or remounts. If you notice sensor failures after a few years, consider replacing older sensors as part of a proactive maintenance plan. Regularly checking TPMS performance reduces the risk of undetected underinflation, improving safety and efficiency.
Tools & Materials
- jack(Stable floor jack; use jack stands for safety.)
- lug wrench(Appropriate size for lug nuts; ensure not to strip.)
- wheel chocks(Place on opposite wheel to prevent rolling.)
- torque wrench(Use vehicle-recommended lug nut torque.)
- tire pressure gauge(Analog or digital; verify after installation.)
- replacement TPMS sensor(Direct TPMS sensor compatible with vehicle.)
- valve stem(Replace with new stem if old shows wear.)
- valve core tool(For removing/replacing valve cores.)
- sensor programming/relearn tool(Needed if vehicle requires standalone relearn device.)
- bead-seat lubricant(Aids bead seating for airtight seal.)
- soap/water spray(Leak testing solution for valve areas.)
- rim cleaning brush(Remove debris from bore before sensor install.)
Steps
Estimated time: 60-120 minutes
- 1
Prepare workspace and tools
Park on a flat surface, engage parking brake, and gather all tools. Inspect wheel and tire condition, verify compatible TPMS sensor is on hand, and review the vehicle’s relearn requirements in the owner’s manual.
Tip: Double-check sensor compatibility before removing the wheel to avoid wasted effort. - 2
Loosen lug nuts and lift the vehicle
Loosen lug nuts while the wheel is still on the ground, then raise the car with a jack and secure with jack stands. This prevents wheel movement during removal.
Tip: Use the star pattern when torquing lug nuts back to spec to ensure even load. - 3
Remove the wheel and access the TPMS valve
Take off the wheel and locate the TPMS valve stem. Deflate the tire if replacing the sensor, then prepare to dismount the tire bead if needed.
Tip: Keep track of which wheel you’re working on to avoid mix-ups during reassembly. - 4
Install the new sensor and seal
Position the new TPMS sensor in the valve hole, thread by hand to avoid cross-threading, then tighten to spec. If replacing a valve stem, install the new stem and seal.
Tip: Ensure the sensor sits flush and the seal is intact before bead seating. - 5
Reseat the tire bead and inflate
Reseat the tire bead using bead-seat lubricant and inflate to the recommended pressure. Check for leaks around the valve stem.
Tip: A properly seated bead reduces the risk of slow leaks after installation. - 6
Relearn or program the sensor
Follow the vehicle’s relearn procedure using the onboard menu or a TPMS tool. Confirm that each wheel’s ID is recognized by the ECU.
Tip: If your car requires a specific order for relearn, follow it exactly. - 7
Verify readings and torque lug nuts
Recheck the tire pressures with a gauge. Lower the car and tighten lug nuts in a star pattern to the manufacturer’s specification.
Tip: A stable TPMS signal should appear within a few minutes after relearn. - 8
Test drive and final checks
Drive for 5–15 minutes to allow readings to stabilize. Recheck pressure and TPMS readings after the drive; address any anomalies.
Tip: Document any discrepancies and recheck sensor IDs if issues persist. - 9
Document and store sensor information
Record the sensor ID, placement, and install date for future maintenance. Keep the relearn tool and manual accessible for reference.
Tip: Maintain a simple log for easier maintenance during tire rotations.
Frequently Asked Questions
Do I need professional help to install a TPMS sensor?
Direct TPMS installation can be straightforward for some vehicles, but others require special tools or OEM relearn procedures. If you’re unsure, a professional can ensure correct sensor programming, sealing, and calibration.
You may be able to do it yourself if you have the right tools and follow the relearn steps; otherwise, a shop can handle it safely.
What tools do I need to relearn the TPMS?
Most cars allow relearn through the onboard menu, while others need an OBD tool or a dedicated TPMS programming device. Check your owner’s manual for the exact method.
Usually, your car’s TPMS menu or a diagnostic tool will guide the relearn process.
Can I reuse an old TPMS sensor?
If the old sensor is undamaged and compatible with your wheel and vehicle, it can be reused. Inspect the stem, seal, and battery (if applicable) before reinstalling.
If it looks good and matches your system, reusing is possible, but testing is essential.
How long does a relearn take?
Relearn typically takes 5–15 minutes depending on the vehicle and method. Some cars complete automatically after a short drive.
Most relearns are quick, but some vehicles may need a longer diagnostic step.
What are signs of a failed TPMS install?
Frequent “check tire pressure” warnings, inconsistent readings, or persistent leaks around the valve stem indicate issues. Recheck sensor IDs and seals.
If warnings keep coming up, recheck the installation and go through the relearn again.
Are OEM sensors required for every vehicle?
Some vehicles require OEM sensors for guaranteed compatibility, while others work with aftermarket sensors if programmed correctly. Always verify with your vehicle’s documentation.
OEM isn’t always mandatory, but you must confirm compatibility first.
Watch Video
What to Remember
- Verify sensor compatibility before purchase
- Perform a precise relearn to sync the sensor with the ECU
- Check for leaks after seating the bead
- Tighten lug nuts to spec in a star pattern
- Test drive to confirm stable TPMS readings