How to Put Tire Pressure Sensors On (TPMS)
A practical, step-by-step guide to installing TPMS sensors, verifying compatibility, relearning the system, and confirming accurate readings for safer driving.

If you’re wondering how to put tire pressure sensors on, this guide covers direct and indirect TPMS sensor installation, compatibility checks, essential tools, and a safe, step-by-step relearn process. You’ll learn how to select the right sensors, mount or replace them, reseat the tire, and confirm accurate readings for safer driving. According to Tire Pressure Tips, proper installation minimizes faults and keeps your TPMS reliable.
What it means to learn how to put tire pressure sensors on and why it matters
Understanding how to put tire pressure sensors on starts with TPMS basics. Direct TPMS uses sensors mounted in the wheel, communicating pressure data to your vehicle’s computer. Indirect TPMS relies on wheel speed and rotation data to estimate pressure. Either approach requires correct sensor selection, proper mounting or installation, and a relearn or calibration step to ensure your dashboard reads accurately. For drivers, this translates into consistent tire pressures, better fuel efficiency, and reduced risk of sidewall damage from underinflation. The goal is clear: you want a reliable, error-free TPMS that tells you when a tire needs air, not when a sensor has failed. How to put tire pressure sensors on is ultimately about following the right steps, using the right tools, and verifying the system after install.
Sensor types and compatibility considerations
There are two main TPMS sensor families: direct sensors (installed inside the wheel) and indirect sensors (relying on wheel speed sensors). Direct sensors offer precise, real-time pressure data but require correct valve hardware and wheel compatibility. Indirect systems depend on software logic and may need calibration after tire changes. Before you buy sensors, confirm compatibility with your vehicle’s make, model, and wheel size. Check your owner’s manual or manufacturer guides for sensor type, valve stem dimensions, and relearn requirements. This reduces the chance of incompatibilities that lead to false readings or nuisance fault codes.
Safety and prerequisites before you start
TPMS work involves removing tires and potentially lifting the vehicle. Always wear eye protection and gloves, use chocks on the opposite wheel, and ensure the vehicle is on a flat, stable surface. If you’re not comfortable with bead breaking or tire removal, consult a professional. Keep a tire gauge handy to verify pressures before and after work. Make sure you have clear access to the wheel and spokes, and never work under a wheel that isn’t secured. This initial safety mindset keeps you, your tools, and the wheel safe during the job.
Verifying vehicle compatibility and wheel readiness
Start by identifying your vehicle’s year, make, and model to lock in TPMS sensor type. Confirm wheel compatibility for the chosen sensors, including stem length and valve hole size. If you’re reusing an old sensor, examine the stem for cracks and ensure the electrical connections are intact. Clean the wheel mounting surface and inspect the bead area for damage. Verifying these basics prevents misfits that could cause leaks or sensor failure after installation.
Preparing your workspace and tools
A clean, organized workspace speeds up installation and reduces mistakes. Gather all required tools before you start: a torque wrench, valve-core tool, bead-seating tool (if required), a tire iron, soapy water for leak testing, a tire pressure gauge, a thread sealant if your sensor kit requires it, and replacement valve stems if needed. Have a relearn tool handy if your vehicle requires it. Keep a smartphone or notebook nearby to reference manual steps and sensor cycle times. This preparation keeps the process smooth and predictable.
Removing the old sensor and valve assembly safely
If you’re replacing an old sensor, deflate the tire and mark the bead. Break the bead carefully and separate the tire from the wheel in the area opposite the valve stem. Remove the old sensor and valve core, inspecting the stem for wear. Replace the valve stem if it shows cracking or wear. Clear any debris from the valve seat and ensure the hole is clean before installing the new sensor. Maintain a steady, controlled approach to avoid damaging the tire or wheel.
Installing the new TPMS sensor and valve stem
Lubricate the new sensor’s gasket with a light coat if required by the kit. Thread the new valve through the wheel, then tighten the sensor to the specified torque. Use a torque wrench to avoid over-tightening, which can damage the sensor or wheel. Reattach any mounting brackets and seals as per the kit’s instructions. Ensure the sensor’s orientation aligns with the factory valve orientation to avoid interference with the tire bead.
Re-seating the tire and checking for leaks
Carefully mount the tire back onto the wheel, ensuring the bead seats evenly around the rim. Inflate the tire to the recommended pressure and check for leaks using soapy water at the bead and valve. If leaks are detected, reseat the bead and tighten components as required. Verify the air pressure is within the manufacturer’s target range. A proper seal prevents slow leaks that can trigger TPMS fault indicators later on.
Calibrating and relearning the TPMS system
Many vehicles require a relearn or calibration step after sensor installation. This can involve a specific button sequence, driving the vehicle for a period, or using a scan tool. If your car has an automatic relearn, drive for 10-30 minutes at highway speeds to complete it. For manual relearns, follow the vehicle manual precisely. Calibrating ensures the system accurately reflects each tire’s real-time pressure and temperature data.
Post-installation tests and verification
After relearning, verify sensor readings by checking each tire’s pressure with a gauge and ensuring the dashboard shows corresponding values. Drive briefly and monitor for any TPMS fault codes. If the system reports a fault, recheck sensor seating, wiring, and relearn status. Keeping logs of pressures helps compare before-and-after values and confirms the install succeeded.
Common pitfalls and how to avoid them
Avoid mixing sensor brands on the same vehicle unless specifically supported. Don’t reuse damaged valve cores or old seals. Avoid overtightening the sensor; use a torque spec. If you’re uncertain about the relearn procedure, consult the vehicle’s manual or a professional. Finally, don’t neglect calibration checks after long drives or after weather changes, as air pressure fluctuates with temperature.
Maintenance and long-term care for TPMS sensors
Periodically inspect sensors for corrosion or damage, especially in harsh climates. Replace batteries or whole sensors according to manufacturer guidance, and recheck calibration after tire replacements. Regularly check tire pressures, and perform a quick relearn if you notice inconsistent readings. Proper maintenance extends sensor life and keeps TPMS readings reliable.
Tools & Materials
- TPMS sensor kit (new sensor(s))(Check compatibility with vehicle make/model and wheel size.)
- Valve stem wrench(For removing old sensor and seating the new stem.)
- Torque wrench(To apply correct torque on sensor and valve stem.)
- Tire pressure gauge(Verify pressures during and after installation.)
- Bead seating tool (if required)(Only needed for stubborn beads or certain wheels.)
- Relearn tool or vehicle-specific relearn procedure(Some vehicles require a scan tool or built-in relearn sequence.)
- Soapy water or leak-detection fluid(Check for leaks at bead/valve after reseating.)
- Safety gear (gloves, eye protection)(Protection during disassembly and mounting.)
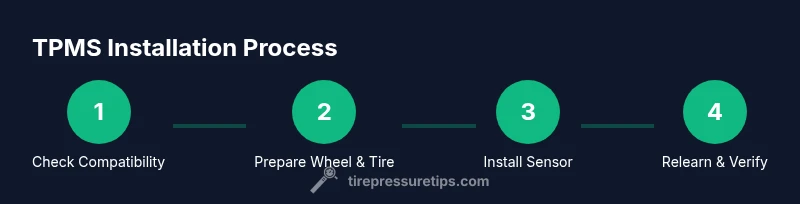
Steps
Estimated time: 2-4 hours total
- 1
Verify compatibility and safety
Confirm you have the correct TPMS type for your vehicle (direct vs indirect) and that the sensor hardware matches wheel size and stem length. Review the vehicle manual for any specific relearn requirements before you begin.
Tip: Double-check sensor model and wheel size against official specs to prevent incompatibility. - 2
Prepare workspace and tools
Clear a flat, stable work surface. Gather all tools and materials, and set chocks on the opposite wheel. Ensure you have adequate lighting and a clean area to work in.
Tip: Lay out tools in order of use to avoid multiple trips. - 3
Deflate and break bead (if required)
If the tire is still mounted and you must access the valve area, deflate the tire to a safe level. Use appropriate bead-breaking methods if necessary, following wheel manufacturer guidelines.
Tip: Bead breaking can damage tires if done improperly; proceed slowly and use the right tool. - 4
Remove old sensor and valve core
Carefully detach the old sensor from the valve stem and remove the core if present. Inspect the valve stem for cracks and replace if needed.
Tip: Handle components gently to prevent damage to the wheel or bead. - 5
Install new TPMS sensor and valve stem
Thread the new sensor through the wheel, attach the valve stem, and tighten with the torque wrench to the recommended spec. Refit any seals or fittings per the kit instructions.
Tip: Cross-threading is a common failure; ensure the sensor sits straight before torquing. - 6
Re-seat tire and inspect for leaks
Mount the tire back onto the wheel, ensuring the bead seats evenly. Inflate to the correct pressure and check for leaks with soapy water around the bead and valve.
Tip: If you see bubbles, reseat the bead or replace the sealant as needed. - 7
Perform relearn/calibration
Use your vehicle’s relearn procedure or a compatible scan tool to calibrate the TPMS. Some cars relearn automatically after driving.
Tip: Follow the exact sequence in your manual; wrong steps can prevent recognition. - 8
Verify readings and complete validation
With the tires mounted and inflated, verify each sensor reads the actual tire pressures. Drive briefly to ensure the system stabilizes and no fault codes appear.
Tip: Keep a log of readings for reference and future maintenance.
Frequently Asked Questions
Do I need to relearn TPMS after installing new sensors?
In most cases, a relearn is required after sensor installation or replacement. Some vehicles have automatic relearn procedures, while others need a manual sequence or a scan tool. Always consult your vehicle manual for the exact steps.
Yes. Most cars require a relearn after sensor installation, either automatically or via a tool or manual steps.
Can I install TPMS sensors myself at home?
Yes, with the right tools, parts, and safety precautions, you can install TPMS sensors at home. Be prepared to remove and reseat tires, manage bead integrity, and perform a relearn. If you’re unsure, seek professional help for complex wheels or newer vehicles.
It’s doable at home if you have the right tools and follow the steps carefully.
What tools do I need for TPMS sensor installation?
You’ll typically need sensors, a tire valve tool, a torque wrench, tire gauge, and sometimes a relearn tool or vehicle-specific procedure. Keep soap solution for leak testing and protective gloves.
Common tools include sensors, a torque wrench, and a relearn tool if required by your vehicle.
How long does TPMS sensor installation take per wheel?
Expect 60-90 minutes per wheel for installation, replacement, and relearn, depending on wheel design and whether bead breaking is needed.
About an hour to an hour and a half per wheel, depending on complexity.
Watch Video
What to Remember
- Confirm sensor compatibility before purchase.
- Install with proper torque to avoid damage.
- Perform relearn/calibration after installation.
- Test readings and check for leaks to verify success.
- Follow safety precautions to protect yourself and the wheel.