Troubleshooting a Broken Tire Pressure Gauge: Quick Fixes and Safe Workarounds
Urgent guide to diagnose, test, and fix a broken tire pressure gauge with practical steps, safety tips, and reliable alternatives.

According to Tire Pressure Tips, a broken tire pressure gauge usually points to a simple problem like a cracked housing, a stuck valve, or a dead battery in digital models. Start with a visual inspection, then compare readings against a known-good gauge or your TPMS readout. If readings are unreliable, replace the gauge immediately.
Why a broken tire pressure gauge poses safety risks
A broken tire pressure gauge is more than an inconvenient tool malfunction—it can directly affect your safety on the road. Inaccurate readings may lead to underinflated or overinflated tires, increasing the risk of a blowout, longer stopping distances, and reduced fuel efficiency. The Tire Pressure Tips team emphasizes that even small gauge errors compound over time, especially in extreme weather or when your tires are near their limit. By recognizing early warning signs, you can prevent unsafe driving conditions and extend tire life. Remember: a faulty gauge can mask genuine pressure issues, so verify measurements with a second method if anything seems off. This is not just about accuracy; it’s about consistent tire health and predictable handling on every trip.
How gauges fail: common mechanisms
Most failures come from physical damage, wear, or environmental exposure. Common culprits include a cracked gauge housing that lets air leak, a bent or clogged nozzle that won’t form a proper seal, a worn or stuck pressure release valve, and, for digital models, a dying battery or corrosion on the contacts. Age matters: inexpensive, lower-precision gauges tend to degrade faster. Internal springs can loosen, needles can stick, and calibration marks can drift. The result is readings that don’t match reality, making it hard to determine whether to add or release air. Whenever you notice an odd reading, inspect the gauge’s exterior first, then test against a reference tool to confirm.
How to inspect your gauge for quick diagnostics
Begin with a visual check: look for cracks in the housing, a warped or loose nozzle, or a damaged seal at the gauge tip. Wiggle the chuck and ensure it seats firmly on the valve stem. Clean any dirt or residue that might affect the seal, especially around the nozzle and gauge face. If you have a digital gauge, check the battery compartment for corrosion and ensure the battery is seated correctly. For analog gauges, verify the needle moves freely without sticking. A simple test is to compare readings at the same pressure on a known-good gauge; if numbers diverge, the broken gauge is likely at fault. In all cases, replace if damage is evident or readings vary beyond a small margin.
Testing methods: visual, calibration, and comparison
A multi-step testing approach yields the best clarity. First, perform a visual inspection (as above) and attempt a few quick tests on cold tires. Second, compare the gauge against a known-good tool or the TPMS readout on most modern vehicles. Third, if possible, check at a service station with a calibrated gauge. Some gauges include a built-in calibration feature; if yours does, follow the manufacturer instructions to reset. Finally, document differences to determine whether the gauge needs replacement. If discrepancies persist after calibration and comparison, treat the gauge as unreliable and retire it.
When to rely on alternatives: TPMS and known-good gauges
TPMS (tire pressure monitoring systems) provides a live pressure readout, but it’s not a substitute for checking with a physical gauge—especially for precise inflation targets. Use the TPMS as a secondary verification while you test a known-good gauge. If you don’t have access to another gauge, many tire shops offer a quick pressure check with their calibrated equipment. In emergencies, you can visit a gas station that stocks a standard gauge and cross-check against your vehicle’s recommended pressure found in the door jamb label or owner’s manual. The key is to avoid making decisions based on a suspected broken gauge alone. Safety and accuracy come first.
Using a digital gauge: accuracy tips
Digital gauges are convenient but sensitive to battery life and contact quality. Ensure the battery is fresh and installed correctly, and clean the contacts if readings seem inconsistent. When using a digital model, apply the gauge perpendicular to the valve stem to avoid leaks and inaccurate numbers. If the display flickers or dies, replace the battery or the gauge itself. Some digital gauges have auto-calibration features; use them if available, but don’t rely solely on auto-calibration—manual cross-check with a known-good gauge is essential for accuracy.
Replacement options: what to look for when buying a new gauge
If you determine the gauge is broken beyond repair, choose a replacement with clear markings, a wide measuring range (ideally 0–60 PSI for most passenger cars), and a secure chuck that seals well on metal and plastic valve stems. Look for gauges that include both analog and digital readings, or at least a model known for durability and precision. A good replacement should feel solid, with a smooth needle or responsive digital display, and a robust, leak-free nozzle. Consider carrying a spare gauge—errors in one tool shouldn’t derail your maintenance routine.
Calibration, maintenance, and storage best practices
Regular maintenance prolongs gauge life. Wipe the exterior after use to keep dust out of the nozzle, store the gauge in a dry place away from direct sunlight, and check the calibration periodically if the tool is frequently used. Avoid dropping the gauge or forcing it onto a valve stem with excess force; damage to the nozzle or seals is common after a mishap. Label older gauges and retire them after a few years of heavy use, even if readings seem plausible. When in doubt, replace aging equipment with a known-good gauge to ensure ongoing accuracy.
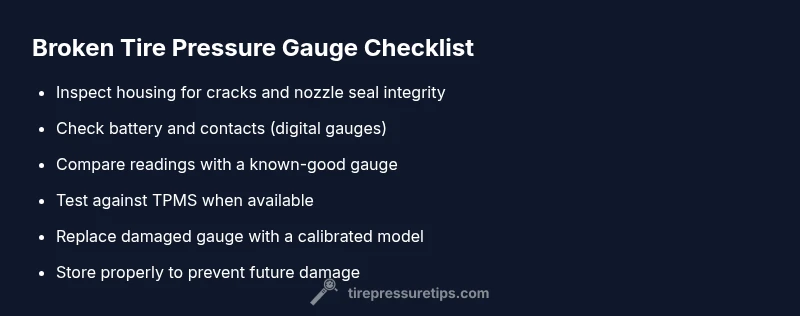
Quick home troubleshooting checklist (no fluff)
- Inspect for visible damage on housing and nozzle
- Check battery in digital gauge and clean contacts
- Compare with a known-good gauge
- Test at multiple tires and try cold tires for accuracy
- Verify readings against the TPMS when available
- Replace if damaged or inaccurate
- Recalibrate or replace after a fall or impact
- Store properly to prevent future wear
Common mistakes and essential safety precautions
Avoid inflating or deflating tires solely based on a suspect gauge; unsafe pressure can lead to loss of control. Don’t force gauges onto valve stems, which can damage the stem or cause air leakage. Never rely on a single tool for critical decisions; always cross-check with a second gauge or TPMS. If you’re unsure about readings, pause and contact a professional. When working around hot tires or after driving, let tires cool before checking pressure to improve accuracy and safety.
Steps
Estimated time: 20-40 minutes
- 1
Gather tools and safety equipment
Collect a known-good tire pressure gauge, your current gauge, and a flashlight. If you’re testing in a garage, ensure the car is parked on a flat surface and the parking brake is engaged. Wear eye protection if you anticipate spraying air or cleaning fluids near the gauge. This prep minimizes risk and ensures consistent results.
Tip: Having a spare gauge handy reduces downtime if one tool fails. - 2
Inspect the broken gauge visually
Examine the gauge body for cracks, dents, or obvious leaks around the nozzle. Check the nozzle’s seal and the connection to the stem. If the gauge is visibly damaged or the seal is compromised, do not reuse it—replace it. This quick check often reveals obvious faults.
Tip: A bright light helps reveal hairline cracks or leaks on the housing. - 3
Compare readings with a known-good gauge
Take the same tire and measure with your spare gauge in the same environment. If the readings diverge beyond a small tolerance, the broken gauge is likely inaccurate. Document the readings and proceed to replacement if variance is large or inconsistent.
Tip: Use tires at room temperature for the most accurate comparison. - 4
Test with TPMS and external reference
If your vehicle has TPMS, observe the live readout and compare to the gauge reading. Visit a station or shop with calibrated equipment if available. A TPMS can confirm whether the tire is under or over-inflated relative to recommended pressure.
Tip: TPMS is excellent for trend verification, not a substitute for precise gauge checks. - 5
Replace or recalibrate as needed
If the gauge is damaged or consistently inaccurate, replace it with a new, calibrated model. After replacement, test against the known-good gauge to confirm accuracy. If your gauge supports recalibration, follow the manufacturer steps to reset.
Tip: Keep calibration records or receipts with your gauge for future reference. - 6
Verify final pressures and reset routine
Inflate tires to the recommended pressure, then recheck with both gauges to ensure stability. Document any discrepancies and store the tools properly in a dry place to reduce the chance of future failure. This final check confirms inflation accuracy before driving.
Tip: Always inflate cold tires for the most accurate measurement.
Diagnosis: Gauge shows inaccurate readings or won't register pressure
Possible Causes
- highPhysical damage to gauge body or nozzle
- mediumStuck or damaged pressure release valve
- lowBattery failure in digital gauge
Fixes
- easyInspect exterior for cracks; replace gauge if cracked or air leaks from the nozzle
- easyClean or replace the nozzle; reseat connections; attempt recalibration if supported
- easyTest against a known-good gauge or TPMS; do not rely on the broken gauge for inflation decisions
- mediumReplace damaged gauge with a new, calibrated model; have professional calibration if accuracy is critical
Frequently Asked Questions
What should I do first if my tire pressure gauge seems broken?
Start with a visual check for damage, then compare readings with a spare gauge or the TPMS readout. If readings are inconsistent, replace the gauge rather than guessing tire pressure.
First, check for damage and compare with another gauge or TPMS to confirm. If readings disagree, replace the gauge.
Can TPMS readings replace a tire pressure gauge?
TPMS provides a live readout but isn’t a precise replacement for a physical gauge. Use TPMS as a verification tool and rely on a good gauge for inflation accuracy.
TPMS helps verify trends, but you should still use a physical gauge for precise inflation.
How do I test if a gauge is accurate?
Test against a known-good gauge on the same tire at the same ambient conditions. If readings differ beyond the gauge’s tolerance, replace or recalibrate the damaged gauge.
Test it against a trusted gauge on the same tire; if it differs, it’s time to replace.
What should I look for when buying a replacement gauge?
Choose a gauge with clear markings, durable construction, a reliable seal, and an appropriate pressure range. A digital option with a durable display is helpful, but ensure it’s easy to calibrate.
Pick a sturdy gauge with clear markings and a good seal; calibration matters for accuracy.
Is it unsafe to drive with a broken gauge?
It’s not unsafe to drive, but driving with unknown tire pressures can be risky. You should verify pressures and inflate to recommended values as soon as possible.
It’s not unsafe to drive, but you should verify and set tire pressure to the recommended level as soon as you can.
How often should a tire pressure gauge be replaced?
There’s no fixed interval; replace if you see damage, persistent inaccuracy, or drift after calibration. Regular checks with a known-good gauge are recommended.
Replace the gauge if it’s damaged or unreliable, and test it against a known good gauge regularly.
Watch Video
What to Remember
- Inspect gauge integrity before inflating.
- Cross-check with a known-good gauge or TPMS.
- Replace damaged gauges promptly to ensure safety.
- Regular maintenance extends gauge life and accuracy.