Mountain Bike Tire Pressure Calculator: Optimize Your MTB PSI
Learn how the mountain bicycle tire pressure calculator helps riders dial in PSI for MTB tires based on weight, tire width, terrain, and tire type. Practical guidance for grip, comfort, and pinch-flat prevention.

Why MTB Tire Pressure Matters
Tire pressure is one of the simplest, most effective levers for MTB performance. The right PSI affects grip, rolling resistance, ride comfort, and the risk of pinch flats on rough rocky sections. Over-pressurized tires ride hard, skip over small obstacles, and can reduce traction when the trail is loose. Under-pressurized tires risk rim strikes, squirming under load, and delayed steering responses. For mountain biking, a single pressure setting rarely fits all terrains, riders, and tires. The idea is to balance stability with grip, support with suppleness, and puncture resistance with rolling efficiency. While riders vary, a practical starting point exists: use a mountain bicycle tire pressure calculator to tailor pressures to your weight, tire width, and trail conditions. This approach helps you move beyond guesswork and toward data-informed adjustments. By documenting how your tires behave at different pressures, you’ll build a personal pressure profile for your most frequented trails.
How the mountain bicycle tire pressure calculator works
A tire pressure calculator for mountain bikes takes a few core inputs and converts them into a PSI estimate. The primary factors are rider weight, tire width, terrain roughness, and tire type, which influence contact patch size and supporting load. The calculator uses a simple heuristic rather than an exact physics model, so the result should be viewed as a starting point rather than a fixed rule. You’ll see the value generated in PSI, which you can fine-tune by testing on actual trails. Keep in mind that temperatures, tire volume, tubeless setup, and rim width can all shift the ideal pressure slightly. The calculator also reinforces the notion that pressure is not static: your preferred PSI may vary with weather, season, and riding style. Use it to establish a baseline, then adjust with small increments during your rides.
Key Inputs and Recommended Ranges
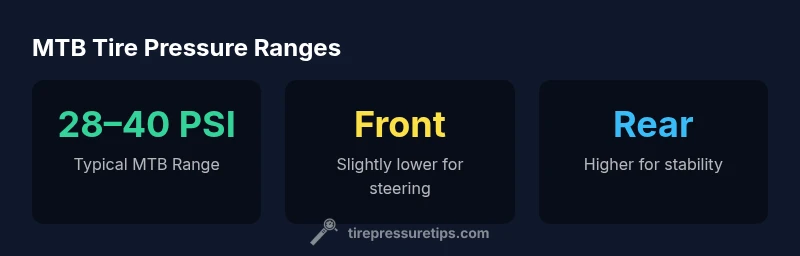
The calculator uses four inputs: Rider Weight (lbs), Tire Width (mm), Terrain Roughness Factor (unitless), and Tire Type Multiplier (unitless). Rider weight helps determine how much load the tire must support; wider tires require less PSI than narrow ones at the same weight. Terrain Roughness Factor increases the baseline pressure for harder surfaces and reduces it for soft surfaces. The Tire Type Multiplier accounts for tubeless or tubed configurations and bead-to-bead fit. As a practical starting point, most MTB setups fall in a broad PSI range (roughly mid-20s to mid-40s), but the exact value depends on your wheel size, tire width, and how committed you are to grip versus rolling efficiency. The goal is to reach a PSI that minimizes pinch flats on rough rocks while maintaining predictable handling.
How to Use the Calculator in Real Life
To get the best results, gather the four inputs before you begin: (1) rider weight, (2) your tire width, (3) terrain roughness, and (4) tire type. Enter them into the calculator and review the PSI output. Use this as a starting point and then test carefully on a familiar section of trail. Increase or decrease PSI by small increments (1–2 psi) and ride for a few minutes to gauge grip, traction, and how the bike responds to steering input. Record your observations to build a personal pressure map and adjust intervals between rides for season changes or new tires.
Practical Scenarios: Trail Types and Pressure Choices
- Cross-country on hardpack: Aim for a balanced PSI that preserves rolling efficiency but still allows for grip. If the front feels skittish, drop front pressure slightly and test.
- Technical rocky downhill: A touch lower PSI can improve tire compliance and reduce harsh impacts, but monitor for pinch flats on sharp rocks.
- Loose dirt and roots: Lower pressures generally increase surface contact and traction; test gradually to avoid folding the tire bead.
- Wet or cold conditions: Temperature reduces pressure; recheck readings after a cold snap or after parking in cold shade, and adjust to maintain similar feel on the trail.