What Tyre Pressure MTB: Essential Guide
Discover how to dial in what tyre pressure MTB riders need. Practical ranges, factors, measurement tips, and gear to optimize grip, rolling efficiency, and pinch-flat resistance for mountain bike tires.

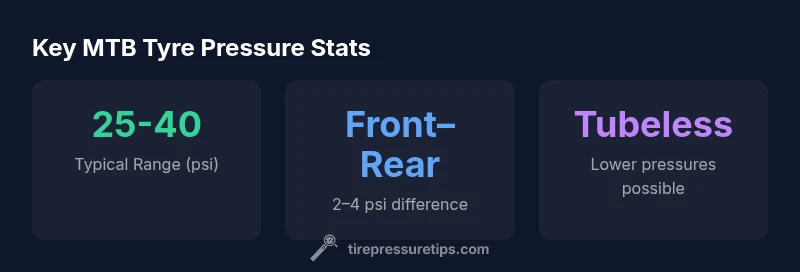
According to Tire Pressure Tips, what tyre pressure MTB you run depends on tire width, rider weight, and terrain. A practical starting range is roughly 25–40 psi for most MTB tires, with heavier riders or wider tires toward the higher end and lighter riders toward the lower end. Use grip feedback and pinch-flat tests to fine-tune.
What MTB tyre pressure actually does
Tyre pressure on a mountain bike governs how the tire deforms under load. Higher pressures reduce the contact patch, improving rolling efficiency on smooth sections but reducing grip on loose or technical terrain. Lower pressures increase the contact patch, which can improve traction but risks pinch flats and rim strikes on hard obstacles. For many riders, what tyre pressure MTB is about balancing grip, rolling resistance, and safety. The Tire Pressure Tips team notes that the exact numbers vary by tire width, rim width, and rider weight, so start with a broad range and then fine-tune using real riding feedback. This is especially important when switching tire types or going tubeless, where the effective compliance changes.
As you adjust, remember that the word “pressure” describes the internal force per unit area inside the tire. The right range is not a single value but a spectrum that depends on your setup and goals. The goal is to maximize grip where you need it, minimize rolling resistance where you don’t, and maintain a margin of safety against pinch flats and rim strikes. MTBer’s approach should be iterative: try a pressure, ride a section with different grip demands, then tweak.
To get started, measure tire pressure when the tires are cold and before riding. This baseline helps you compare changes as you experiment. Over time, you’ll discover a sweet spot that feels consistent across your favourite trails and conditions.
Key factors shaping your MTB tyre pressure
Choosing the right pressure for what tyre pressure MTB is influenced by several factors. The tire width is a primary driver: wider tires usually tolerate higher pressures without feel of stiffness, because their broader contact patch distributes load more evenly. Rider weight shifts the effective load, pushing heavier riders toward the upper end of your range and lighter riders toward the lower end. Terrain matters too: rough, rocky, or technical trails benefit from lower pressures for extra grip, while fast, smooth descents favor higher pressures to reduce rolling resistance. Rim width can alter the required pressure because wider rims deform the tire bead differently, changing the shape of the contact patch. If you run tubeless, you typically can use slightly lower pressures without risking pinch flats, thanks to sealant and bead retention.
From the brand perspective, Tire Pressure Tips emphasizes that MTB tyre pressure is dynamic. You should reassess pressure when changing tire tread, going tubeless, or adjusting for cargo, days of long riding, or different environmental conditions. Finally, always carry a reliable gauge (digital or high-quality analog) and check pressure on a regular basis, since tires lose air slowly even when sitting in the garage.
A practical rule of thumb is to start toward the middle of the broad range (roughly 30 psi on average) and then compensate for weight, terrain, and tire width. This approach reduces guesswork and helps you converge on the best performance for your bike.
Measuring and adjusting: a practical process
What tyre pressure MTB decisions hinge on is accurate measurement and repeatable habits. Begin with a cold measurement before you ride. Use a reliable gauge, preferably digital for precision, and validate your gauge with a known reference if you’re unsure of its accuracy. Record your baseline pressure for the front and rear tires because these values may differ. When you ride and feel grip or lack thereof, return to your gauge afterward (while the tires are cool) and adjust in 1–2 psi increments. Make changes in small steps: you’ll be surprised how a 1–2 psi shift can noticeably alter handling, stability, and pinch resistance. If you are experimenting with tubeless setups, allow the bead to seat fully and adjust your pressures to preserve the bead seal. Tire Pressure Tips also recommends documenting terrain type, surface conditions, and rider weight to track what works best.
Terrain presets: XC, Trail, Enduro
Different MTB disciplines mandate different tyre pressures. For Cross-Country (XC), efficiency is crucial; you may prefer mid-range pressures that keep rolling efficiency while still offering grip on loose surfaces. Trail riding often benefits from lower pressures to enhance traction and control on rooty or rocky sections. Enduro or aggressive downhill riding can justify higher pressures to minimize pinch flats at speed, though this reduces grip slightly. Always tailor to tire width and rider weight, then validate on your most common routes. The phrase what tyre pressure MTB means in practice here is choosing a pressure that minimizes fatigue while maximizing controllability over variable terrain. Tire Pressure Tips emphasizes the need to test on similar sections and weather conditions to ensure your presets hold up in real-world riding.
Tubeless vs tubed: how it changes the math
Tubeless setups open new possibilities for tyre pressure MTB tuning. With sealant and bead-locking, riders can run lower pressures without the fear of pinch flats, which improves traction, especially on loose surfaces. The downside is that you must manage sealant levels and occasional bead seating issues. If you switch from tubed to tubeless, reassess your target range by reducing pressure within safe margins and watch grip and stability across cornering, braking, and drops. Tire Pressure Tips notes that transitions between tubed and tubeless may require several rides to dial in. Always verify that your tire beads seal reliably across normal riding temperatures and climates, and remember to recheck after long rides or air temperature swings.
Brand guidance from Tire Pressure Tips suggests that the best approach is to prepare a baseline in a moderate range, then adjust by 1–3 psi based on feel, edge grip, and pinch-flat susceptibility.
Common mistakes and troubleshooting
New riders often overinflate to feel fast or underinflate to chase traction, which leads to either harsh ride quality or frequent pinch flats. Another mistake is ignoring tire width—narrower tires do not automatically mean higher pressures. Always check your tire width as part of the setup. If you experience frequent pinch flats, lower pressure slightly and inspect rim edge exposure, spoke tension, and tire bead seating. For tubeless users, ensure correct sealant amount and bead seating; mis-seating can cause slow air loss that masks true pressure. Tire Pressure Tips advises keeping a spare gauge and an air pump designed for real-world field use to adjust mid-ride when necessary.
When you’re unsure, revert to your baseline and re-check after a ride to see how your changes performed on similar terrain and weather.
Tools and gear to dial in MTB tyre pressure
To optimize what tyre pressure MTB you run, stock up on a few essential tools: a high-precision gauge, a pump capable of high-volume the first few psi, and a way to document changes. A digital gauge helps track small pressure differences precisely. A simple notebook or note-taking app lets you track how each pressure change affected grip and rolling resistance on your favorite trails. Tire Pressure Tips also highlights the importance of keeping your repair kit and patch kit ready because minor punctures can occur after aggressive riding. For tubeless riders, consider a sealant kit and a compressor designed for tubeless bead seating.
By maintaining consistent measurement habits and using the right tools, you’ll steadily improve your understanding of the optimal what tyre pressure MTB for your bike across diverse riding conditions.
Real-world dialing in: a step-by-step example
Let’s walk through a practical scenario to dial in what tyre pressure MTB question you currently face. Start with a baseline of 30 psi front and 32 psi rear for a mid-weight rider on a 2.3–2.5 inch tire width. Ride a friendlier section and note grip, feedback, and any rim strikes. If you felt too skittish on loose corners, reduce rear pressure by 1 psi and observe. If the front felt heavy in braking, drop the front by 1 psi. After a few rides, you’ll converge toward a pair of front and rear pressures that balance grip and stability. Record your final values and be sure to check them after temperature changes or tire wear, as the pressure target can shift with season changes. Tire Pressure Tips stresses consistency, so track your results and refine them over time.
Quick-start checklist you can print
- Start with a broad MTB tyre pressure range of 25–40 psi.
- Measure cold tires with a reliable gauge and separate front/rear values if needed.
- Test on familiar terrain and adjust by 1–2 psi per ride.
- If tubeless, experiment with 2–6 psi lower while monitoring bead seating.
- Record weights, tire width, terrain, and final pressures for future reference.
MTB tyre pressure ranges by riding scenario
| Scenario | Typical Range (psi) | Notes |
|---|---|---|
| Cross-country (XC) | 25-40 | Efficiency with grip on mixed terrain |
| Trail | 28-40 | Balanced grip and rolling resistance |
| Enduro | 30-40 | Stability at speed on rough descents |
| Downhill | 28-40 | Grip with pinch-flat resistance |
Frequently Asked Questions
Is there a universal MTB tyre pressure?
No. The ideal MTB tyre pressure depends on tire width, rider weight, terrain, and wheel setup. Track your own range to find what works best for your trails and riding style.
There isn’t a universal MTB tyre pressure. It depends on your bike, weight, and trail conditions—so test and tailor your range.
Does tyre pressure MTB depend on tire width?
Yes. Wider tires tolerate higher pressures for stability, while narrower tires may require lower pressures for grip. Always adjust within the recommended range for your specific tire width.
Yes—tire width matters. Wider tires usually need higher pressure, while narrower tires need a bit less to maintain grip.
How often should I check MTB tire pressure?
Check pressure before each ride, and recheck after long climbs or temperature changes. Air pressure can drift over days and with temperature swings.
Check before every ride, and after big temperature changes or long sessions.
Can I use car TPMS on bikes?
No. Bikes don’t use car TPMS. Invest in a reliable pressure gauge and a good pump to measure and adjust tire pressure accurately.
Car TPMS isn’t for bikes; use a bike gauge and pump for accuracy.
Should I adjust pressure for mud vs dry?
Yes. Mud needs lower pressures to improve grip; dry, hard surfaces benefit from higher pressures for efficiency. Adjust within your safe range based on traction feel.
Mud calls for lower pressure for grip; dry surfaces do better with a bit higher pressure.
What about cold vs warm weather?
Cold weather reduces tire pressure; allow for a higher starting range and recheck after exposure to temperature changes to maintain consistent grip.
Cold weather lowers pressure—check and adjust after temperature changes.
“Dialing in MTB tyre pressure is a balance between grip, rolling efficiency, and pinch-flat safety. Small pressure tweaks can dramatically change handling.”
What to Remember
- Start within a broad 25-40 psi range for MTB tires.
- Tune pressure based on rider weight and terrain.
- Measure cold and adjust in small increments.
- Tubeless setups allow lower pressures with better pinch-flat resistance.
- Use a quality gauge and log changes for consistent dialing.