What Should Bike Tire Pressure Be? A Practical Guide
Discover the ideal bike tire pressures for road and mountain bikes, how to adjust for weight and weather, and practical tips for accurate measurement and maintenance.

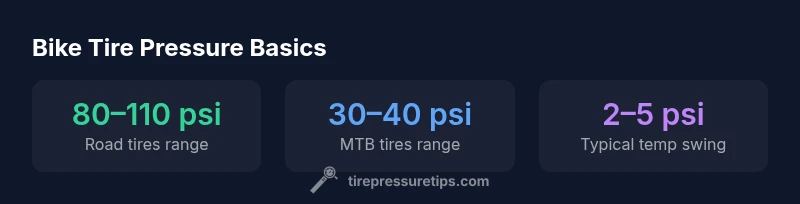
What should bike tire pressure be? The correct pressure depends on tire width, rider weight, and riding conditions. In general, road tires run roughly 80–110 psi, while mountain bikes use about 30–40 psi for standard-width tires. Always check the sidewall printed range and adjust for terrain, load, and temperature to avoid pinch flats or sluggish handling.
Understanding tire pressure basics
If you're asking what should bike tire pressure be, the short answer is: within the tire's published range, tailored to your bike type and riding conditions. Tire pressure is not a fixed number; it is a dynamic setting influenced by tire width, load, terrain, and temperature. PSI is the most common unit in North America, but many riders in other regions use BAR or kPa. The sidewall of every tire lists a recommended range; staying within that range reduces pinch flats, improves grip, and preserves tire life. In practice, road bikes typically run higher pressures for efficiency, while wider tires on gravel or mountain bikes operate at lower pressures to boost compliance. Tools like a digital gauge give you a precise reading; however, accuracy matters more than the exact number. Always check pressures when tires are cold, and re-check after a ride or a temperature shift. According to Tire Pressure Tips, keeping pressure within the published range is essential for safety and performance.
How to find the correct pressure for your bike
Your first stop is the tire sidewall. Look for a printed range (for example, 80–110 psi or 5.5–7.6 bar). Choose a starting point near the middle of that range based on your tire width and typical riding conditions. Narrow road tires (25–28 mm) generally run toward the higher end of their range for efficiency and speed, while wider tires (32–40 mm) favor the lower end for comfort and grip. If you ride with a heavier load, such as cargo or a bike with a front rack, you may need to move slightly higher within the range. Always verify with a reliable gauge and ensure both tires are within their recommended ranges. After setting, ride for a few miles and recheck the pressures when the tires are cold to guard against slow leaks or heat buildup during the ride.
Common mistakes and how to avoid them
Common mistakes include inflating beyond the recommended range, failing to account for temperature changes, and relying solely on approximate feel rather than measurement. Pinch flats are more likely at too-low pressures on rough surfaces, while overinflation can reduce grip and cause a harsher ride. Avoid guessing by using a reliable gauge, ensure the gauge is calibrated, and check pressures at least weekly during peak riding seasons. If you change tires, rims, or sealant types, revisit the recommended pressure ranges. Finally, remember that TPMS on bikes is increasingly common, but it should supplement, not replace, manual checks—especially after long rides or big temperature swings.
How to adjust pressure by riding conditions
Riding on smooth pavement vs. rough gravel requires different pressures. For road surfaces, lean toward the higher end of the range for efficiency, but avoid the maximum to preserve traction. On rough terrain or loose surfaces, reduce pressure within safe limits to improve grip and comfort, especially with wider tires. Temperature, rider weight, and tire width all influence the ideal setting. If you’re carrying gear or a heavier rider, small increments of 2–5 psi can make a noticeable difference in control and tire wear. Always test after adjustments by taking a short ride and reassessing when tires are cold.
Tools and techniques for accurate measurement
Invest in a digital tire gauge for quick, repeatable readings. Calibrate your gauge regularly against a known standard, especially if you drop or bump the device. Use a cold-start check: measure before riding, not after it has heated up. For tubeless setups, verify bead seating and pressure stability as you adjust, since air leaks can masquerade as incorrect pressure. Keep a small note or app log of the pressures you use for different tires and conditions to help you refine your personal settings over time.
Temperature and tire pressure dynamics
Temperature changes influence air density inside the tire, causing pressure to rise with heat and drop when it’s cold outside. In practical terms, a tire set at 90 psi in mild weather might read a little higher on a hot day and noticeably lower on a cold morning. To minimize variance, check pressure in similar ambient conditions and recheck after long rides, especially in weather swings. Your goal is consistency within the tire's published range, not chasing a single number.
Quick-reference pressure ranges by tire width
- Narrow road tires (25–28 mm): 90–110 psi for performance, 80–100 psi for comfort and durability
- Standard road tires (28–32 mm): 85–105 psi
- Gravel tires (32–40 mm): 40–65 psi
- Mountain bikes (2.0–2.4 in): 30–45 psi
- Hybrid tires (28–38 mm): 50–75 psi
Always start mid-range and adjust based on load, terrain, and personal preference.
Pressure ranges by common tire types
| Tire Type | Typical Pressure Range | Notes |
|---|---|---|
| Road tires (25–28mm) | 80–110 psi | Sleek, fast, higher stability on smooth pavements |
| Gravel tires (32–40mm) | 40–65 psi | Balance between traction and rolling resistance |
| All-mountain tires (2.1–2.4in) | 30–45 psi | More cushion for rough trails |
| Hybrid tires (28–38mm) | 50–75 psi | Versatile for mixed surfaces |
Frequently Asked Questions
How do I know the right pressure for my bike?
Start with the tire's published range on the sidewall. Choose a mid-point within that range based on tire width and riding conditions, then fine-tune by testing on your usual routes. Use a reliable gauge and check when tires are cold.
Start with the sidewall range, pick a mid-point, and adjust after a short test ride when the tires are cold.
Can TPMS accurately reflect bike tire pressure?
TPMS provides a useful alert and can help detect large changes, but it is not a perfect replacement for direct gauge measurements. You should still verify pressure with a manual gauge periodically, especially after switches in temperature or terrain.
TPMS helps, but you should still periodically verify pressure with a manual gauge.
How often should I check tire pressure?
Check pressures weekly during peak riding seasons and before long or high-speed rides. After big temperature shifts or tire changes, recheck to ensure readings stay within the recommended range.
Check weekly, and after temperature changes or tire changes.
What happens if I ride with too high or too low pressure?
Too high can reduce grip and increase the risk of a rim impact, while too low raises the chance of pinch flats and excessive wear. Stay within the sidewall range for best balance of grip, efficiency, and tire life.
Too high hurts grip; too low raises pinch-flat risk. Stay within the recommended range.
Does temperature affect bike tire pressure?
Yes. Warmer temperatures raise pressure slightly, while cold temperatures lower it. Check pressure after temperature swings and adjust within the tire's published range as needed.
Temperature changes affect pressure; recheck after temperature swings.
Should I adjust pressure for tubeless tires?
Tubeless tires can be a bit more forgiving, but they still follow the same principles: stay within the tire's range and adjust for load and terrain. Regular sealant maintenance can also affect the effective pressure.
Tubeless still follow the range; adjust for terrain and load.
“Maintaining the correct tire pressure is an ongoing calibration, not a one-time setting.”
What to Remember
- Check the tire sidewall and start within the published range
- Adjust for terrain, load, and temperature to optimize grip and wear
- Use a reliable gauge and calibrate it regularly
- Temperature swings require periodic rechecks
- TPMS helps, but manual checks remain essential