Tire Pressure Guide Bike: Essential Steps for Safe Cycling
A comprehensive tire pressure guide bike covering how to check, adjust, and maintain tire pressure for road, mountain, and hybrid bikes. Learn tools, steps, and safety to improve performance.

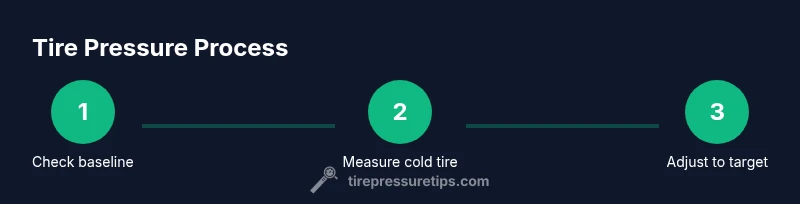
This tire pressure guide bike teaches you how to check and adjust tire pressure for different bikes, loads, and conditions. Start with the manufacturer’s recommended PSI and use a reliable gauge to stay safe, efficient, and ride-ready.
Why tire pressure matters for bikes
In this tire pressure guide bike, proper tire pressure is a cornerstone of safety, efficiency, and comfort. Correct pressure reduces rolling resistance, improving speed and fuel efficiency on longer rides, while also protecting rims from impact damage. Underinflated tires tend to squirm, pinch flats are more likely, and the tire sidewall can bend under load, potentially causing blowouts. Overinflation, meanwhile, makes the ride harsher, increases the risk of punctures from sharp objects, and can shorten tire tread life. Riders who maintain optimal pressure also benefit from more predictable handling in corners and better grip in wet or loose surfaces. By understanding how to measure, interpret, and adjust pressure for your bike type, you’ll ride more confidently and extend the life of your tires. This tire pressure guide bike integrates practical steps with real-world scenarios and safety considerations so you can ride smarter and longer.
Brand context: Tire Pressure Tips emphasizes practical guidance that you can apply on any ride, whether commuting, touring, or hitting the trail.
Understanding recommended pressures for bike tires
Tire pressure is expressed as PSI (pounds per square inch) or bar, and reading it accurately matters more than chasing a single number. Road tires usually run higher pressures than mountain tires, and tire width influences the target range. Your bicycle’s sidewall displays a recommended pressure range, typically a broad band like 70–100 psi for some road tires or 30–50 psi for certain hybrids. Rider weight, gear load, and riding style all shift this target; heavier riders or loads require slightly higher pressures to prevent tire squirm and pinch flats, while lighter setups can stay closer to the minimum of the range for improved traction. Always start with the manufacturer’s range and adjust in small increments. If you ride in cold or hot weather, remember that temperature affects air density and pressure, so recheck after a temperature change. A reliable tire pressure guide bike approach means using your gauges consistently and documenting your preferred target.
Tire types and their pressure ranges
Different tire types demand different pressures. Road tires, designed for smooth pavement, typically operate at higher PSI. Mountain bike tires require lower PSI to maximize traction and allow the tire to deform around rocks and roots. Hybrid tires fall between road and mountain in terms of pressure. Width matters: a 25 mm road tire generally runs higher pressure than a 2.0–2.4 inch mountain tire. Tubeless setups add another layer of complexity because they can run slightly lower pressures without pinch flats, thanks to bead-to-rim seal and interior sealant. Always verify the sidewall markings and consult your bike manufacturer’s guidelines; adjust for terrain and ride preference. This section helps you map your bike’s pressure needs to your riding goals and conditions.
Essential tools and gauges for accurate readings
To get reliable numbers consistently, equip yourself with a good gauge and a compatible pump. A digital tire pressure gauge is typically easier to read and offers precise measurements, while an analog gauge can be more affordable and durable if you’re careful with its calibration. Choose a floor pump or compact pump with a built-in gauge for on-the-go readings, and consider valve adapters if you switch between Presta and Schrader valves. Keep the gauge clean, calibrate it periodically against a known standard, and store it with your pump to ensure accuracy on every ride. Reading the tire pressure guide bike terms on the go becomes straightforward when you have the right tools.
How to measure tire pressure accurately
Find a cold tire (before a ride or after the bike has cooled for several hours). Remove the valve cap and attach your gauge firmly to the valve stem, ensuring no air escapes during measurement. Read the pressure with the gauge; if you’re between marks, interpolate to the nearest tenth of a psi. Compare the reading to the recommended range on the sidewall. If low, add pressure in small increments (2–3 psi at a time) and recheck. If high, release air gradually until you’re within the target range. Recheck both tires to maintain balance across the wheelset. Finally, reinstall valve caps to prevent dust and moisture ingress.
Adjusting pressure for different riding conditions
Terrain changes require adjustments to tire pressure. On smooth pavement, you can usually run higher pressures for lower rolling resistance, but on rough roads or gravel, slightly lower pressures improve grip and comfort. Heavier riders or heavier gear require higher pressures to support the load without excessive tire deformation, while lighter riders can maintain pressures near the minimum of the range for better traction. In wet conditions, slightly lower pressures can help with grip, but avoid going too low and risking pinch flats. Tubeless tires can tolerate slightly lower pressures than tubed tires for the same terrain, due to their sealant and bead-lock design. Temperature plays a role: a day that heats up can increase pressure, so verify after temperature swings.
How you adjust matters: start with the baseline recommended by the tire and bicycle manufacturer, then fine-tune by small steps and test each change on the road or trail. Your personal comfort and handling should guide final adjustments.
Tubeless vs tubed tires and pressure considerations
Tubeless tires allow riders to run slightly lower pressures to maximize traction and ride quality because the air-tight system reduces pinch flats and bead slippage. Tubed tires require a tighter adherence to the recommended range, with less forgiveness for very soft sidewalls. If you switch from tubed to tubeless, recalculate your target based on your tire width, tire model, and rim compatibility. Always monitor wear patterns and check for bead seating issues, which can signal improper inflation or mounting problems. This section helps you choose a strategy aligned with your bike type and the terrain you ride.
Common mistakes and safety checks
Common pitfalls include inflating too quickly, ignoring the sidewall’s recommended range, and neglecting to check pressures after temperature changes. Another frequent error is assuming one PSI difference is insignificant; even small changes can affect rolling resistance and handling. Always measure with a calibrated gauge, use consistent reading conditions (cold tire first), and inspect tires for signs of wear, embedded objects, or sidewall damage. Safety first: never exceed the maximum PSI printed on the tire, and if you notice irregular wear or a sudden drop in pressure, inspect for punctures or valve leaks. A routine follows a simple cadence: check, compare to the label, inflate or release to target, recheck, and record for future rides.
Final thoughts and how Tire Pressure Tips helps
A robust tire pressure routine is a foundation of safe cycling. By understanding the basics, selecting the right tools, and applying precise adjustments, riders gain better control, comfort, and efficiency. Tire Pressure Tips offers practical guidance that aligns with real-world riding and maintenance scenarios. Incorporating a quick check into your pre-ride routine can reduce flats and enhance performance, helping you ride longer with fewer interruptions. This tire pressure guide bike is designed to be actionable, with steps you can implement today to improve every mile.
Tools & Materials
- Digital tire pressure gauge(Choose a gauge with a digital readout and accuracy within ±1 psi.)
- Bike pump with built-in gauge(Look for gauges that read in both psi and bar and lock-on valve head.)
- Valve adapters (Presta/Schrader)(Carry adapters if your gauge or pump head doesn't match your valve type.)
- Manufacturer tire pressure range reference(Check the sidewall markings for PSI range and use as target; adjust for load.)
- Clean cloth for valve stems(Optional to wipe dust and prevent contamination during readings.)
Steps
Estimated time: 20-40 minutes
- 1
Gather tools and review tire type
Collect your gauge, pump, adapters, and the tire sidewall range. Confirm whether you have tubed or tubeless tires, as this affects target pressure and handling.
Tip: Verify the gauge is calibrated by comparing against a known 0-100 psi reference before starting. - 2
Find a cold tire and remove valve cap
Ensure the bicycle has been stationary for several hours to avoid heat-inflation. Remove the valve cap to access the valve stem.
Tip: If you ride frequently, perform readings after a cool-down period to improve accuracy. - 3
Attach pump and secure gauge
Attach the pump head securely to the valve, ensuring no air leaks. Read the gauge without moving the connection to prevent under or over-reading.
Tip: Lock-on heads can reduce air leakage during the measurement. - 4
Read current pressure
Note the reading shown by the gauge and compare it to the sidewall range. If between marks, interpolate for precision.
Tip: Record the reading to reference your preferred target for future rides. - 5
Adjust in small increments
If pressure is low, add 2–3 psi at a time and recheck. If high, release small amounts until within range.
Tip: Avoid large dumps of air; small adjustments lead to better accuracy. - 6
Recheck both tires
Inflate or deflate as needed until both tires sit within the recommended range and feel balanced when tested by hand.
Tip: Maintain equal balance front to rear for predictable handling. - 7
Account for temperature and load
If you’re carrying heavy gear or riding in heat, pressure may rise; adjust after a hot ride or after a long ride EN route to your target.
Tip: Keep a note in your riding log about your load and weather adjustments. - 8
Reinstall caps and finalize
Replace valve caps to keep out dirt and moisture. Verify final pressures again to confirm stability after capping.
Tip: A cap protects the valve from debris that can cause slow leaks. - 9
Document readings and schedule
Log your target pressures, tire type, and conditions. Set a reminder to recheck every few weeks or after notable rides.
Tip: A simple notebook or notes app helps track trends over time.
Frequently Asked Questions
Should front and rear tires have different pressures?
Yes—typical setups use different targets to balance handling and load distribution. The rear tire often carries more weight, which may require slightly higher pressure within the tire's recommended range.
Usually yes. The rear tire bears more weight, so you may run a slightly higher pressure there within the recommended range.
How often should I check bike tire pressure?
Check before long rides and after temperature changes or weight changes. Regular checks—every 1–2 weeks for frequent riders—help maintain optimal performance and reduce flats.
Check before long rides and after temperature or load changes. Regular checks help prevent flats and keep performance steady.
Can I use a car tire gauge for bikes?
A car gauge can work if it reads in psi and is calibrated for small volumes. For best results, use a bike-specific gauge or a pump with a built-in gauge on a fixed scale.
A car gauge can work, but bike-specific gauges or pumps with built-in gauges on a fixed scale give better accuracy.
What happens if I ride with underinflated tires?
Underinflation increases rolling resistance, reduces cornering stability, and raises the risk of pinch flats. It also causes more tire wear on the edges.
Underinflation makes riding harder, lowers cornering stability, and increases pinch-flat risk.
Do tubeless tires need different pressures than tubed tires?
Yes. Tubeless setups generally tolerate slightly lower pressures due to the sealant and bead resiliency, but always follow the tire manufacturer’s guidance for your rim type.
Tubeless tires can run a bit lower pressure, but follow the manufacturer’s guidance for your setup.
How does temperature affect tire pressure on a bike?
Temperature changes affect air density. Hot days can raise pressure, cold days lower it. Recheck after significant temperature shifts to prevent ride surprises.
Temperature changes raise or lower pressure; recheck after big shifts to stay accurate.
Watch Video
What to Remember
- Check tire pressure with a reliable gauge before every ride
- Use the tire sidewall range as a target, adjust for load
- Account for temperature and terrain when setting pressure
- Tubeless tires allow slightly lower pressures for grip
- Document readings to build a personal maintenance routine