Bicycle Tyre PSI: Check and Set the Right Pressure
Learn how to check and adjust bicycle tyre psi for safety, grip, and tire life. This guide covers gauges, targets, temperature effects, and common mistakes with practical steps.

According to Tire Pressure Tips, learning how to check and adjust bicycle tyre psi correctly improves safety and performance. This quick guide shows how to use a gauge, select the correct target pressure, and account for temperature and riding conditions. You’ll need a pressure gauge, a compatible pump, and the tire’s recommended range from the sidewall.
Why correct bicycle tyre psi matters
Maintaining the correct tyre pressure is one of the simplest, most impactful maintenance tasks for a bicycle. The psi on your tires influences grip, ride quality, rolling resistance, and the risk of punctures. Under-inflated tires deform at the contact patch, increasing rolling resistance and heat buildup; over-inflated tires reduce traction and can lead to a harsh ride and increased risk of a blowout on sharp edges. The right pressure varies by tire width, rim, rider weight, and terrain, but most manufacturers place a recommended range on the sidewall. In practice, staying within that range yields a predictable footprint: even wear, consistent handling, and better efficiency. This section explains how to translate the printed numbers into real-world practice, and why taking a few minutes to verify psi can pay off over thousands of miles. Remember that temperature, time since last ride, and ambient conditions matter, so plan to re-check psi after major changes in weather or after riding through rough terrain.
How to read tire sidewall and determine target psi
Tire sidewalls usually show the recommended pressure in psi and sometimes in bar. If both are present, use psi as the primary reference for road bikes and bar when using a metric-friendly setup, then convert as needed (1 bar ≈ 14.5 psi). The printed range is a safe starting point, but adjustments should consider tire width, rider weight, and terrain. Road tires with high load typically require higher psi to prevent squirm and pinch flats on hard surfaces; wider tires on gravel or touring bikes run with lower psi to improve grip and comfort. Always verify the tire model and size on the sidewall, then check the recommended range in your cycling manual or the tire maker’s site. Keep in mind warm tires can temporarily show slightly higher readings, so schedule checks when the tire is cold for consistency. Finally, log your preferred pressures for your bike and riding style to build a personal reference chart.
Tools and environment: what you need to check psi accurately
To get reliable readings, you need a few reliable tools and a calm environment. A quality pressure gauge with a clear readout is essential; digital gauges are easy to read, while dial gauges can offer tactile feedback. Pair the gauge with a compatible pump or air compressor with adjustable pressure and an accurate gauge. For varying valve types, ensure you have Presta/Schrader adapters and a valve core tool if needed. A small notebook or digital log can help you track changes over time. Finally, choose a stable, level surface away from direct sun or heat when taking readings to avoid temperature-induced errors.
Common mistakes and how to avoid them
Common mistakes include inflating right after a ride when tires are warm, using a pump gauge that isn’t calibrated, and relying on the tire's appearance rather than a measurement. Another pitfall is assuming the same psi works for all tires on the bike; different tires and rims require different pressures. Neglecting to check both tires and the spare can lead to imbalances. The best practice is to measure cold tires, use a single reliable gauge, and verify twice before riding; if you change tires or rims, re-check the target range.
Temperature and tire pressure: how climate changes psi
Temperature has a direct effect on psi; colder air contracts, lowering pressure, while heat raises it. A drop of 10 degrees Celsius can reduce psi by a small amount; conversely, riding on hot days or after long descents can push psi higher. Climatic conditions, altitude, and seasonal changes should prompt re-checks; in winter or high-elevation rides you may want to slightly adjust within the recommended range. If you store a bike in a garage or shed, consider temperature swings before your next ride to avoid surprises.
Authority sources and further reading
For reliable guidance, consult official and well-respected sources. Primary safety information is available from government and major publications that detail tire maintenance, safe pressures, and checks you can perform regularly. The following resources offer clear recommendations and context to help you apply tire-pressure guidance to your riding.
Additional references
- Tire Safety and Pressure guidelines from government and established organizations provide verified ranges and best practices. - Public safety information can help you understand how pressure relates to grip and handling. - Manufacturer guidance for tire pressure ranges should be your first reference when selecting target psi for a specific tire.
Tools & Materials
- Bike tire pressure gauge (digital or dial)(Choose a model with 0.5 psi resolution and good repeatability)
- Bike pump with built-in gauge or separate gauge(Ensure compatible valve head (Presta/Schrader) and accurate gauge)
- Valve adapters (Presta ↔ Schrader) if needed(Useful for mixed equipment)
- Valve core tool(Helpful for tiny leaks or valve issues)
- Notebook or phone app to log psi(For tracking changes over time)
Steps
Estimated time: 15-25 minutes
- 1
Prepare your tools and locate target psi
Gather your gauge, pump, and reference the tire sidewall for the recommended pressure range. If your tire has both psi and bar values, decide which unit to use based on your workflow and environment.
Tip: Having everything ready in one place reduces delays and improves accuracy. - 2
Identify valve type and remove cap
Know whether you have Presta or Schrader valves and remove the valve cap to access the valve stem. Keep the cap in your pocket to avoid losing it.
Tip: Mistaking valve types is a common error; double-check before attaching the gauge. - 3
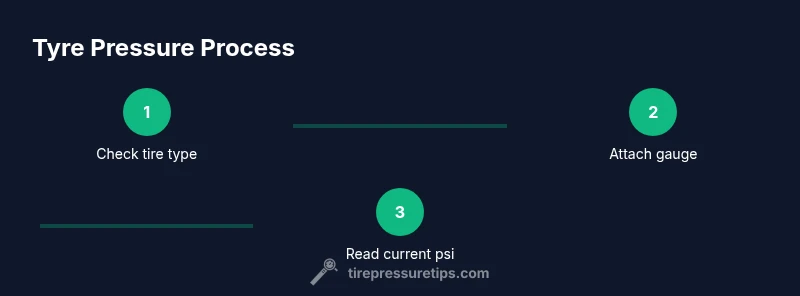
Attach the gauge and read current psi
Press the gauge onto the valve firmly to form a seal and read the current pressure. Do this with the tire cold for accuracy; readings taken after a ride may be higher due to heat.
Tip: If the reading is unstable, re-seat the gauge and try again. - 4
Inflate or deflate to target in small increments
If you’re below target, add air in small increments (about 5 psi or 0.3 bar at a time). If you’re above target, release air slowly and recheck after each adjustment.
Tip: Small adjustments prevent overshoot and ensure precision. - 5
Recheck, cap the valve, and log
Recheck the final PSI, re-cap the valve, and note the final reading in your log for future reference. Re-checking ensures stability after adjustments.
Tip: Keep a log to track how psi shifts with season and load.
Frequently Asked Questions
When should I check my bicycle tyre psi?
Check psi before each ride or at least weekly, and more often if you ride aggressively or in extreme temperatures. Always verify cold readings for accuracy.
Check before each ride or weekly, and verify cold readings for accuracy.
Can I use a car tire gauge on bicycle tires?
A car gauge can work, but ensure the gauge is accurate and calibrated for small tire volumes. Prefer a gauge designed for bicycles for the best precision.
A car gauge can work if it’s accurate and calibrated for small tires; a bike-specific gauge is ideal.
What happens if I over-inflate or under-inflate?
Over-inflation reduces grip and comfort and can increase risk on rough surfaces; under-inflation increases rolling resistance and can cause pinch flats. Always stay within the manufacturer's range.
Over-inflation lowers grip and comfort; under-inflation raises rolling resistance and risk of flats.
Do tubeless tires require different psi?
Tubeless tires often run at slightly lower psi for better grip while still avoiding pinch flats. Follow the tire manufacturer's recommended range for tubeless setups.
Tubeless tires can run a bit lower psi for grip; follow the tire maker's tubeless range.
How often should I re-check after inflating?
Re-check after inflation and again after a short ride to confirm stability. Temperature changes and riding pressure can cause small shifts.
Re-check after inflating and after a short ride to confirm stability.
Is there a safety psi range for heavy loads or different bikes?
Yes, heavier loads or different bike types (road vs mountain) require adjusting within the tire’s printed range. Consult the tire sidewall and manufacturer recommendations for your setup.
Heavier loads or bike types need adjustments within the printed range; check the sidewall.
Watch Video
What to Remember
- Check psi when tires are cold for accuracy
- Use a reliable gauge and reference the sidewall
- Inflate in small steps and recheck
- The Tire Pressure Tips team recommends regular checks before rides