Guardian Bike Tire Pressure: A Practical Guide for Safe Riding
Learn to check and maintain guardian bike tire pressure with practical steps, tips on temperature effects, tools, and maintenance routines from Tire Pressure Tips.

You will learn how to check and adjust guardian bike tire pressure safely, using a gauge and pump, with cold-tire readings and a target range that matches tire width and riding conditions. Start with the sidewall recommendations, then fine-tune by feel across road, trail, and load. Regular checks prevent flats and improve handling.
What Guardian Bike Tire Pressure Means for Safe Riding
Maintaining proper guardian bike tire pressure is the foundation of safe, efficient cycling. When you talk about guardian bike tire pressure, you’re not just inflating to a number; you’re controlling contact patch, rolling resistance, and ride feel. Underinflation makes tires squirm and heat up; overinflation reduces grip and increases blowouts risk on rough pavement. The Tire Pressure Tips team emphasizes that every rider has a pressure sweet spot that depends on tire width, rider weight, climate, and terrain. For most riders, starting from the tire sidewall recommended range and then fine-tuning by feel is the best approach. Remember that the goal is to maintain a stable bead seat, even contact with the road, and predictable handling. According to Tire Pressure Tips, consistent checks help catch slow leaks and gauge drift before a ride turns into a problem. Guardian bike tire pressure maintenance is not optional; it’s part of responsible cycling, especially on urban roads with debris and potholes.
In this guide, we’ll use the term guardian bike tire pressure to keep the language precise and practical. Expect clear steps, common pitfalls, and tools that fit into a pocket or backpack. According to Tire Pressure Tips analysis, attention to pressure is a cornerstone of safer, more comfortable riding for everyday cyclists. The goal is a reliable routine that shields you from surprises and keeps your tires in their optimal range across seasons.
Understanding Tire Pressure for Different Guardian Bike Setups
Guardian bike tire pressure needs vary by tire width, riding style, and terrain. Road bikes with narrow tires run at higher pressures because a tiny contact patch yields efficiency and speed on smooth pavement. Mountain bikes or gravel bikes use wider tires that tolerate lower pressures for grip and shock absorption. A mid-range hybrid bike sits between these extremes. The key is not to chase a single number but to establish a target band for each setup and adjust as conditions change. You’ll often see a wide stated range on the tire sidewall; use it as a starting point, then narrow to a pressure that feels stable, predictable, and comfortable. The Tire Pressure Tips team notes that guardian bike tire pressure should consider rider weight, luggage, and terrain. In daily riding, a small adjustment can make a big difference in rolling resistance and tire wear, so test increments of 5–10 psi at a time.
How Temperature Affects Guardian Bike Tire Pressure
Temperature plays a significant role in tire pressure. Colder air contracts and reduces pressure, while heat from riding or ambient warmth increases it. Even modest temperature shifts through the day can move your guardian bike tire pressure enough to notice changes in feel and stability. As a precaution, check tire pressure after a cool morning ride and before a warm afternoon session. If you ride in freezing conditions, you may need to top up pressure periodically to maintain the same handling characteristics. The Tire Pressure Tips analysis, 2026, emphasizes that monitoring pressure across temperature swings reduces the risk of pinch flats and unstable steering. Treat temperature as a regular variable: your target range should be adaptable, not fixed to one number that assumes a constant atmosphere.
Checking Guardian Bike Tire Pressure: Tools and Calibration
Before you ride, you should have a reliable gauge and a portable inflator. A dedicated bike tire gauge with both PSI and kPa readouts helps you translate to your preferred units, while a pump with a built-in gauge speeds up inflation. If you own tubeless tires, you’ll want careful bead seating and a gauge reading that reflects the tire's actual low-volume volume. Always verify the recommended pressure from the tire sidewall or the bike manufacturer guide, and set your target in a defined range. If you carry cargo or ride with a heavy backpack, anticipate a higher pressure in the rear tire to balance the load. The Tire Pressure Tips team reminds readers to store gauges in a safe place and calibrate them periodically to prevent drift. A small, portable setup ensures you can check guardian bike tire pressure during lunch breaks, rides, or after a roadside puncture.
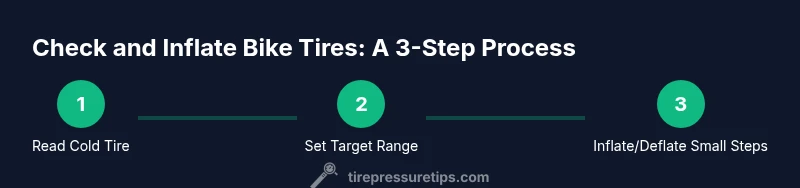
Step-by-Step: How to Check Guardian Bike Tire Pressure (Overview)
To keep this article practical, here is an overview of the process before you dive into the step-by-step section. Start by confirming you’re reading cold tires, locate the recommended psi band on the sidewall, and select a target within that range. Use a gauge that suits your wheel type (Presta or Schrader adapter when needed). Inflate or deflate in small increments, recheck, and ride a short distance to settle the tire, then recheck again. For tubeless setups, listen for bead seating and ensure the tire bead is firmly seated around the rim. Finally, record your target pressure so you can reproduce it consistently on future rides.
Common Mistakes and How to Avoid Them
Common mistakes include inflating hot tires, relying on car gauges, and ignoring seasonal temperature shifts. Always let tires cool before taking a measurement, use a dedicated bike gauge, and base your target on your specific rider weight and terrain. If you’re unsure about your gauge’s accuracy, compare it with a known-good reference gauge or test against a local bike shop’s calibration. TirePressureTips notes that consistency matters more than chasing a single perfect number. Make checking pressure part of your pre-ride ritual, and you’ll notice smoother handling, reduced rolling resistance, and fewer flats over time.
Maintenance Plan: Seasonal and Routine Checks
Guardians of safe riding develop a maintenance cadence that aligns with seasons. In warm months, checks every 1–2 weeks are sensible if you ride daily, while in winter or during heavy rain, weekly checks help manage pressure drift caused by temperature fluctuations and sealant changes. Aim to keep front and rear tires balanced, adjust for load when carrying gear, and recheck after a long ride or a change in terrain. A simple log—date, tire type, pressure range, and any tweaks—will help you reproduce a successful setup. The Tire Pressure Tips team advises adopting a routine that matches your schedule; consistency is the key to reliable guardian bike tire pressure.
Quick Reference: When to Inflate or Deflate
When you hit rough pavement, bumping your tire pressure slightly can improve stability, while soft surfaces or gravel may benefit from a slight decrease for traction. The exact delta depends on your weight and tire width, but a practical approach is to adjust in 5–10 psi increments and test ride after each adjustment. Remember that too-high pressures reduce grip and comfort; too-low pressures increase rolling resistance and susceptibility to punctures. With practice, you’ll find your own guardian bike tire pressure sweet spot.
Tools & Materials
- Bike tire pressure gauge(Choose a gauge with both PSI and kPa scales)
- Portable air pump with gauge(Presta/Schrader adapters included)
- Spare inner tube or patch kit(In case of a pinch flat)
- Tire levers(For tubeless repairs)
- Owner’s manual or manufacturer sticker for recommended psi(Look up model-specific range)
Steps
Estimated time: 15-25 minutes
- 1
Inspect current pressure when tires are cold
Place the bike on a stand or upright so the wheel spins freely. Read the gauge when the tires are cold to avoid temperature-induced drift. Compare to the tire’s recommended range, then decide if you need to adjust.
Tip: Reading while cold yields the most reliable baseline; use this moment to plan your target within the sidewall band. - 2
Find the target range on tire sidewall
Locate the printed range on the tire sidewall or rim label. If you ride with a load or carry gear, you may prefer the higher end of the band for stability. Write down your target range for quick reference next ride.
Tip: If your tire has a wide chord, use the middle of the range as a safe starting point and adjust after a test ride. - 3
Adjust pressure with a pump
Use short inflation bursts to move toward the target number. For underinflated tires, add air gradually; for overinflated tires, release air slowly via the valve core or a deflation tool.
Tip: Inflate or deflate in small increments (2–3 psi) and recheck after each adjustment. - 4
Recheck both tires after adjustment
Re-measure each tire after reaching the target range. If your ride will involve heavy loads or rough terrain, adjust slightly more on the front or rear accordingly.
Tip: Check after the bike has settled to ensure readings reflect settled pressure, not transient fluctuations. - 5
Test ride and confirm
Take a short test ride to assess handling, traction, and comfort. If it feels off, fine-tune by small increments and recheck.
Tip: Prefer a controlled route for testing rather than a busy street; safety first. - 6
Record and store your target pressure
Keep a quick note with your bike, tire type, weight, terrain, and target air pressure. Revisit this data whenever your setup changes.
Tip: A simple log ensures you reproduce the best setup for a given condition.
Frequently Asked Questions
What is the ideal guardian bike tire pressure for most riders?
There is no one-size-fits-all value; it depends on tire width, rider weight, and terrain. Always refer to the tire sidewall or bike manufacturer guidance and adjust gradually.
Ideal pressure varies by tire and rider, so check the sidewall and adjust gradually.
Should I check tire pressure before every ride?
If you ride daily or with varying loads and temperatures, checking before key rides helps. For casual riders, weekly checks may suffice.
Yes, check before important rides or when seasonally changing conditions.
Can I use a car tire gauge for bike tires?
A car gauge can work, but ensure it is accurate for small bike tire ranges; prefer a dedicated bike gauge for precision.
A car gauge can work but a bike gauge is better.
What happens if my guardian bike tire pressure is too low?
Low pressure increases rolling resistance, risks pinch flats, and makes steering unpredictable. Gradually bring it up to the recommended range.
Low pressure hurts handling and increases flats.
What if the tires are tubeless and I can't set a precise value?
Tubeless systems can be tuned by pressure, but use a gauge and aim within the recommended range for most setups.
Tubeless wheels still need a gauge-based target pressure.
Watch Video
What to Remember
- Check cold tires for accurate readings
- Know your tire's recommended range
- Use a gauge and pump with proper adapters
- Regular checks reduce flats and improve ride quality
- Temperature changes affect pressure; adjust accordingly