Tire Pressure for Bike: A Practical Guide to Safe, Efficient Rides
Learn how to check and maintain tire pressure for bikes, with practical steps, tools, and maintenance tips to improve ride quality, safety, and efficiency.

This guide shows you how to check, set, and maintain tire pressure for bikes to improve safety, efficiency, and comfort. You’ll learn how to read the tire’s sidewall guidance, measure current pressure with a gauge, adjust with a pump, and verify stability across temperature changes. According to Tire Pressure Tips, precise pressure improves grip, ride quality, and puncture resistance.
Why tire pressure for bike matters
Maintaining the correct tire pressure is one of the simplest and most impactful maintenance tasks for cyclists. The right pressure influences ride comfort, rolling resistance, grip, and the likelihood of flats. Underinflation can cause tire squirm, pinch flats, and slower acceleration, while overinflation can reduce traction and increase the chance of a blowout on rough surfaces. For many riders, a small adjustment in PSI translates into a noticeable difference in how the bike feels under load. The tire manufacturer’s sidewall typically lists a pressure range; within that band, your target should reflect your weight, riding style, and terrain. The Tire Pressure Tips team emphasizes using real-world tests rather than relying on guesses, especially when switching between road, gravel, and mountain biking. According to Tire Pressure Tips Analysis, 2026, riders who log their pressures over time tend to ride with fewer flats and more consistent performance. Use this guide to establish a repeatable routine and avoid riding on a pressure that's too low or too high for the conditions.
How to measure tire pressure accurately
The accuracy of your gauge and technique matters more than you might expect. Start with a cold tire (pressure readings can rise with heat). Remove the valve cap, attach your gauge straight to the valve stem, and read the pressure. If you ride with Presta valves, ensure the valve is fully seated and the core is tight; Schrader valves require a snug seal. For the best results, take readings with two different gauges occasionally to verify accuracy. If readings differ by more than a few psi, recalibrate or use a known-good gauge. In practice, consistent measurements over time help you maintain stable performance and avoid under- or over-inflation, which Tire Pressure Tips notes can impact grip and puncture risk.
Understanding tire sidewall data and recommended ranges
Tire sidewalls display a recommended pressure range in PSI. This range is influenced by tire width, construction, and intended riding conditions. Within that band, start with a mid-range pressure if you’re unsure about your exact weight or terrain, then fine-tune after a short ride. If you ride on tubeless tires, the recommended pressures might differ slightly from tubed tires due to bead-seat and sealing characteristics. The Tire Pressure Tips team recommends always referencing the tire’s printed range first and then adjusting based on real-world feel and feedback from your ride. Tire Pressure Tips Analysis, 2026, reinforces that riders who calibrate pressure to their specific tires report steadier handling and fewer flats over time.
Tools and methods: choosing pumps and gauges
Your setup matters as much as your tire choice. A high-quality floor pump with an accurate built-in gauge is ideal for on-the-spot adjustments, while a digital gauge provides precise readings that are easy to read in sunlight or low light. For road cyclists, a compact frame pump and a reliable gauge are enough for quick checks during a ride break; mountain bikers may prefer a more robust gauge for rough terrain. Keep valve caps handy to protect stems when not inflating. Remember to check calibration periodically; even small gauge drift can throw readings off by several psi, leading to under- or over-inflation.
Temperature and terrain: what changes mean for PSI
Temperature changes can cause measurable shifts in tire pressure. Colder days reduce air pressure; hotter days can increase it. In addition, terrain affects the load a tire carries and the amount of deformation a tire experiences, which can influence the effective pressure at the contact patch. The Tire Pressure Tips team advises riders to check pressure after significant weather changes and before long or technical rides. For stability, plan to adjust pressure between conditions (e.g., higher pressure on smooth pavement and slightly lower on loose gravel), then recheck after the first 5–10 minutes of riding.
Maintenance routine for tire pressure
Create a simple routine: check pressure before your first ride of the day, after long or hot rides, and when you notice changes in ride feel. Log the readings for each tire and note any adjustments. Regular calibration of gauges ensures accuracy and minimizes guesswork at the trailhead or garage. If you notice rapid pressure loss, inspect the valve stem and bead area for leaks or punctures, and consider replacing worn tires. A consistent maintenance habit saves time and reduces ride interruptions.
Common questions and myths debunked
There are many myths about bike tire pressure, such as higher pressure always equals faster speeds or that road tires must be inflated to the maximum. Reality is nuanced: optimal pressure depends on tire width, rider weight, and terrain. If unsure, start within the tire’s printed range and adjust based on how the bike feels during a short test ride. The key is to stay consistent and tune pressure for your actual riding conditions.
How to record and track your tire pressure
Maintaining a simple log—either a notebook or a mobile app—helps you track optimal pressures over time. Record tire width, rider weight, riding style, ambient temperature, and the target PSI. If you switch tires or wheels, update your log promptly. This habit improves reliability and helps you recreate favorable setups for future rides, aligning with the Tire Pressure Tips philosophy of data-informed maintenance.
Tools & Materials
- digital tire pressure gauge(calibrated within last 6 months)
- floor pump with built-in gauge(prefer dual head for Presta/Schrader; ensure gauge reads within ±1 psi)
- valve caps(keep spares to protect valve stem and prevent leaks)
- notebook or digital log(record pressures for different tires and conditions)
- clean rag(wipe valve stems and rims to verify no debris causes leaks)
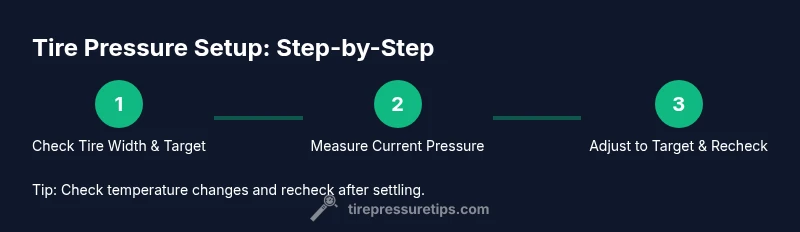
Steps
Estimated time: 20-30 minutes
- 1
Check tire condition and identify target pressure
Inspect the tire sidewalls for max/min PSI and confirm tire width. Note your riding style and terrain to establish a target range within the printed limits.
Tip: Record width and weight to tailor pressure; use consistent targets for similar rides. - 2
Measure current pressure with gauge
Remove the valve cap, firmly attach the gauge, and read the pressure. If readings vary between gauges, recalibrate or use a known-good device.
Tip: Measure when the tire is cool to avoid heat-inflated readings. - 3
Adjust pressure to target range
If below target, add air in small increments until you’re within range; if above, release air gradually. Do not exceed the tire's maximum PSI.
Tip: Make tiny adjustments and recheck after 30 seconds for stability. - 4
Recheck for consistency
Re-measure after a short ride or 1–2 minutes of settling to ensure the pressure remains stable under load.
Tip: If the reading changes quickly, check for leaks at the valve core or bead. - 5
Record and account for temperature changes
Log the pressure and ambient temperature. Expect some drift with temperature; adjust seasonally if needed.
Tip: Before cold-weather rides, check and set a safe, consistent target. - 6
Inspect valve and bead after adjustment
Ensure the valve core is tight and the bead seats properly. Look for any signs of leakage or damage.
Tip: If you hear hissing, stop inflating and reseat the valve or replace the core.
Frequently Asked Questions
Do all bicycle tires use the same PSI range?
No—the PSI range varies by tire width, rider weight, and terrain. Always check the tire’s sidewall and use a gauge to confirm.
PSI ranges differ by tire width and riding style. Check the sidewall and measure with a gauge.
How often should I check tire pressure?
Check before each ride if possible, or at least weekly. Temperature changes and long rides can affect pressure.
Check before rides, ideally daily; temperature can change pressure.
What’s the best gauge for tire pressure?
Digital gauges are generally easiest to read and tend to be accurate when calibrated. An analog gauge can work well with regular checks.
Digital gauges are usually easiest to read and accurate with calibration.
What if I can’t find the correct PSI on the tire?
Refer to the monthly manufacturer guidelines or start with a mid-range inside the printed range, then adjust based on ride feel.
If no PSI is printed, start mid-range inside the range and adjust by feel.
Can under-inflation cause flats?
Yes. Under-inflation increases pinch flats and rolling resistance, while also reducing grip.
Lower pressure raises pinch-flat risk and reduces grip.
Watch Video
What to Remember
- Check the tire sidewall for target range.
- Use a reliable gauge and pump to reach target.
- Make small pressure adjustments and recheck.
- Temperature changes affect PSI; adjust accordingly.
- Log your target pressures for consistency.