Tire Pressure Aftermarket: Practical Guide for Drivers
Practical guide to checking, adjusting, and maintaining tire pressure for aftermarket tires, with TPMS guidance, tools, and safety tips for drivers.

Learn how to accurately check and adjust tire pressure for aftermarket tires, verify TPMS readings, and maintain safe levels for better wear, fuel economy, and handling. You will understand how to use a gauge, interpret placard specs, and perform regular cold-condition checks with practical guidance from Tire Pressure Tips.
Why aftermarket tire pressure matters for drivers
Aftermarket tires introduce new variables to how a vehicle carries load, responds to speed, and wears out. Unlike original equipment tires, aftermarket models vary in width, profile, and construction, which can shift the optimal inflation pressure. According to Tire Pressure Tips, following the tire placard and the vehicle manufacturer's load and speed rating is essential when you install aftermarket tires, because pressure choices directly affect handling, stability, and tire life. When pressure is too low, the tire deflects excessively, generating heat, uneven wear, and poorer fuel economy. When pressure is too high, the contact patch shrinks, reducing grip and increasing ride harshness. The right pressure balances load distribution, tread contact, and sidewall support, which matters especially for aftermarket tires that may run different temperatures during warm weather or aggressive driving. In addition, adjusting pressures for aftermarket tires helps TPMS sensors maintain accurate readings and reduces nuisance alerts from incorrect inflation. Tire Pressure Tips's guidance emphasizes checking pressures when tires are cold, verifying the target value on the door placard, and understanding that aftermarket tires can require small but meaningful adjustments from OEM recommendations. This foundation keeps drivers safe, comfortable, and cost-effective over the tire's life.
How aftermarket tires influence recommended pressures
When you install aftermarket tires, the overall footprint and construction can shift how pressure translates into a contact patch. Wider or taller tires change how load is distributed across the tread, which can alter ideal inflation. Construction differences, such as radial versus non-radial designs and bead profiles, also influence how the sidewall supports the load and dissipates heat. In practice, you should still start with the vehicle's published target pressure from the door placard and then assess performance on a short test drive. Make small adjustments if the tire model’s manufacturer recommends it, and always verify after a cooling period. The goal is consistent contact patch performance across all four tires and stability during acceleration, cornering, and braking. This approach reduces uneven wear and maintains predictable handling, regardless of aftermarket tire choice. Based on Tire Pressure Tips research, drivers who verify pressures against a known baseline report more consistently even wear patterns and fewer surprises when temperatures rise or driving conditions change.
Understanding how wide and aftermarket tread profiles affect pressure
Aftermarket tires often vary in width, profile, and tread design, which can meaningfully affect recommended inflation pressure. A wider tire increases the contact patch width, which changes how the tire deforms at load and how heat conducts through the tread and sidewall. A taller sidewall can alter flex characteristics, influencing ride quality and curvature of the contact patch under cornering. The tire’s internal construction and bead profile also play a role in how well the tire sits on the wheel rim, especially when rims are aftermarket or have different offsets. The practical takeaway is to use the placard as your baseline, then test for grip, steering response, and even wear on a few highway miles. If the tire manufacturer provides specific adjustments for their model, follow those directions, and repeat measurements after the vehicle has cooled. Consistency is the key to safe, predictable performance with aftermarket tires.
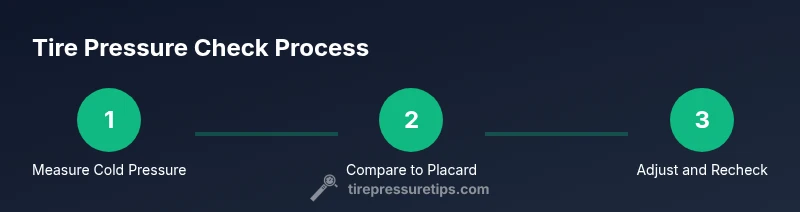
Step-by-step: measure and adjust for aftermarket tires
- Find the target inflation pressure on the door placard or in the vehicle manual, then prepare to measure with the tire cold. Readings taken after the car has sat overnight or at least a few hours of not being driven are more reliable. 2. Remove the valve cap and inspect the valve stem for damage, since aftermarket tires sometimes use different valve cores. 3. Attach a calibrated gauge securely to the valve stem and read the pressure. If the gauge shows a reading that differs from the target, you will adjust accordingly in the next step. 4. Inflate or deflate to reach the target pressure, applying small increments and rechecking after each adjustment to avoid overinflation. 5. Repeat on all tires, including the spare if applicable, using the same procedure to ensure even performance. 6. Record readings and the ambient temperature to monitor changes over time and plan your next check. Estimated total time: 15-25 minutes.
Reading and recording for durability
Great tire pressure practice includes documenting each reading and the conditions under which you tested. Keep a simple log that includes the tire position, measured pressure, the target pressure, and the ambient temperature. Regular notes help you spot gradual shifts—perhaps due to seasonal temperature changes or wear patterns—that a single, one-off check might miss. If you notice persistent deviations, consult the tire manufacturer or a professional to confirm compatibility with your vehicle’s load requirements. This discipline supports longer tire life, balanced wear, and safer driving under a variety of conditions. Consistency with measure, adjust, and re-check becomes part of your routine maintenance, just like checking tread depth.
Tools and devices you’ll use
Selecting the right tools is fundamental to accurate readings. Use a reliable digital tire pressure gauge or a high-quality dial gauge, and keep an inflation source accessible for adjustments. A tire placard or the vehicle manual is essential to know the target pressure, and a pressure log helps you track trends over time. For aftermarket tires, you may also benefit from a valve core tool, especially if you’re changing valve stems or correcting leaks. Consider soap and water for quick leak checks around the valve stem and bead area after adjustments. A simple notebook or mobile app can store your readings, making it easy to review when temperatures shift or you rotate tires. Keep in mind that gauge calibration matters; periodically compare readings with a known good gauge.
Safety tips and maintenance routines
Always begin measurements with cold tires, since heat inside a warm tire raises the pressure reading and can mislead you about correct inflation. Do not exceed the tire’s maximum inflation pressure printed on the sidewall, as this can cause a blowout or rapid wear. After installing aftermarket tires, recheck pressures after your first 100 miles or so, when the tires have had a chance to settle. If you drive aggressively or carry heavy loads, you may need to re-evaluate the pressures at regular intervals.”
Common mistakes when dealing with aftermarket tires
Common mistakes include relying on a single reading, calibrating gauges infrequently, and ignoring the placard in favor of a personal preference. Another frequent error is not accounting for temperature; readings taken in hot conditions reflect elevated pressure. Always use a cold-reading baseline and re-check after driving to confirm that your adjustments are correct. Failing to re-check after a change in tire size, load, or driving style can undermine handling and wear patterns. This is particularly true with aftermarket tires that differ in width or construction from the OEM tires; consistency in measurement and adherence to the manufacturer’s guidance help mitigate these risks.
Verifying with TPMS and calibration after tire changes
TPMS readings mirror relative changes in tire pressure, not absolute numbers. After changing to aftermarket tires, you may need TPMS reprogramming or sensor recalibration to reflect the new sizes and weights. Many vehicles allow recalibration via the vehicle's settings menu or require a service tool to retrain sensors to the new configurations. If TPMS messages persist after you’ve set the correct inflation, consult your tire dealer or the vehicle manufacturer’s service guidelines. Regular checks of both pressure readings and sensor status help prevent false alerts and ensure your TPMS provides meaningful guidance.
Real-world maintenance: a practical post-install routine
Make tire pressure checks part of your seasonal maintenance routine. When temperatures shift, re-check pressures and adjust if needed, since air pressure changes with temperature. Rotate tires according to the manufacturer’s schedule and inspect bead seating during every rotation. Watch for slow leaks around valves or rims and seal or replace components as necessary. By combining cold-check habits with routine rotation and leak checks, you’ll maximize tire longevity, safety, and fuel efficiency.
Tools & Materials
- Digital tire pressure gauge(Calibrated and readable across typical tire pressures)
- Air compressor or access to inflation station(Ensure adaptor fits valve stem)
- Tire placard or vehicle manual(Driver-side door jamb placard)
- Valve core tool(Optional when replacing valve stems)
- Tire pressure log or app(Record readings for trend tracking)
- Soap and water for leak checks(Identify slow leaks)
Steps
Estimated time: 15-25 minutes
- 1
Find the target pressure
Locate the official target pressure from the door placard or the owner's manual. Ensure tires are cold before measuring. This value serves as your baseline for all subsequent adjustments.
Tip: Always start with a cold reading to avoid temperature-induced errors. - 2
Remove valve caps and inspect
Take off the valve caps and visually inspect the valve stems for damage or corrosion. Damaged valves can skew readings or cause leaks, especially with aftermarket setups.
Tip: Keep valve caps in a small container to prevent loss during measurement. - 3
Attach gauge and read
Firmly attach the gauge to the valve stem and read the pressure. If the gauge oscillates or reads wildly, re-seat the connection and try again with a different gauge if needed.
Tip: Double-check readings with a second gauge for accuracy. - 4
Inflate or deflate to target
If the reading is low, add air in small increments and recheck after each increment. If it’s high, release air slowly and retest. Do not rush to the target value; precision matters for grip and wear.
Tip: Use the inflation device’s gauge for rough adjustments, final-check with your handheld gauge. - 5
Repeat on all tires
Proceed to the remaining tires, ensuring all four (and the spare, if your vehicle uses one) reflect the same target pressure. Inconsistent pressures undermine handling and wear patterns.
Tip: Rotate through tires systematically to maintain balance. - 6
Record results and monitor
Log the measured pressures, the target values, and the ambient temperature. Use this record to monitor trends and schedule future checks, especially during temperature shifts or after long trips.
Tip: Set reminders to recheck every few weeks or with every season change.
Frequently Asked Questions
Why do aftermarket tires sometimes require different inflation pressure than OEM tires?
Aftermarket tires can differ in width, construction, and load characteristics, affecting how they distribute load and heat. Always default to the placard and manufacturer guidance, then verify with a road test.
Aftermarket tires can need small pressure adjustments; start with the placard and recheck after driving.
Can I use a regular tire gauge for aftermarket tires?
Yes. A properly calibrated gauge provides reliable readings, but ensure it is accurate by cross-checking with another gauge from time to time.
Yes, just ensure your gauge is accurate and cross-check if you’re unsure.
What about TPMS with aftermarket tires?
TPMS readings reflect relative pressure changes. After changing tires, you may need sensor reprogramming or recalibration to match the new sizes and weights.
TPMS may need recalibration after tire changes to stay accurate.
What if I cannot find the recommended pressure placard?
Check the vehicle manual and service literature. If unavailable, consult the dealer or tire manufacturer for the correct baseline before driving.
If you can't find the placard, ask the dealer or tire maker for the baseline.
How often should I check tire pressure with aftermarket tires?
Check at least monthly and before long trips, and after temperature changes or heavy loading conditions.
Check monthly and before long trips, especially in temperature swings.
Should I recalibrate TPMS after every rotation?
Not usually. Follow the vehicle’s service manual, which may require recalibration after a tire or sensor change but not after every rotation.
Only recalibrate if the manual instructs or if sensors are replaced.
Watch Video
What to Remember
- Check cold readings for accuracy
- Use placard target as baseline
- Aftermarket tires may require small adjustments
- Re-check after inflation and drive
- Maintain a simple pressure log