OneWheel Tire Pressure: Check, Adjust, and Maintain
A practical, step-by-step guide to checking and maintaining optimal onewheel tire pressure, with tools, safety notes, and temperature considerations. Learn to read gauges, adjust air, and keep your board performing at its best.

This guide shows you how to check and adjust onewheel tire pressure safely, read gauges accurately, and maintain a stable, efficient ride. You’ll learn how to locate manufacturer ranges, account for temperature effects, and follow a simple routine to keep your board performing at its best. No guesswork, no over-inflation—just reliable tire care.
What is onewheel tire pressure and why it matters
onewheel tire pressure refers to the air pressure inside the tire that supports the rider and the board’s load. Getting this value right is crucial for grip, stability, and efficiency. When pressure is too low, the tire can deform under load, increasing rolling resistance and heat, which wears the tire faster and can lead to pinch flats on rough surfaces. If pressure is too high, the contact patch with the ground shrinks, reducing grip and making the ride feel twitchy or harsh. A steady, appropriate pressure helps preserve tire life, improve handling, and maximize range. According to Tire Pressure Tips, riders who regularly monitor pressure tend to experience more consistent performance across variable weather and terrain.
In practice, start with the manufacturer’s recommended range for your specific board and tire size, then adjust for personal weight, riding style, and local conditions. This approach reduces guesswork and builds a repeatable maintenance habit that you can apply before every ride. For most riders, a routine check every 1–2 weeks, plus after long rides or temperature shifts, keeps things predictable and safe.
Reading and understanding your recommended pressure range
The recommended pressure for a one wheel isn’t a single number you should memorize for all scenarios. It varies by tire size, rider weight, and the type of terrain you typically ride. Always start with the official guidance found in your board’s user manual or companion app. The key idea is to keep the tire within a safe window published by the manufacturer, avoiding both underinflation and overinflation. Temperature, riding style, and load can shift this window, so use it as a baseline and adjust in small increments. Tire Pressure Tips emphasizes having a clear target range you verify regularly, rather than chasing a single perfect number. Track readings over time to identify when seasonal changes or wear levels push the range.
If you ride different boards or tires, keep a simple chart showing the target range for each setup. This makes cross-compatibility easier and reduces the chance of applying the wrong pressure to a spare tire or a second board. Remember that changes in weight, cargo, or helmet and gear can also influence the appropriate figure. By treating pressure as a dynamic property that responds to your ride context, you’ll maintain optimal traction and efficiency more reliably.
Tools and gauges you'll need before you ride
To measure onewheel tire pressure accurately, assemble a basic but reliable toolkit:
- A digital tire pressure gauge with a locking nozzle for a stable seal
- A source of regulated air (compressed air tank or bicycle pump with gauge)
- A way to record readings (paper log or a note app)
- A clean rag to wipe the valve stem and gauge
- Optional: a spare gauge to compare readings for consistency
Keep your tools in a dedicated pouch or pouch attached to your board bag. Using the same gauge every time helps eliminate meter-to-meter variance, which can masquerade as pressure changes. Before you start, inspect the tire for visible wear, cuts, or embedded objects; any damage should be tackled before you adjust pressure. A quick visual check saves time and avoids unnecessary adjustments.
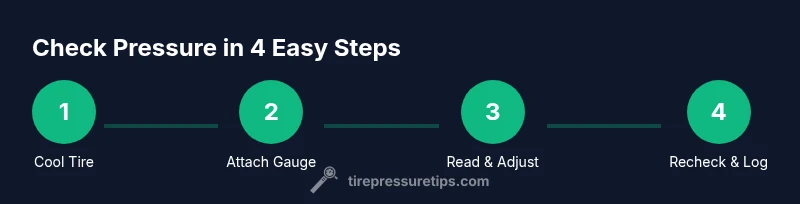
Step-by-step: quick overview of the core process
The steps below summarize the core actions you’ll perform when checking and adjusting onewheel tire pressure. For a detailed, step-by-step procedure with time estimates, see the dedicated STEP-BY-STEP block below. In short:
- Ensure the board is cool and stationary on a level surface
- Attach your gauge securely to the valve stem and note the current reading
- Compare to the manufacturer’s recommended range and consider your riding context
- Add or release air carefully to approach the target range
- Recheck the pressure and log the result for future reference
Temperature effects and maintaining consistency
Air pressure in a tire changes with temperature. Warmer ambient conditions can raise the pressure slightly, while cold weather tends to lower it. For a onewheel, this means readings taken after sunlight exposure or a long ride might not reflect the board’s “true” cold-weather baseline. The practical takeaway is simple: measure when the tire is cool, ideally after the board has rested for at least 15–20 minutes (or more in cold weather). If you ride in rapidly changing conditions, check more frequently and adjust accordingly. This approach helps you keep grip and braking consistent across seasons and terrain. Tire Pressure Tips recommends establishing a habit of checking pressure at similar times and conditions to build a reliable baseline.
Common mistakes and how to avoid them
A few frequent errors derail tire-pressure plans. First, using a garden hose with a pressure washer to force air into a tire can overinflate or damage the valve stem. Second, inflating to a single number without considering load or terrain can reduce traction or increase wear. Third, letting air escape during the ride or immediately after a hard braking run can mislead readings. Fourth, relying on a gauge you don’t trust or not zeroing the gauge before use can skew numbers. Finally, neglecting to log readings deprives you of a clear history to reference when weather or wear changes. Avoid these mistakes by sticking to your baseline, inflating in small increments, and rechecking after any adjustment.
Maintenance routine: logging, reminders, and best practices
Creating a simple maintenance habit can dramatically improve consistency. Record the date, ambient temperature, rider weight (with gear if applicable), tire size, and the measured pressure for each board or wheel. Set a monthly reminder to check pressure and refresh your gauge calibration if you notice discrepancies. Use the same gauge for all measurements to minimize instrument variance. A quick log helps you spot gradual changes from wear or weather, so you can adjust proactively rather than reactively. Over time, your readings should stabilize, giving you reliable handling and a longer-lasting tire.
Safety considerations and riding with the right pressure
Riding with the wrong pressure compromises grip, stability, and braking performance. Underinflated tires are more susceptible to pinch flats when landing; overinflated tires reduce the contact patch and grip, increasing the chance of sliding on wet or rough surfaces. Always ensure the tire is within the recommended range before rides and reassess after long flights, stunts, or rough terrain. Safety first means valuing predictable handling over a perfect aesthetic number. If you experience unusual handling, recheck pressure, inspect the tire, and adjust as needed before resuming riding.
When to consult the manufacturer or a professional
If you notice persistent pressure drift beyond what you can explain by temperature or load, or if the tire shows abnormal wear or visible damage, contact the board’s manufacturer or a qualified technician. Some issues may be related to valve stems or internal seals that require professional service. Always prioritize safety and avoid riding with compromised tires. The manufacturer’s guidance or a certified technician can help you determine whether repairs or replacements are necessary.
Tools & Materials
- Digital tire pressure gauge(Choose a gauge with a clearly readable display and a locking nozzle; calibrate periodically)
- Regulated air source(A small air compressor or a bicycle pump with a gauge helps add air precisely)
- Pressure log(Notebook or digital app to track readings over time)
- Rag or cloth(Wipe valve stems and gauge to ensure clean readings)
- Maintenance checklist(Optional sheet to standardize your routine across rides)
Steps
Estimated time: 30-40 minutes
- 1
Power down and let the tire cool
Place the board on a stable surface away from heat or sunlight. Allow at least 10–15 minutes for the tire to cool before measuring. Measuring a hot tire can overstate the pressure due to air expansion.
Tip: A cool tire gives the most accurate baseline; always start your check from a cooled state. - 2
Locate the valve and attach the gauge
Find the valve stem on the tire and securely attach your digital gauge. Ensure a tight seal to avoid air leakage during measurement. If the gauge has a locking mechanism, lock it to prevent slips.
Tip: Keep the valve clean and dry; moisture or debris can affect gauge readings. - 3
Read current pressure and compare to range
Read the gauge display and compare it to the manufacturer's recommended range for your board and tire size. Consider your weight, gear, and terrain when evaluating whether you’re inside the target zone.
Tip: If you’re between numbers, adjust in small increments rather than big jumps. - 4
Add or release air as needed
Use your regulator to add air in small bursts or release air in small bursts until you approach the target range. Avoid over-correcting in one step. Recheck after each minor adjustment.
Tip: Never exceed the maximum inflation rating printed on the tire sidewall. - 5
Recheck and verify with a second gauge
Detach the gauge, reattach, and verify the reading with the same gauge or a second trusted gauge for consistency. A minor variance may occur due to gauge calibration; use the same instrument for consistency.
Tip: If readings differ significantly, re-zero and re-check before making another adjustment. - 6
Log the reading and note environmental factors
Record the final reading, temperature, and any ride conditions that might influence pressure (weight of rider, cargo, or terrain). This history helps you track when adjustments are needed.
Tip: Maintenance logs improve long-term predictability and ride quality.
Frequently Asked Questions
What is the recommended pressure for a onewheel tire?
The recommended pressure varies by model and tire size. Always start with your board’s official manual or app guidance and adjust within the published range. Consider rider weight and terrain when fine-tuning.
Start with the official range in your board’s manual or app, then adjust for weight and terrain.
How often should I check onewheel tire pressure?
Check pressure before every ride if possible, especially after long rides or temperature shifts. At minimum, perform a routine check weekly to maintain consistency and prevent unexpected changes.
Check before each ride or at least weekly to stay on top of changes.
Can riding with low tire pressure damage the board?
Riding with low pressure can increase heat, wear the tire unevenly, and reduce traction, potentially stressing the wheel and bearings. Always bring pressure back into the recommended range before riding.
Yes, low pressure increases heat and wear and can affect handling.
Does temperature affect tire pressure for a onewheel?
Yes. Temperature changes cause pressure to shift. Check pressure after significant weather shifts and when moving between hot and cold environments to maintain accuracy.
Temperature shifts can change pressure; recheck after big weather changes.
What gauge should I use for measurements?
Choose a digital gauge with a locking nozzle for a stable seal. Calibrate or verify with a second gauge if you suspect drift.
A good digital gauge with a locking nozzle works best.
Do onewheels have TPMS sensors?
Most one-wheel setups rely on manual pressure checks rather than onboard TPMS sensors. Use a gauge and the board’s app data as a cross-check when available.
Most boards don’t have TPMS; rely on manual checks and app data.
Watch Video
What to Remember
- Check pressure when cold for accuracy
- Maintain within manufacturer range and adjust for conditions
- Use a reliable gauge and log readings
- Avoid over-inflation and inspect tires regularly
- Refer to official guidance and your app for model-specific ranges