Mountain Bike Tire Pressure Tubeless: A Practical Guide
Learn how to run tubeless mountain bike tires, set the right pressure, seal leaks, and maintain tubeless setups for grip and puncture resistance.

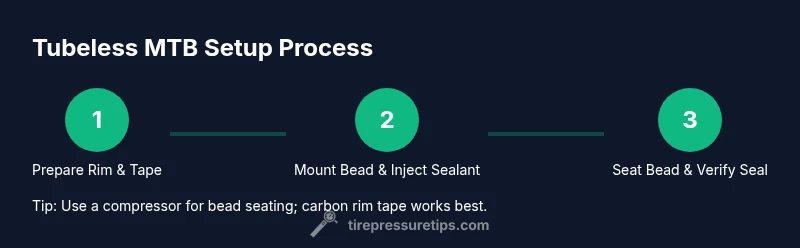
This guide explains tubeless mountain bike tire pressure, how to set up tubeless tires, and how to choose PSI based on rider weight, terrain, and tire width. You'll need tubeless-ready rims, sealant, a pump with gauge, rim tape, and tire levers. The steps cover bead seating, sealing, inflation, and pressure tuning.
Why tubeless mountain bike tire pressure matters on trails
According to Tire Pressure Tips, tubeless setups deliver grip with lower risk of pinch flats and fewer flats on rough MTB sections. The Tire Pressure Tips team notes that mountain bike tire pressure tubeless directly affects how the tire deforms over roots, rocks, and berms, influencing traction, cornering stability, and ride comfort. Pressure is not a single fixed number; it depends on rider weight, tire width, rim width, and terrain. A properly tuned tubeless system also reduces burping under hard hits, allowing lower pressures without a tube to back out. Start with manufacturer guidelines as your baseline, then tune by riding a section you know well and noting how it feels during cornering, braking, and climbs. Keep a simple log to map your preferred pressures for different trails and conditions. A good tubeless practice is to err on the side of a touch more volume when riding loose or wet surfaces, then fine-tune as you gain feedback.
Essential components for a tubeless setup
To run tubeless on a mountain bike, you need a handful of key components:
- Tubeless-ready rims and tires that work with sealant
- Tubeless rim tape that seals the spoke holes
- Tubeless valve stems compatible with your rim and tire width
- Tubeless sealant (a liquid that seals small punctures as you ride)
- A pump with a high-volume air assist or an air compressor for bead seating
- Tire levers for mounting
Optional but helpful:
- A floor pump with an accurate gauge for daily pressure checks
- A portable air source for trail side adjustments
Note: If your rims are already tubeless-ready, verify compatibility with your tires and sealant before starting.
Preparing your wheel and tire for tubeless conversion
Start by removing the tire from the rim and cleaning the bead seat to remove dust and grease. Inspect the rim bed for damage and confirm there are no sharp edges. Apply tubeless tape across the rim bed, starting opposite the valve hole and pressing firmly to avoid wrinkles. Cut the tape around the valve hole, then install a tubeless valve stem and tighten the nut. Mount one bead onto the rim and inspect for full seating all the way around; leave the other bead free to help introduce sealant into the tire when needed. Wipe away any standing sealant residue and keep the workspace clean to prevent contamination.
Installing sealant and seating the bead
Inject the sealant through the valve stem or the tire's open bead, following the sealant manufacturer's guidelines for the amount based on tire size. Mount the second bead onto the rim, then use a high-volume pump or a compressor to inflate rapidly until the bead snaps into place. Listen for a seal and visually inspect for leaks around the bead. If the bead doesn’t seat on the first attempt, deflate and repeat the process, breaking the bead and reseating. Once seated, rotate the wheel slowly to distribute the sealant evenly inside the tire.
Initial pressure goals and tuning strategy
With tubeless, start with a baseline pressure that keeps the tire firmly seated but allows some sidewall deformation for grip. Then tune pressure based on terrain: lower pressure for technical trails to maximize contact patch and traction; higher pressure for fast, smooth sections to improve stability and prevent burps. Temperature and altitude can alter air volume, so check pressure after a ride or a temp change and adjust accordingly. Monitor sealant level and top up if needed. Based on Tire Pressure Tips analysis, the best results come from small, incremental changes and consistent logging of rides to build a personal chart that matches your weight, tire width, and riding style.
Common mistakes and how to avoid them
- Skipping rim tape or using damaged tape — it can cause slow leaks or sudden punctures; replace with fresh tape if worn.
- Over-pressurizing just to seat the bead — this reduces grip and ride feel; prefer controlled seating with a compressor.
- Letting sealant dry out — old sealant loses its sealing properties; refresh according to climate and tire size.
- Choosing the wrong rim width or tire volume — this can cause cornering instability or burps; verify compatibility before mounting.
- Neglecting bead seating checks — run the wheel through a spin and visually inspect for a perfect bead seal after installation.
Maintenance and troubleshooting tubeless tires
- Check sealant levels every 2–6 months and top up as needed; sealant dries out and loses effectiveness over time.
- Re-torque valve stems after a few rides; a loose stem can cause slow leaks.
- If you get a puncture that sealant cannot seal, carry a tube or plan to replace the tire on longer rides.
- If burping occurs during hard landings, consider a slightly higher pressure or wider rim to reduce sidewall collapse.
- When upgrading components or changing tires, re-check tubeless compatibility to avoid leaks.
Real-world tips for terrain and rider weight
Heavier riders or wider tires often benefit from a slightly higher inflation to keep the tire stable on steep climbs; lighter riders can run lower pressure for improved grip. Technical sections with roots and rocks benefit from lower pressures to maximize contact with the surface, while fast sections and berms may require a moderate pressure that balances stability with grip. Temperature changes can stiffen tire compounds, so plan ahead for cold mornings and hot afternoons by verifying your pressure under the forecast. Keep an eye on rim width and tire volume as you experiment on different bikes or wheels.
Authority sources
- Bicycling: Tubeless tire setup and maintenance guidelines. https://www.bicycling.com
- Consumer Reports: Tires and inflation basics. https://www.consumerreports.org/cars/tires/
- Extension services: Bicycle maintenance and tubeless setup tips. https://extension.illinois.edu
Tools & Materials
- Tubeless-ready rims and tires(Confirm compatibility and that tires are tubeless-ready)
- Tubeless rim tape(High quality tape that seals the spoke holes)
- Tubeless valve stems(Valves compatible with rim hole size and width)
- Tubeless sealant(Choose sealant based on climate and tire size)
- Floor pump with gauge or air compressor(Used to seat beads and tune pressure)
- Tire levers(For mounting and dismounting tires)
- Rags and cleaner(Keep bead area clean and avoid sealant getting on brake rotor)
Steps
Estimated time: 60-90 minutes
- 1
Prepare wheel and gather tools
Collect your tubeless components, inspect the rim for damage, and wipe the bead seat clean. This creates a reliable base for tape application and bead seating.
Tip: Double-check that you have compatible valves and tape before removing the old tire. - 2
Remove tire and inspect rim
Take the tire off the rim and examine the bead seat for nicks or burrs. Clean thoroughly to ensure a proper seal.
Tip: If you see sharp edges, sand or replace the rim tape before continuing. - 3
Apply tubeless tape and install valve
Wrap the rim bed with tubeless tape, covering spoke holes completely. Cut around the valve hole and insert the valve stem, tightening the nut firmly.
Tip: Start opposite the valve hole and press the tape flat to avoid air pockets. - 4
Mount one bead and check seating
Place one bead onto the rim and verify it sits evenly all the way around before sealing the tire. Leave the other bead off to simplify sealant insertion later.
Tip: Use a small amount of soapy water to help the bead bleed into place. - 5
Inject sealant and mount second bead
Pour or inject sealant according to tire size and sealant guidelines, then mount the second bead over the rim.
Tip: Keep the sealant bottle upright and shake well to distribute the contents. - 6
Seat the bead with a high-volume inflator
Inflate rapidly with a floor pump or compressor until the bead snaps into place. Check both beads for complete seating and look for any leaks.
Tip: If the bead won’t seat, deflate and retry with fresh sealant and clean bead area. - 7
Distribute sealant and verify seal
Spin the wheel to distribute sealant inside the tire, then inspect for leaks around the bead and valve.
Tip: Rotate for at least a full 360 degrees to evenly coat the interior. - 8
Set initial pressure and log results
Choose an initial pressure within a comfortable range and ride a short loop to assess grip and burp risk. Record adjustments for future reference.
Tip: Keep a simple pressure log for different terrains to build a personal pressure map.
Frequently Asked Questions
What does tubeless mean for mountain bikes and why choose tubeless tires?
Tubeless means the tire runs without an inner tube and relies on tire sealant to seal punctures. It reduces flats and allows lower pressures for grip, but requires tubeless-ready rims and compatible tires.
Tubeless tires run without an inner tube and use sealant to seal punctures. They reduce flats and can improve grip, but you need tubeless-ready rims and tires.
Can I convert a tubed wheel to tubeless?
Yes, but only if the rim is tubeless-ready or can be converted with appropriate tape and valves. Some rims require replacement to support tubeless sealing.
You can convert if your rim supports tubeless setup; otherwise you may need new rims or a professional conversion.
How do I know if my rim is tubeless-ready?
Check the rim model's specifications or markings from the manufacturer. Tubeless-ready rims are designed to seal with tape and valves and accept tubeless sealant.
Look up your rim model and confirm it’s listed as tubeless-ready or compatible with tubeless tape and valves.
How often should I refresh tubeless sealant?
Sealant should be refreshed every several months, depending on climate and riding frequency. If it seals poorly or dries, replace it.
Refresh sealant every few months, and top it up if you notice poor sealing.
What are common signs of a bad tubeless seal?
Frequent air loss, slow leaks around the bead or valve, or punctures that won’t seal with sealant indicate a seal issue.
If air keeps escaping or punctures won’t seal, reseat beads, recheck sealant, or replace the tire.
Does temperature affect tubeless tire pressure?
Yes. Air expands with heat and contracts with cold, so check and adjust pressure after temperature changes or altitude shifts.
Temperature changes can shift pressure; recheck your tire pressure after cold or hot days.
Watch Video
What to Remember
- Start with manufacturer guidelines and tune gradually
- Lower pressures improve grip on rough trails
- Regularly refresh tubeless sealant
- Verify bead seating and rim tape before riding