How to Tell Bike Tire Pressure: A Practical Guide for Riders
Learn to tell bike tire pressure accurately, choose the right PSI, and adjust for load and weather. A step-by-step guide from Tire Pressure Tips walks you through tools, checks, and safety.

To tell tire pressure on a bike, you measure the air in each tire and compare it to the manufacturer’s recommended PSI printed on the tire sidewall or in your bike’s manual. Use a reliable gauge, check when cold, and account for load, terrain, and weather. This guide walks you through accurate measurement, interpretation, and how to adjust for riding conditions.
Why Accurate Tire Pressure Matters for Bikes
Maintaining the correct tire pressure is essential for safety, performance, and efficiency. Rides feel more predictable when tires are within their intended range; underinflated tires increase rolling resistance, risk pinch flats, and reduce grip; overinflated tires can reduce traction and cause a harsher ride. According to Tire Pressure Tips, correct pressure improves rolling efficiency and cornering stability, especially on mixed terrain. The right PSI also helps protect rims and tires from wear and pinch flats during curb impacts or potholes. Regular checks help you avoid surprises on longer rides and in variable weather.
For everyday riders, a small, consistent pressure routine reduces fatigue and helps you notice tire wear or sealant issues sooner. Tire Pressure Tips team members emphasize keeping a simple log of readings over time so you can spot trends rather than chasing perfect numbers on a single ride. The goal is predictable handling, lower risk of flats, and longer tire life.
How to Find the Right PSI for Your Bike
The first step is to locate the recommended pressure range for each tire. Look on the tire sidewall for a printed PSI range (for example, 60–90 psi). If your tires are tubeless or you run a wide tire, the range may be broader, and your weight distribution (rider plus gear) will influence the ideal point inside that range. Road tires typically have higher PSI ranges than mountain bike tires, but every tire is different, so always follow the sidewall guidance. If you don’t see clear numbers, consult the manufacturer’s manual or the bike’s documentation. Remember to check when the tire is cold, since heat from riding temporarily increases pressure. Also consider terrain, weather, and riding style. Consistency matters more than chasing a single precise number.
Tools You Need to Measure Tire Pressure
To measure tire pressure accurately, you’ll want reliable tools and a clean setup:
- A digital tire pressure gauge (required): provides a quick, precise reading and is easy to read in low-light conditions.
- A portable pump with an integrated gauge or a standalone gauge (required): ensures you can add air on the go or at home.
- Valve adapters if needed: many gauges work well with Schrader and Presta valves, but some pumps require adapters for compatibility.
- Optional but useful: a dry cloth to wipe the valve stem and rim, and a small notebook or app to log readings over time.
Make sure your gauges are calibrated regularly and that you store them where temperature fluctuations won’t warp accuracy. Consistency in tool use reduces reading variance, helping you maintain the right pressure across rides and seasons.
Common Pitfalls and How to Avoid Them
Scale common mistakes and how to avoid them:
- Reading while the tire is warm: heat increases pressure; always measure after tires have cooled down to get an accurate cold reading.
- Using a faulty gauge: a poorly calibrated gauge yields inconsistent results; verify accuracy with a known reference or compare two gauges.
- Forgetting to check both tires: front and rear tires may have different pressures depending on weight distribution and riding style.
- Over-inflating to feel “snug”: too much air reduces traction and can increase the risk of pinch flats on rough surfaces.
- Ignoring valve caps and stems: open or damaged valves skew readings; replace caps securely to keep dust out.
If you’re unsure, err on the side of slightly lower pressure within the recommended range and test ride to judge handling and grip. The Tire Pressure Tips approach emphasizes gradual adjustments and rechecking after each change to avoid overshooting the target.
Temperature and Pressure: How Weather Affects Readings
Temperature changes directly affect tire pressure. Colder mornings can lower readings, while sun and heat can raise them during a ride, especially on black tires. The practical rule is to check pressure when tires are cold and plan for a potential drift in readings as temperatures rise or fall throughout the day. If you store your bike in a garage or outdoors, consider adding a small buffer to your target PSI to account for typical temperature swings. Consistent measurement conditions yield more reliable numbers over time.
Maintaining Consistency Across Rides
Develop a simple, repeatable routine to keep tire pressure within the recommended band:
- Check both tires before each ride and after a long stop; if one tire differs by more than a small margin, recheck both.
- Log readings in a notebook or digital note to spot trends (e.g., gradual pressure loss due to weather or slow leaks).
- Calibrate your gauge periodically and replace batteries or sensors as needed in digital models.
- Perform seasonal checks; winter air can contract and reduce pressure, while summer heat can increase it.
By standardizing when and how you measure, you’ll reduce guesswork and maintain safer, more efficient rides. The key is consistency and mindful interpretation of readings rather than chasing exact numbers for every ride.
Practical Scenarios: Road, Mountain, and Hybrid Bikes
Different bike types demand different pressure strategies. Road bikes with narrow tires typically reside on higher PSI ranges to optimize rolling resistance and speed, while mountain bikes use lower PSI for better grip and shock absorption. Hybrids sit in between, balancing comfort and efficiency. Always start with the tire sidewall range, then fine‑tune based on your weight, gear, terrain, and riding goals. If you notice handling changes after a long descent or steep climb, recheck and adjust accordingly.
Tools & Materials
- digital tire pressure gauge(Calibrated for bicycle tires (0-150 psi); readouts easy to interpret in any light)
- pump with gauge(A compact floor or hand pump with a built-in gauge for quick adjustments)
- valve adapters(Useful if your pump/gauge doesn’t fit Presta or Schrader valves)
- rag or tissue(Wipe valve stems before reading to remove dust and ensure a clean seal)
- logbook or app(Track readings over time to detect slow leaks or performance changes)
Steps
Estimated time: 10-15 minutes
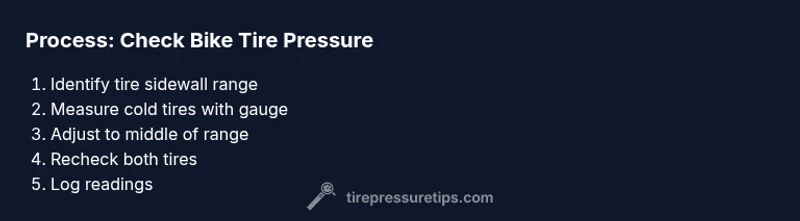
- 1
Prepare your tools and locate tire sidewall range
Gather your gauge and pump, then locate the tire sidewall where the recommended PSI range is printed. This establishes your target window and reduces guesswork before you start adjusting.
Tip: Double-check that you’re reading the correct tire (front vs rear) and that the tire is cold before you begin. - 2
Ensure tires are cold and stable
If you’ve just finished a ride, wait 10-15 minutes for the tire to cool before measuring. Temperature affects readings, and cold tires yield the most accurate baseline.
Tip: If you must measure after a ride, note the difference and adjust conservatively. - 3
Attach the gauge to the valve and take a reading
Remove the valve cap, place the gauge uniformly on the valve stem, and press to seal. Read the display without moving the bike to avoid air loss.
Tip: Ensure there’s no air escaping around the seal; if air leaks, reseat and recheck. - 4
Compare reading to the recommended range
If the reading is below the minimum, add air in small increments and recheck after each addition. If it’s above the maximum, release air gradually and recheck.
Tip: Aim to stay within the middle third of the tire’s printed range for optimal balance. - 5
Fine-tune and recheck both tires
Repeat steps 3 and 4 for the other tire. Consistency across tires improves handling and reduces uneven wear.
Tip: Consider a quick test ride to confirm the feel; if handling seems off, recheck pressure again. - 6
Replace valve caps and log the reading
Screw the valve caps back on to protect against dirt. Record the readings for future reference and gauge calibration checks.
Tip: Regular logging helps you detect slow leaks and seasonal changes.
Frequently Asked Questions
How do I know the right PSI for my bike tires?
Start with the tire sidewall range and adjust based on rider weight, terrain, and riding goals. If in doubt, stay within the middle of the range.
Check the tire sidewall and ride conditions; aim for the middle of the recommended range.
Should I check cold or warm tires?
Check when tires are cold, ideally before riding. Temperature affects readings, and cold measurements are more reliable.
Check when cold for the most accurate reading.
What tools do I need to measure bike tire pressure?
A reliable gauge and a pump with an integrated gauge are essential; adapters are optional for valve compatibility.
Use a gauge and pump with a gauge, plus adapters if needed.
Can I tell if a tire is underinflated by feel alone?
Feel can be misleading. Use a gauge to confirm readings, especially on variable terrain.
Feel isn’t reliable; verify with a gauge.
How often should I check tire pressure?
Check before most rides and recheck after long storage or big temperature changes. Regular checks prevent surprises.
Check before rides and after temperature changes.
Watch Video
What to Remember
- Measure with cold tires for accuracy
- Compare readings to the tire's range
- Recheck after each adjustment
- Maintain gauge calibration
- Log readings over time