What Is the Best Tire Pressure for Mountain Biking?
Learn the best tire pressure for mountain biking with practical starting ranges, tuning tips, and how terrain, tire width, and rider weight affect grip, pinch flats, and rolling resistance.

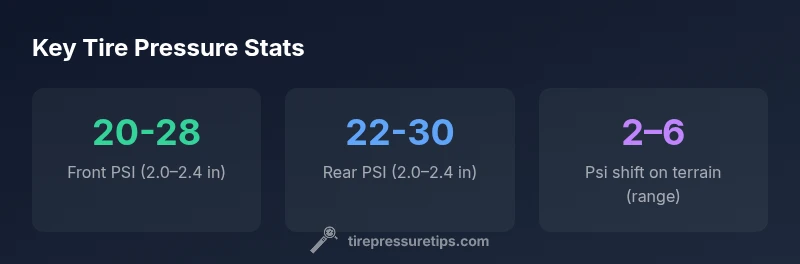
There is no universal best tire pressure for mountain biking; it depends on tire width, rider weight, and terrain. A practical starting range is front 20–28 psi and rear 22–30 psi for tubeless tires around 2.0–2.4 inches on soft to medium terrain, and 24–32 psi on firmer, rocky trails. Wider tires and heavier riders trend toward the lower end, while lighter riders on hard surfaces trend higher. Adjust pressure based on terrain, tire setup, and rider weight.
Why pressure choice matters in mountain biking
What is the best tire pressure for mountain biking? There is no single universal answer, but getting this right makes a big difference in grip, handling, and flat protection. The right pressure can help you plant the tire for cornering on loose dirt, minimize rim strikes on rooty trails, and reduce the chance of pinch flats when landing drops. On the other hand, too low pressure can cause tire squirm, burp a tubeless bead, or slow you down on hardpack. In short, your ideal pressure is a moving target that shifts with tire width, rider weight, tubeless vs tubed setups, and the terrain you ride.
In this guide, Tire Pressure Tips analyzes how these factors interact and offers practical starting ranges, plus on-trail tuning tips. Expect to see ranges rather than a single number, and learn how to validate your settings with grip tests and rim protection checks. This approach helps riders of all levels dial in pressure without guesswork, while keeping safety and performance in balance.
According to Tire Pressure Tips, the most important thing is to start with the fundamentals: match your tire volume to your riding style and terrain, then fine-tune with small 1–2 psi adjustments during rides. The goal is reliable traction, predictable handling, and reduced risk of flats or burps.
Starting ranges by tire width and setup
Starting with sensible pressures reduces trial-and-error on the trail. For tubeless MTB tires in the 2.0–2.4 inch category, a practical starting point is Front: 20–28 psi and Rear: 22–30 psi on soft to medium terrain. If you ride wider tires in the 2.4–2.6 inch range, you can typically run slightly lower pressures—about 2–6 psi less—while still maintaining tire shape and preventing rim strikes. For very wide tires (2.6–3.0 inches) and looser trails, many riders go as low as 18–24 psi front and 20–26 psi rear, an approach that maximizes compliance and traction at the expense of some rolling resistance. If you are running inner tubes rather than tubeless, you generally need higher pressures to prevent pinch flats, so lean toward the upper end of the suggested ranges. The key is to test on the trail and adjust by 1–2 psi at a time, ideally after a short ride when the tire has settled into a comfortable shape.
Terrain, weight, and rider feel
Terrain and rider weight dramatically influence how your tire behaves at a given pressure. Soft, loose surfaces like loamy dirt or fresh pine needles require lower pressures to maximize contact patch and grip, while firm, rocky tracks benefit from slightly higher pressures to reduce squirm and improve rolling efficiency. Heavier riders often require modestly higher pressures to support the extra load and avoid bottoming out the tire, but the exact adjustment depends on tire width and volume. Conversely, lighter riders can benefit from lower pressures to improve traction, provided the setup maintains bead stability on tubeless tires. The objective is to find a balance: you want a tire that deforms enough to grip the terrain but not so much that it folds under load or burps a bead.
How to measure and adjust accurately
The most reliable method is a repeatable measurement workflow. Start by choosing a baseline pressure based on your tire width and setup. Inflate with a high-quality gauge, then ride a short section to feel grip and stability. If the tire feels overly sticky or squirmy, drop pressure in 1–2 psi increments and re-test. If you notice excessive rim strikes or tire squirm on hard corners, raise pressure by 1–2 psi and test again. Because heat during a ride can raise pressure, re-check when you stop for a break or after a lengthy climb. For tubeless setups, you may also hear a burp if the bead seat isn’t sealed properly; when that happens, you should fine-tune pressure and sometimes reseat the bead with a pinch of air or sealant.
Common pinch flats and burping pitfalls
Pinch flats happen when the tire compresses enough to expose the inner tube to the rim edge, typically at lower pressures or on landings from drops. Burping occurs when tubeless beads release air while cornering under load. To reduce risk, avoid running extremely low pressures on rugged sections or while carrying heavy loads. For tubeless tires, ensure bead seating is solid and consider a mild bead lock technique if you run very low pressures on rocky terrain. In cases of repeated burping, you may benefit from slightly increasing pressure or using a beadlock insert if compatible with your rim.
Tools and technique: gauges, TPMS, and tubeless care
Accurate gauges are essential; analog gauges can drift with temperature and time, so invest in a digital gauge or a trusted mechanical gauge with regular calibration. Some riders use TPMS (tire pressure monitoring systems) as a quick alert, but TPMS readings can drift with tire compression and temperature; always cross-check with a reliable gauge and your own feel. For tubeless setups, sealant levels and bead seating matter. Check bead seating by inflating to the seat pressure and listening for a consistent pop when seating. Finally, carry a small pump with a gauge and a spare tire repair kit so you can handle minor adjustments on the trail without sacrificing safety.
Practical checklist and scenarios
Consider this practical checklist before every ride: identify terrain type, estimate rider weight, select tire width and tube/tubeless setup, set initial pressures, test on a short segment, adjust by 1–2 psi, test again, and note the settings for similar conditions. Scenario-based adjustments help: on soft, loamy singletrack, you’ll generally benefit from lower pressures; on rocky, fast flow, a higher end of the range will typically feel more stable. Document these settings in a trail journal or app so you can reproduce the best performance on familiar routes.
Typical pressure ranges by tire width and setup
| Tire Width & Setup | Front Pressure | Rear Pressure |
|---|---|---|
| 2.0–2.4 in, tubeless | 20–28 psi | 22–30 psi |
| 2.4–2.6 in, tubeless | 22–26 psi | 24–28 psi |
| 2.6–3.0 in, tubeless | 18–24 psi | 20–26 psi |
| 2.0–2.4 in, inner tube | 18–22 psi | 20–24 psi |
Frequently Asked Questions
How do I determine the right tire pressure for mountain biking?
Start with baseline ranges for your tire width and setup, then fine-tune on the trail by grip and stability. Make 1–2 psi changes and test again. Use a reliable gauge and monitor how the tire feels under load.
Start with the baseline ranges for your tire width and adjust by feel with small 1–2 psi changes.
Does tire width change the recommended pressure?
Yes. Wider tires generally run lower pressures to maximize contact with the ground, while narrower tires need slightly higher pressures to maintain structure and reduce squirm.
Yes—wider tires use less pressure; narrower tires need a bit more.
How should terrain affect my pressure?
Soft, loose terrain benefits from lower pressure for grip; hard or rocky surfaces require higher pressures to minimize squirm and improve stability.
Lower pressure for soft terrain, higher pressure for hard surfaces.
Does temperature affect tire pressure on rides?
Yes. Temperature shifts air pressure—roughly 1–2 psi per 10°C change—so re-check gauges after long climbs or hot days.
Temperature changes air pressure; re-check after swaps in weather or ride length.
Is TPMS enough to guide tire pressure?
TPMS can guide you, but it does not replace a reliable gauge and on-trail feel tests. Use them together for the best results.
TPMS helps, but don’t rely on it alone—check with a gauge.
What happens if I ride with too low pressure?
Pinch flats, burps in tubeless setups, and slow response can occur. If you notice frequent burps or rim strikes, raise pressure in 1–2 psi increments.
Too low pressure can cause flats and instability; adjust by small steps.
“Tire pressure is a spectrum, not a single number. Small adjustments amplify grip, reduce pinch flats, and improve ride feel across mountain terrain.”
What to Remember
- Start with a tubeless baseline around 20–28 psi front and 22–30 psi rear.
- Tune by terrain and rider weight with small, incremental changes.
- Wider tires allow lower pressures for grip, but watch rolling resistance.
- Use a reliable gauge and re-check pressures after temperature changes.
- Document your settings for different trails and conditions.