Filling Air in Tires: A Practical, Safe Guide
Learn how to fill air in tires correctly, check PSI, and maintain proper tire pressure for safety, fuel efficiency, and longer tire life. This Tire Pressure Tips guide walks you through tools, steps, and common mistakes for reliable inflation.

Goal: You will learn to safely fill air in tires, check PSI, and understand when to adjust pressure. You’ll need a reliable air source (pump or compressor), a tire pressure gauge, and the vehicle's recommended PSI from the door jamb sticker or owner’s manual. According to Tire Pressure Tips, correct tire pressure reduces wear, improves fuel efficiency, and enhances road safety.
Why filling air in tires matters
Maintaining proper tire pressure is one of the simplest, most impactful ways to keep a car safe and efficient on the road. When tires are underinflated, contact patches become larger, increasing rolling resistance and leading to faster wear, reduced grip, and poorer fuel economy. Overinflated tires, on the other hand, wear more quickly in the center, reduce ride comfort, and can increase the risk of a blowout on rough pavement. The Tire Pressure Tips team emphasizes that consistently inflating to the recommended PSI improves handling, braking response, and overall tire life. In daily driving, a small change in pressure can lead to noticeable differences in traction during wet or snowy conditions, making it essential to check routinely.
To avoid the most common problems, drivers should know where to find the exact PSI for their vehicle—the placard on the door jamb, the owner's manual, or the manufacturer's website. Those numbers apply to a cold tire, meaning the car hasn't been driven more than a mile or two. Temperature also matters: hot weather or a long freeway drive can cause tires to heat up and pressure to rise, so readings taken after a drive are not reliable for setting the baseline pressure. Regular checks, ideally monthly or before long trips, help catch slow leaks, valve stem issues, or punctures that would otherwise go unnoticed. Regular maintenance such as rotating tires and aligning wheels can help maintain even wear and improve safety in adverse conditions.
How tire pressure is measured: PSI, cold vs hot readings, and TPMS
PSI, or pounds per square inch, is the standard unit used to express tire inflation pressure. The exact target pressure for each tire is not arbitrary; it’s chosen to balance traction, handling, wear, and ride comfort. Readings should be taken when tires are cold, typically before driving or after at least three hours of inactivity, because heat from driving increases pressure. Temperature changes over the day also affect readings: a 10-degree Fahrenheit drop can reduce pressure by a noticeable amount, while hot weather can raise it. Many modern vehicles include TPMS (tire pressure monitoring system) that alerts you when a tire falls below the recommended level. Remember: TPMS is an alert, not a precise gauge. You should still verify with a physical gauge on each tire.
To ensure accuracy, perform a cold-pressure check and compare the result to the manufacturer’s specification, usually found on the door jamb placard or in the owner's manual. If you’ve driven recently, wait until tires cool down to re-check. If TPMS reads low, it’s a signal to inspect for slow leaks or punctures, or to add air as needed. Keeping tires within the recommended range improves braking distance, steering response, and overall road stability, especially in wet or icy conditions.
Tools and preparations: what you need
Before you begin, gather your tools and ensure you are in a safe, flat area away from traffic. You’ll typically need a tire inflator (air compressor or portable pump) with an integrated or independent pressure gauge, a reliable tire gauge for cross-checking, and the vehicle’s PSI placard as your reference. It’s also helpful to have a small flashlight for valve caps and stems, a clean rag to wipe off dust, and gloves for grip. If you’re unsure about the exact recommended pressure, keep the owner’s manual or the placard handy. A spare tire and the jack kit should be accessible but only use them in a controlled environment if necessary. Finally, confirm you’re inflating when tires are cold and on a level surface to avoid skewed readings and inconsistent results.
Step-by-step: how to fill air in tires
-
Prepare your workspace: Park on a flat, level surface and engage the parking brake. Retrieve your PSI placard and gauge. Take a quick visual check for visible damage or punctures. This ensures you start from a stable, safe baseline. Tip: Avoid inflating near traffic and ensure the valve stems and caps are clean.
-
Check current pressure: Remove the valve cap and place the gauge on the valve stem. Read the pressure and compare with the recommended PSI. If the reading is within the target range, you may not need to inflate. If it’s low, plan to add air gradually. Tip: Use a gauge you trust and cross-check with a second gauge if you’re unsure.
-
Inflate or release as needed: If underinflated, attach the air hose and add air in short bursts, pausing to check pressure after each burst. If overinflated, depress the central valve core or release air through the nozzle until you reach the target PSI. Tip: Don’t rush—small adjustments lead to better accuracy.
-
Recheck after inflation: Once you reach the target PSI, recheck with the gauge to confirm accuracy. Replace the valve cap tightly. Tip: Avoid overtightening, which can strip the valve stem.
-
Repeat for each tire: Move to the remaining tires, repeating steps 2–4. If your vehicle has different front and rear PSI values, inflate accordingly. Tip: Always measure all tires and note any abnormal readings for later diagnosis if needed.
-
Final check and TPMS: Recheck all readings after you’ve completed inflation. If your TPMS triggered during the process, allow a short drive of 1–2 miles and recheck; if it remains active, inspect for leaks or damage. Tip: Keep a small log of readings for future reference.
-
Replace caps and store tools: Put the valve caps back on and secure the inflator. Store your tools back in their case. Tip: Cap placement helps keep moisture and dirt out of the valve.
-
Schedule follow-ups: Check tire pressure again within a week or after any significant temperature change. Tip: Seasonal changes can affect tire pressure more than you expect.
Estimated time: 15–30 minutes, depending on the number of tires and gauge accuracy.
Aftercare: verifying pressure and safety checks
After inflating, it’s essential to verify that each tire is at or near the recommended PSI and that the change didn’t introduce new issues. A thorough post-inflation check includes re-reading all tires with your gauge, inspecting valve stems for leaks, and ensuring TPMS warnings are resolved. If you notice consistent underinflation over time, there may be a slow leak or a puncture in one tire. A professional inspection is advised in such cases. Regularly maintaining correct tire pressure improves fuel economy, reduces uneven wear, and enhances handling in adverse weather. If you live in an area with temperature swings, consider checking pressure weekly during extreme seasonal peaks.
Common mistakes and troubleshooting
Common mistakes include inflating all tires to a single pressure when the vehicle specifies different values by axle, neglecting to check the spare tire, and relying solely on TPMS without a physical gauge. Another frequent error is checking pressure after a long drive or on a hot tire, which yields higher readings and leads to overinflation when corrected for. Troubleshooting tips: use cold readings for initial inflation, verify readings with two gauges if you suspect inaccuracy, and inspect for slow leaks around the valve stem and bead area. If a tire loses pressure quickly, seek professional inspection for punctures, damaged rims, or faulty TPMS sensors. Regular checks align with safe driving practices and can prevent blowouts on the highway. Implementing a simple maintenance log helps track changes and plan replacements proactively.
Tools & Materials
- Air compressor or portable pump with gauge(Must be able to read pressure accurately; ideally with a built-in gauge.)
- Tire pressure gauge (digital or dial)(Use a reliable gauge and cross-check with another gauge if unsure.)
- Vehicle owner’s manual or door jamb PSI placard(Contains exact PSI values per axle/tires.)
- Valve core tool(Helpful for leak issues or valve maintenance.)
- Soapy water solution(Use to detect slow leaks around valve stems/beads.)
- Gloves(Improves grip and keeps hands clean during inflation.)
Steps
Estimated time: 15-30 minutes
- 1
Prepare your workspace
Park on a flat, level surface and engage the parking brake. Gather your PSI placard and gauge, and inspect tires for obvious damage. This ensures you start from a safe baseline and reduces the risk of slipping during inflation.
Tip: Ensure you’re away from traffic and have good lighting. - 2
Check current pressure
Remove the valve cap and place the gauge on the valve stem. Read the pressure and compare it to the recommended PSI. If within range, you may skip inflation for that tire.
Tip: If readings differ between gauges, repeat with a second gauge to confirm accuracy. - 3
Inflate or deflate to target
If underinflated, attach the air hose and inflate in short bursts, checking pressure after each burst. If overinflated, release air gradually until you reach the target PSI.
Tip: Small adjustments yield better accuracy than large bursts. - 4
Recheck after adjustment
Once you reach target PSI, recheck with the gauge to confirm accuracy. Replace the valve cap securely.
Tip: Tighten caps fully to prevent moisture ingress. - 5
Repeat for all tires
Proceed to the remaining tires and repeat steps 2–4. Note any tire with unusual readings and inspect if needed.
Tip: Follow axle-specific front/rear pressures if specified. - 6
Final TPMS check
After inflation, drive 1–2 miles to allow TPMS to recalibrate, then recheck pressure if possible.
Tip: If TPMS remains active, seek professional inspection for leaks or sensor issues. - 7
Document and store tools
Return all tools to their storage and log your readings for future reference.
Tip: A simple log helps track changes over time. - 8
Schedule regular checks
Plan routine checks, especially during seasonal temperature changes, to maintain optimal tire health.
Tip: Aim for monthly checks or before long trips.
Frequently Asked Questions
When should I check tire pressure?
Check at least once a month and before long trips. Also check if you notice a change in ride feel, handling, or after rotating tires.
Check at least monthly and before long trips, especially if you notice changes in handling.
How do I know the correct PSI for my car?
Look for the placard on the driver’s door jamb or consult the owner’s manual. The numbers vary by axle and tire type.
Check the door placard or manual for the exact numbers.
Is TPMS the same as PSI gauge?
TPMS alerts you when pressure is low, but you should still measure with a gauge to set the correct target. TPMS helps you detect underinflation.
TPMS warns you about low pressure, but you should measure with a gauge to set the correct level.
Can I inflate tires to different pressures on front and rear?
Yes, some vehicles have different recommended pressures per axle. Always follow the placard or manual for front vs rear values.
Some cars have different front and rear numbers; check your placard.
What if I overinflate?
Overinflation causes uneven wear, a harsher ride, and reduced traction. Release air gradually to reach the target PSI.
Overinflating can hurt wear and grip. Let air out slowly to the right level.
What should I do if TPMS keeps warning after inflation?
After inflation, drive a short distance to reset the system. If warnings persist, inspect for leaks, faulty sensors, or damaged stems.
If the light stays on after inflation, check for leaks or faulty sensors.
Watch Video
What to Remember
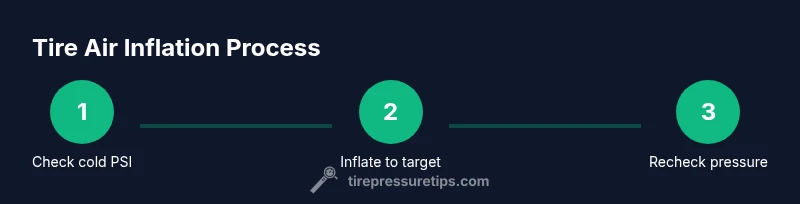
- Check cold PSI for accuracy
- Use a reliable gauge and cross-check
- Inflate to the recommended PSI, per axle
- Recheck after short drive and keep a log