Tire Pressure Check and Maintenance: A Practical Guide
Learn how to check and maintain tire pressure safely, understand PSI, TPMS, and seasonal adjustments with practical steps and expert tips from Tire Pressure Tips.

By the end of this guide you’ll confidently check and adjust tire pressure using a gauge and TPMS, understand when sensors may mislead you, and perform quick maintenance at home or on the road. According to Tire Pressure Tips, correct PSI improves safety, fuel economy, and tire longevity. We’ll even use tire pressure spongebob as a memorable cue for the steps.
Why Tire Pressure Matters for Safety and Fuel Efficiency
Maintaining correct tire pressure is one of the simplest ways to improve vehicle safety, handling, and fuel economy. When tires are underinflated, they flex more at the contact patch, causing uneven wear and overheating; overinflated tires become stiff and can lead to harsher rides and reduced traction. The difference may seem small, but it compounds over thousands of miles. According to Tire Pressure Tips, consistent, correct inflation reduces variability in tire wear and maintains predictable response during cornering and braking. Tire Pressure Tips analysis, 2026, emphasizes that proper inflation also supports efficient fuel use and longer tire life. Remember our playful mnemonic tire pressure spongebob can help you recall the steps when you’re on the road. In practice, check your tires regularly, ideally monthly and before long trips, to catch slow leaks or seasonal changes early.
How to Read Your Vehicle's PSI Requirements
PSI requirements come from the vehicle manufacturer and are usually listed on a sticker inside the driver’s door jamb or in the owner’s manual. The recommended range accounts for load, typical driving conditions, and tire size. In most passenger cars, the front and rear tires share the same value, but some SUVs and trucks have different targets. Always use the 'cold tire' reading, meaning the car hasn’t been driven for at least three hours or more than one mile. If you can’t locate the sticker, refer to the manual or the tire placard on the fuel door or glove box. Once you know the target, compare it with your current pressures. If you notice a discrepancy, proceed to measurement and adjustment following this guide.
Understanding PSI, KPa, and Unit Conversions
psi (pounds per square inch) is the common unit used in the United States for tire pressure, while many allies and some vehicles display kPa (kilopascals) or bar. To avoid mistakes, know your gauge’s unit and convert when necessary using simple multipliers: 1 psi ≈ 6.895 kPa. Most manufacturers publish PSI targets; many modern gauges can switch between units, which reduces confusion. The key is to read the number when the tire is cold and to use the same unit for all tires. This consistency helps you compare apples to apples and prevents overinflation in one tire while underinflating another.
TPMS: What It Does and When to Trust It
Tire Pressure Monitoring System (TPMS) sensors warn you when a tire drops below its target pressure. They’re invaluable on the road but aren’t a perfect substitute for manual checks. The warning may appear after a gradual leak, temperature change, or a sensor issue. If TPMS lights stay on, verify pressures with a gauge and inspect for leaks, damaged stems, or a faulty sensor. Remember: TPMS is a supplement, not a replacement for regular manual measurements.
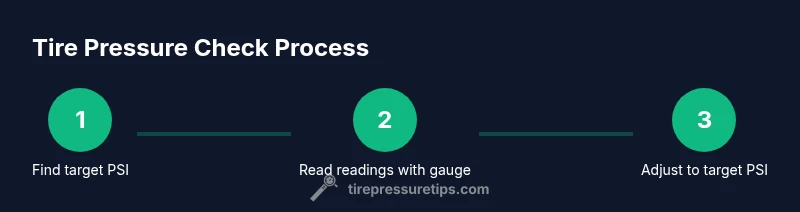
Checking Tire Pressure: A Practical Guide
Here’s what to do, in plain terms, to check tire pressure accurately and quickly. Start with a cold tire and a calibrated gauge. Remove the valve cap, place the gauge on the valve stem, and read the number. Do this for all tires, including the spare if your vehicle recommends it. This section explains why a cold read matters, how to handle a stubborn valve, and how to interpret readings in the context of the manufacturer’s PSI target. It also covers common pitfalls and how to retest after adjusting.
Adjusting for Load, Temperature, and Seasonal Changes
Your tire pressure isn’t static. Heavier loads, higher speeds, and outdoor temperatures can cause pressure to rise or fall. For every 10-degree Fahrenheit change in ambient temperature, tire pressure can shift by a small amount, so adjust accordingly and recheck after a long drive. Always keep a logic-based target: adjust for load (more weight means higher PSI) and season (cold weather usually lowers pressure). You’ll preserve grip, prolong tire life, and maintain even wear by staying near the manufacturer’s recommended PSI.
Common Mistakes and Troubleshooting
Common mistakes include inflating to the wrong target by reading while the tire is warm, ignoring TPMS warnings, and failing to check the spare. Leaking valves, corroded stems, and damaged rims can also produce inaccurate readings. If readings are inconsistent across tires, recheck with a second gauge and look for slow leaks. If you suspect a faulty TPMS sensor, have it inspected by a professional.
AUTHORITY SOURCES
- https://www.nhtsa.gov/road-safety/tires
- https://www.sae.org
- https://nap.edu
Tools & Materials
- Tire pressure gauge(Prefer digital for clear psi/kPa readings)
- Air source (hand pump or compressor)(Ensure it can reach vehicle’s PSI range)
- Vehicle door jamb PSI label or owner's manual(Weighs target range and OEM spec)
- Notepad or app for logging readings(Useful for tracking changes over time)
- Safety gear (gloves, eye protection)(Optional but helpful for heavy-duty tires)
- Tire tread depth gauge(Assesses overall tread life alongside pressure)
Steps
Estimated time: 25-45 minutes
- 1
Gather tools and locate PSI targets
Collect a gauge, air source, and the official PSI target from the door jamb or manual. Confirm you have all four tires plus the spare if recommended. This ensures consistent readings across all tires.
Tip: Keep caps on valves when not in use to avoid dust or moisture. - 2
Check tires when cold
Ensure tires haven’t been driven for at least three hours; a cold reading yields the most accurate pressure. If you’ve just driven, wait and recheck later.
Tip: Avoid checking after a long drive, which raises the readings. - 3
Remove valve caps
Carefully unscrew the valve caps and set them aside so they don’t get lost. Cap removal is necessary to expose the valve stem for the gauge.
Tip: Keep track of caps; losing one can let dirt into the valve. - 4
Attach gauge and read pressure
Firmly press the gauge onto the valve stem and read the measurement. Take note of each tire’s reading and ensure the reading is stable.
Tip: If the reading fluctuates, re-seat the gauge and try again. - 5
Compare with target and adjust
If a tire is low, add air until it reaches the target PSI. If overinflated, release air in small increments and recheck.
Tip: Use quick bursts of air to avoid overshooting the target. - 6
Re-check and finalize
Recheck all tires after adjusting, then reattach valve caps. Log readings if you’re tracking changes over time.
Tip: Double-check the spare if your vehicle recommends it. - 7
Test drive and re-check later
Drive a short distance, then re-check the pressures to account for seating changes after the adjustment. This ensures everything is stable after the adjustment.
Tip: Only drive short distances before final readouts. - 8
Document results
Record the PSI targets and final readings for each tire to track future changes and leaks.
Tip: A simple log helps you catch slow leaks early.
Frequently Asked Questions
What is the recommended PSI for tires, and where can I find it?
The recommended PSI is provided by the vehicle manufacturer and is listed on the door jamb sticker or in the owner's manual. Use that value for all tires unless the sticker specifies different targets.
Check your door jamb sticker for the exact PSI and use that as your target.
Does TPMS replace manual tire pressure checks?
No. TPMS alerts you to underinflation but does not replace periodic manual checks with a gauge to verify exact pressure.
No—TPMS helps, but you still need to measure with a gauge.
How often should I check tire pressure?
Check at least once a month and before long trips, especially when temperatures change. Also check if you notice a TPMS warning.
Check monthly and before trips, and after temperature changes.
What happens if tires are overinflated?
Overinflation can cause reduced contact patch, harsher rides, and uneven wear, particularly in the center of the tread.
Overinflated tires wear faster in the center and can reduce grip.
What tools do I need to check tire pressure at home?
You’ll need a tire pressure gauge, a reliable air source, and access to your vehicle’s PSI target. Keep valve caps on when not inflating.
A gauge, an air source, and the car’s PSI target are enough.
What should I do if the TPMS light stays on after inflation?
If the light remains after inflation, you may have a sensor issue or a slow leak. Recheck pressures and have the system inspected by a professional.
If the light stays on after inflation, have it checked for sensor or leak issues.
What to Remember
- Check tires when cold for accurate readings
- Follow OEM PSI targets from label
- TPMS is a guide, not a replacement for gauges
- Log readings to spot slow leaks over time
- Protect valve stems and caps