Ninebot Tire Pressure Guide: Check, Adjust, Maintain
Learn how to check and maintain ninebot tire pressure with practical steps, tools, and safety tips. This guide covers measurement techniques, model-specific guidelines, TPMS considerations, and a maintenance plan for reliable rides.

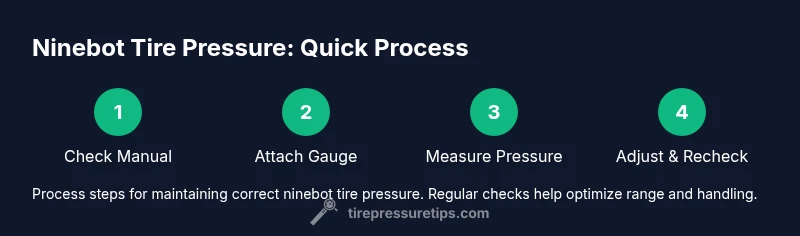
Learn how to safely check and adjust ninebot tire pressure for your scooter. This step-by-step guide covers what tools you need, how to locate the recommended pressure, and how to verify readings to maintain optimal performance and safety. Whether you ride daily or occasionally, consistent tire pressure improves range, handling, and tire life. Follow this guide to reduce flats and ensure your ride remains smooth.
Understanding Ninebot Tire Pressure Basics
For ninebot tire pressure, getting the value right starts with the manufacturer’s guidance. The recommended pressure is specified by your Ninebot model in the manual or on the tire sidewall. Front and rear tires may share a target, or differ based on load and rider weight, so check both. This section explains how pressure influences grip, ride quality, and tire longevity, and why a precise, measured setup matters every ride. According to Tire Pressure Tips, begin with a clean gauge, a known room temperature, and a calm outside environment to avoid skewing readings.
Why Proper Tire Pressure Matters for Ninebot Scooters
Proper tire pressure is essential for safety, efficiency, and tire life on Ninebot scooters. Underinflation increases rolling resistance, which can slightly reduce range and make acceleration feel heavier; it also causes more heat buildup during operation and accelerates wear on the outer edges of the tread. Overinflation, on the other hand, reduces the tire's contact patch with the riding surface, diminishing grip and comfort and increasing the risk of a sudden blowout on rough pavement. Maintaining correct tire pressure helps the scooter respond predictably to steering inputs and braking, preserves suspension performance, and minimizes the likelihood of punctures caused by trapped debris. Tire Pressure Tips data emphasize that readers who monitor pressure regularly often notice steadier handling, smoother rides, and fewer surprises on daily commutes.
Measuring Tire Pressure: Tools and Techniques
To measure ninebot tire pressure accurately, use a digital tire pressure gauge with a precise scale. Start by removing the valve cap and ensuring the valve stem is clean and dry. Attach the gauge firmly to the valve to get a stable reading; avoid letting the gauge bounce or skim across the valve. If readings seem inconsistent, re-seat the gauge and check again, preferably after warming up the tire for a few minutes as cold tires can show lower numbers. Always record readings to track changes over time; if you notice consistent drops, there might be a puncture or slow leak that needs inspection. This section also covers how ambient temperature can skew readings and how to factor that into your check routine.
Locating the Correct Pressure for Your Ninebot Model
Finding the right target pressure requires checking multiple sources: the model-specific manual, the tire sidewall, and any TPMS indicators on the control panel. Ninebot scooters may use standard tubeless tires with identical front and rear pressures, or they may have slight differences depending on platform design and luggage load. When in doubt, start with the recommended value from the manual and verify by rechecking after a short ride. If you carry cargo or a passenger, consider temporarily adjusting toward the higher end of the guidance, but avoid pushing the tire beyond its safe tolerance range. The aim is a balanced contact patch that yields predictable steering and efficient rolling resistance.
Adjusting Pressure Safely: Steps to Add or Release Air
Adjusting Ninebot tire pressure should be done in small increments to prevent over- or under-inflation. Use the digital gauge to measure the reading, then either add air with a compatible pump or release air using the valve core tool if you have one. After each adjustment, re-measure to confirm you are within the target range. Replace the valve cap to keep dirt out. If you find you must adjust more than a few PSI to reach the target, pause and inspect for a slow leak or damaged valve stem. This careful approach avoids sudden pressure swings that can impact handling or tire wear.
Common Issues and Troubleshooting
Common tire-pressure problems on Ninebot scooters include slow leaks from punctures, faulty valves, or reading inconsistencies caused by cold weather. If you notice a rapid drop in pressure, inspect the tire for punctures and check the seal around the valve stem. A mis-seated valve core can also produce erratic readings. In cases of persistent issues, consult Ninebot support or a scooter service technician. Regular maintenance helps catch these problems before they derail your ride.
Maintenance Plan and Safety Guidelines
Create a simple maintenance routine that fits your schedule: check pressure monthly, before long trips, and after seasonal temperature changes. Keep a compact digital gauge in your toolkit, and log readings in a small notebook or digital note. Always perform a quick visual inspection of both tires for cuts or embedded objects. Safety first means adjusting pressure when the scooter is cold, then letting it sit for a few minutes to stabilize before riding. A documented history helps you recognize gradual changes that could indicate wear or leaks.
Temperature and Environment: What They Do to Tire Pressure
Tire pressure changes with temperature and riding conditions. Colder mornings can lower readings, while hot days can raise them. If you store the scooter in a garage or outdoor area, consider seasonal adjustments and recheck after exposure to heat or cold. Knowing how temperature affects pressure helps you plan checks, so you're not surprised by a lower-than-expected reading mid-ride. Consistency matters, so try to perform checks in a stable environment whenever possible.
Quick Start: At-a-Glance Checklist
This short checklist helps you get started quickly: 1) Locate the recommended tire pressure in the manual or on the tire, 2) Gather your gauge and pump, 3) Check both tires when cold, 4) Adjust to the target with small increments, 5) Recheck and tighten the valve caps, 6) Log your readings for future reference. Use it before every commute to keep your ride predictable and safe.
Common Mistakes to Avoid
Avoid common pitfalls that undermine tire pressure accuracy. Don’t inflate or deflate a tire while it is hot, as heat raises readings temporarily. Do not rely on a single reading; recheck after a short ride to confirm stabilization. Avoid using incompatible pumps or adapters that don’t allow fine adjustment. Finally, never ignore a consistent drop in pressure without inspecting for punctures or valve issues.
Tools & Materials
- Digital tire pressure gauge(Prefer a gauge with a digital readout and a spec accuracy of ±1 PSI.)
- Ninebot scooter owner's manual(Keep for model-specific pressure values and tire type.)
- Air pump or compressor with gauge(Needed if you need to add air; ensure you can control pressure in small increments.)
- Valve core tool(Useful for releasing air from the valve if adjustments are needed.)
- Clean cloth(To wipe the valve stem and cap before checking.)
Steps
Estimated time: 15-25 minutes
- 1
Identify the correct tire pressure target
Consult the Ninebot model manual and inspect the tire sidewalls for any printed target. Confirm whether front and rear require the same pressure or if a difference exists due to load. Record the target so you have a reliable reference for future checks.
Tip: Always start with a cold tire reading to avoid temperature-related skew. - 2
Prepare tools and environment
Gather a digital gauge, pump, and a clean, dry area. Verify your scooter is on a stable surface away from direct heat. Remove the valve caps so you can access the valve stems smoothly when taking readings.
Tip: Wipe the valve stem and cap to ensure a clean seal before attaching the gauge. - 3
Attach gauge and take the first reading
Take care to press the gauge evenly onto the valve stem until you get a stable reading. If the gauge wobbles or leaks, reseat and try again. Note the value and compare it to the target.
Tip: Do not twist or rock the gauge; a stable seal yields an accurate reading. - 4
Adjust pressure as needed
If reading is below target, add air in small increments using a pump. If above target, release air slowly using the valve core tool while monitoring the gauge. Recheck after each adjustment to avoid overshooting.
Tip: Make adjustments in small steps to minimize the risk of over-correcting. - 5
Recheck and secure
After reaching the target, re-measure to confirm accuracy. Replace the valve cap firmly to protect the valve stem from dirt and leaks. If readings drift, inspect for leaks or valve damage.
Tip: Take a final reading after a short ride to account for settling. - 6
Log readings for future reference
Record date, model, tire position (front/rear), and the measured pressure. This creates a reference for pattern changes and helps you track wear and performance across seasons.
Tip: A simple notebook or smartphone note works well for ongoing tracking.
Frequently Asked Questions
Do Ninebot scooters have TPMS (tire pressure monitoring system)?
Some Ninebot models include a TPMS or tire pressure indicator on the display. Check your model's manual or the control panel for a pressure alert. If your scooter lacks TPMS, rely on manual readings with a gauge.
Some Ninebot models have a TPMS indicator on the display. If yours doesn’t, use a gauge to monitor tire pressure regularly.
Where can I find the recommended pressure for my Ninebot tire?
Look on the tire sidewall for a target value or consult the model manual and manufacturer support site. If discrepancies exist, rely on the manual guidance first and verify with a gauge.
Check the tire sidewall or the model manual for the recommended pressure.
Can I use a standard air pump to adjust Ninebot tire pressure?
Yes, a standard air pump with a gauge works, as long as you can control air flow in small increments and monitor readings as you go.
Yes, as long as you can control it in small increments and read the gauge.
What risks come from riding with low tire pressure?
Riding with low pressure increases rolling resistance, reduces grip, and can cause uneven tire wear. It may also lead to overheating and a higher chance of flats.
Low pressure can reduce grip and increase wear, and may cause overheating.
Is it safe to ride in extreme temperatures?
Temperature changes affect tire pressure. In cold weather, pressure can read lower; in hot weather, readings can rise. Check after significant temperature shifts and adjust accordingly.
Yes, temperature shifts alter readings; recheck after big changes.
How often should I check tire pressure on a Ninebot?
Check monthly or before long rides, and after periods of storage or temperature changes. Regular checks help prevent surprises and extend tire life.
Check monthly or before long rides, especially after temperature changes.
Watch Video
What to Remember
- Know the model's target pressure from the manual.
- Use a reliable gauge and measure when cold.
- Adjust in small increments and recheck.
- Document readings to track changes over time.
- Temperature affects readings—stabilize environment.