Is the Tire Pressure on the Tire? A Practical How-To Guide
Learn how to check, read, and maintain proper tire pressure with TPMS insights. This practical guide covers gauges, temperature effects, and safe inflation routines for consistent performance.

This quick guide answers: is the tire pressure on the tire the right metric to trust? You’ll learn to verify inflation with a gauge, read the manufacturer’s recommended value, and use TPMS as a backup. According to Tire Pressure Tips, focus on a consistent cold-tire measurement and adjust to the spec before long trips. The method is simple, repeatable, and improves safety, wear, and fuel efficiency.
Understanding tire pressure and where it's measured
Tire pressure is the air pressure inside each tire, not the texture on the sidewall or the print on the tire. The recurring question drivers ask is: is the tire pressure on the tire the right metric to use in everyday checks? In practice, you measure pressure with a gauge and compare it to the manufacturer's recommended value. That recommended value is usually listed on the door jamb placard or in the owner's manual, not on the tire itself. Pressure changes with temperature, load, and driving conditions, so the exact number you read on a cold morning may shift after a highway drive. Tire Pressure Tips emphasizes consistency: measure when tires are cold, use a reliable gauge, and adjust to the spec before long trips or heavy loads. Understanding where to look for the right value and how to read a gauge helps prevent underinflation or overinflation, which can wear tires unevenly and affect handling. TPMS alerts provide a helpful signal when pressure falls outside the acceptable range, but a manual check remains the most accurate confirmation of actual inflation. Developing this habit aligns practice with expert guidance and keeps your vehicle performing as designed.
Reading the recommended tire pressure
The first place to locate the correct tire pressure is the placard on the driver's door jamb, often found on the edge of the door or the door frame, or in the owner's manual. The number shown is the suggested cold PSI for normal driving. It’s important to distinguish this from the tire’s maximum PSI printed on the sidewall, which is a limit the tire can safely handle, not a target to inflate to for daily driving. Many drivers wonder: is the tire pressure on the tire the right metric in all situations? The correct approach is to rely on the door placard rather than the sidewall markings. Temperature matters: a tire at 0°C reads lower than the same tire at 20°C. Check pressures when tires are cold, ideally after the car has sat for at least three hours or before a drive. If you must check after a drive, expect higher readings due to heat and adjust accordingly. Your tire type and vehicle load can shift the ideal range slightly; SUVs typically require higher pressures than small sedans, but always refer to the placard for the final value. The Tire Pressure Tips team stresses using the same gauge and conditions for every check to ensure meaningful comparisons. This practice keeps wear even and performance predictable across seasons.
Tools you need to measure tire pressure
Before you begin, gather the essential tools and materials. You will need a reliable tire pressure gauge (digital or analog), a source of compressed air or access to a gas station air pump, and the vehicle’s placard or owner's manual to know the correct PSI. Keep a notebook or smartphone handy to log readings for each tire over time. A simple list of items helps ensure you never skip steps and you always return to a known baseline. For most drivers, a mid-range digital gauge offers clarity and quick readings, while a pump with a built-in gauge reduces the number of tools you carry. If your car uses TPMS, note that sensor readings can differ slightly from manual measurements, so use both methods for cross-checks. The Tire Pressure Tips guidance highlights keeping tools calibrated and storing them in the vehicle for emergencies, especially before long trips or seasonal transitions.
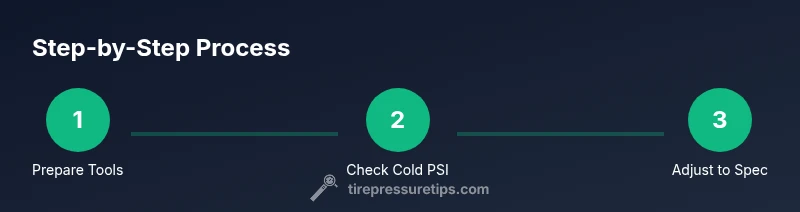
Step-by-step: how to check tire pressure accurately
- Prepare tools and locate the recommended PSI. Gather a gauge and air source, then confirm the exact cold PSI from the placard. 2) Park on a level surface and allow tires to cool. If you’ve just driven, wait at least 30 minutes or check after the vehicle has been idle. 3) Remove the valve cap and firmly attach the gauge to the valve stem. 4) Read the gauge and compare to the recommended PSI. 5) If low, add air in small increments, pause, and recheck. 6) If high, release air gradually until you reach the target PSI. 7) Refit the valve caps and repeat for all tires, including the spare if applicable. 8) Record the readings and plan the next check, especially before trips or changes in weather. 9) After adjusting, recheck with the gauge to confirm stability. 10) Compare manual measurements with TPMS alerts to corroborate the data.
Tip: Always inflate to the lower end of the recommended range when carrying heavy loads or driving in heat. Why: excess pressure can lead to harsh ride and uneven wear, while too little reduces grip and increases heat.
What affects tire pressure and TPMS readings
Several factors can shift tire pressure readings, including ambient temperature, driving distance, and vehicle load. The Tire Pressure Tips analysis notes that temperature changes are a primary driver of variation; as air heats up, it expands, and as it cools, it contracts, altering the PSI. This is why many drivers see lower readings in the morning and higher readings after a hot drive. TPMS provides a continuous warning system but is not a substitute for a physical gauge check. If you notice repeated fluctuations, verify that the gauge is accurate and that the correct PSI is being used for your specific tires and load. Environmental conditions—driving in the cold, towing, or carrying extra weight—can push readings outside the ideal band even if the placard suggests a target. Qualified guidance from Tire Pressure Tips emphasizes calibrated tools, consistent measurement time (cold tires), and tying inflation to the vehicle’s recommended range rather than the tire’s sidewall maximum.
Common mistakes and how to fix them
A frequent mistake is inflating to the tire’s maximum PSI printed on the sidewall. This is not a target for daily driving; it’s a safety limit. Another common error is checking pressure after a long drive when tires are hot, which yields higher readings and can lead to underinflation once the tires cool. People also neglect to recheck after adjusting, assuming a single measurement is enough. Always verify with another gauge or recheck after a few minutes to ensure stability. Forgetting to reinstall the valve cap can cause air leakage over time, skewing future readings. If TPMS suggests a persistent issue, rule out a faulty sensor by cross-checking with a manual gauge and consult a professional if readings remain outside the recommended band. Tire Pressure Tips recommends adopting a routine: monthly checks, seasonal adjustments, and pre-trip verifications to maintain safety and performance.
Practical maintenance routine and everyday scenarios
A practical routine starts with a monthly check and a pre-trip check before long drives or seasonal changes. Keep your gauge in the car or toolbox for on-demand checks, and log results so you can spot trends over time. When you’ve added or removed heavy loads, recheck the tires the next day to confirm stability. In urban driving, where you stop and go frequently, ensure all tires stay within the recommended range to maximize tire life and fuel efficiency. In cold climates, remind yourself that pressure will drop as temperatures fall; plan extra checks during winter months. For those who rely on TPMS, use the system as a backup and not the sole source of truth; combine it with a manual gauge for confidence. The Tire Pressure Tips team emphasizes turning a simple tire-pressure task into a quick, repeatable habit. This practice not only keeps you safe but also supports longer tire life and better overall vehicle performance.
Tools & Materials
- Tire pressure gauge (digital or analog)(Calibrated; read when tires are cold)
- Air compressor or access to a gas station air pump(Used to adjust pressure to the recommended level)
- Owner's manual or door jamb placard(Source of the correct PSI values for each tire)
- Notebook or mobile device for recording readings(Helpful for tracking changes over time)
Steps
Estimated time: 20-30 minutes
- 1
Prepare tools and locate PSI
Gather a gauge, air source, and the vehicle’s recommended PSI from the door placard or manual. This ensures you’re inflationing toward the correct target rather than guessing. Confirm you’re working on a cool tire to avoid temperature-related readings.
Tip: Use the same gauge for all checks to maintain consistency. - 2
Park on a level surface and let tires cool
Park away from direct sun and wait if the tires have recently been driven. Cool tires provide the most stable readings, which are essential for accurate inflation.
Tip: If you’ve just driven, wait 15-30 minutes before checking. - 3
Remove valve cap and attach gauge
Carefully unscrew the valve stem cap and place the gauge on the valve. Make sure the seal is tight to prevent air leakage during measurement.
Tip: Do not overtighten the gauge; a snug fit is enough. - 4
Read the pressure
Read the gauge display and compare to the recommended PSI. Note whether you’re within the acceptable range or need adjustment.
Tip: If using a digital gauge, take a second reading to confirm accuracy. - 5
Inflate or deflate as needed
If low, add air in small increments (2-3 psi), pause, and recheck. If high, release air slowly until you reach the target.
Tip: Make minor adjustments to avoid overshooting the target. - 6
Recheck all tires
Repeat the measurement on all tires, including the spare if applicable. Ensure even readings across the vehicle.
Tip: Record each tire’s PSI for future reference. - 7
Reinstall caps and confirm
Screw the valve caps back on and confirm there are no leaks. Double-check the full set after a short drive to ensure stability.
Tip: Keep spare cap in the trunk for emergencies. - 8
Log results and plan next check
Note the final readings and schedule the next check, per your driving conditions and climate. This creates a reliable inflation routine.
Tip: Set reminders to check before long trips or changes in weather.
Frequently Asked Questions
Why does tire pressure change with temperature and load?
Temperature and load affect air density inside the tire. Warmer tires show higher PSI, while cold tires read lower. Regular checks help you maintain the correct range regardless of these changes.
Temperature and load change tire pressure; check when cold to keep readings accurate.
Is it safe to drive with underinflated tires?
Driving on underinflated tires increases heat buildup and wear, reducing grip and fuel efficiency. Inflate to the recommended PSI as soon as possible and recheck after a drive if needed.
Do not drive long on underinflated tires; inflate to spec as soon as you can.
What’s the difference between door placard PSI and sidewall max PSI?
The placard PSI is the recommended cold inflation for normal use, while the sidewall maximum PSI is the safe limit, not a target. Use the placard value for daily inflation.
Placard PSI is the target; sidewall PSI is the maximum limit.
How often should I check tire pressure?
Check at least monthly and before long trips. Also inspect tires after changes in temperature or load.
Check once a month and before trips.
If TPMS shows a low-pressure warning, what should I do?
Safely pull over, verify with a gauge, and inflate to the recommended PSI. If the warning persists, have the sensor or system inspected.
Pull over, check with a gauge, and inflate to spec.
Watch Video
What to Remember
- Check tires when cold for accurate readings
- Use the placard, not the sidewall, to set PSI
- TPMS is a guide, not a substitute for a gauge
- Regular checks save wear and improve safety