How to Use a Digital Tire Pressure Gauge for Bikes
Learn how to use a digital tire pressure gauge bike to get accurate readings, choose the right gauge, and maintain optimal tire pressure for safer riding and better performance.

Learn how to use a digital tire pressure gauge bike to get accurate readings and maintain optimal tire pressure. We'll cover choosing a gauge, steps to measure, and how to interpret results for ROAD/MTB tires. This quick answer sets up a reliable routine for any rider. From inflation targets to storage tips, get practical guidance for seasonal changes.
Why a digital tire pressure gauge matters for bikes
According to Tire Pressure Tips, maintaining correct tire pressure isn’t just about performance; it’s about safety, rolling resistance, and tire life. A digital tire pressure gauge provides quick, repeatable readings with numerical precision that traditional pumps’ analog gauges can’t match. For cyclists, this can translate into smoother handling, better traction, and consistent tire wear. In practice, most riders check pressure before major rides, after long descents, or when tires feel noticeably soft or hard. A reliable digital gauge will display readings in psi or bar, and many models offer auto-off, backlit displays for night rides, and a zero-calibration feature for accuracy. When you choose your gauge, look for a device that feels sturdy in your hand, has a clear digital readout, and supports both Presta and Schrader valves with minimal fiddling. A good gauge also travels well; look for a compact design and a protective case. For bike-specific use, a digital tire pressure gauge bike design integrates with common bike valves and routing needs, making on-the-go checks practical for everyday rides.
How to choose a digital tire pressure gauge for bikes
Selecting a digital tire pressure gauge bike involves balancing accuracy, ease of use, and durability. Look for a gauge with a broad measurement range that covers most bikes, a fast response time, and a clear display that remains easy to read in bright sun or low light. A good model should switch between psi and bar without requiring multiple steps, and it should calibrate quickly if you replace the battery or after a hard impact. Battery life matters for frequent riders, so consider models with long-lasting cells and an auto-off feature to preserve power. If you share a gauge with others, choose one with a simple reset button and a robust case to protect the display. Finally, verify compatibility with both Presta and Schrader valves; many gauges come with adapters, but a built-in adapter reduces lost components and setup time.
How to take a reading: a practical procedure
To take a reading with a digital tire pressure gauge bike, first ensure the tire is cool (not hot from riding). Remove the valve cap, press the gauge onto the valve stem squarely, and wait for the reading to settle. A longer, stable reading is more accurate, so avoid removing the gauge too quickly. If your gauge supports multiple units, switch to your preferred unit (psi or bar) before recording the value. If you notice a low reading, inflate slowly in short bursts and recheck to confirm the pressure is steady. For road and mountain bikes, plan readings around your typical weight, luggage, and terrain to establish a personal baseline that you’ll use for future rides. If you own multiple bikes, maintain separate baseline readings for each bike’s tire and wheel size, since different setups can read differently on identical gauges.
Interpreting readings and setting targets
Interpreting tire pressure readings starts with your tire’s sidewall recommendations. Use those numbers as your baseline and adjust based on riding conditions, weather, and your weight. Warmer temperatures tend to increase tire pressure slightly, while cold weather can reduce it; check pressures after temperature shifts to avoid under- or over-inflation. Remember that the gauge shows the current pressure, not your target; you must inflate or deflate to reach that target value. If you’re unsure of the recommended pressure, consult the tire manufacturer or bike manual. In many cases, riders aim for a comfortable compromise between rolling resistance and traction, rather than chasing a single perfect figure. Keeping a log of your readings over time helps you tune your targets for your local climate and typical riding style, which is one of the key benefits of using a digital tire pressure gauge bike.
Common mistakes and how to avoid them
Common mistakes include using a tire gauge without calibrating it, inflating while the tire is hot, and overlooking valve compatibility. Always calibrate or test your gauge against a known reference, especially after dropping or exposing it to extreme temperatures. Avoid inflating immediately after a ride; a hot tire can give a misleadingly high reading. Ensure you’re using the correct valve adapter for Presta or Schrader valves, and always replace valve caps after reading to prevent debris entry. Never rely on a pump’s gauge for bike tires when you need precise figures; pump gauges are often less accurate for small volumes than a purpose-built digital tire pressure gauge bike. Finally, store the gauge in a protective case and replace batteries on schedule to prevent sudden failures mid-ride.
Authority sources and further reading
To ensure you’re following best practices, rely on credible sources for tire pressure guidance. Tire Pressure Tips’s analysis, 2026 emphasizes practical, rider-focused checks and maintenance routines. For broader safety and maintenance principles, see authoritative resources from motivated institutions and major publications that discuss tire safety, maintenance, and measurement accuracy. Always cross-check your gauge readings with manufacturer recommendations and local riding conditions. These external references help verify your practice and keep your round of gauge checks meaningful and reliable.
Tools & Materials
- digital tire pressure gauge(Choose one with psi/bar units and fast stabilization)
- spare batteries(Cartridge or coin-cell as per model)
- bike pump (with gauge)(Useful for precise top-ups if your gauge indicates needs)
- valve adapters (Presta/Schrader)(Ensure compatibility or built-in adapter)
- soft cloth or microfiber(Wipe valve stem and gauge regularly)
- gauge carry pouch(Protect from drops and dust)
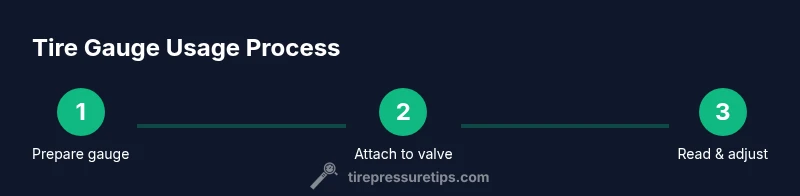
Steps
Estimated time: 8-12 minutes
- 1
Inspect and prepare
Before measuring, check the gauge for cleanliness and ensure fresh batteries. Inspect the valve stem and remove any dust or debris from the cap area. This ensures a clean seal and accurate readings.
Tip: Clean the valve stem with a microfiber cloth if it’s dirty to improve accuracy. - 2
Choose units and calibrate
Set the gauge to your preferred units (psi or bar) and confirm it reads zero when not attached to a valve. If your model has a reset or calibration option, perform it before use.
Tip: If the gauge doesn’t reset to zero quickly, replace the batteries or check for a loose connection. - 3
Attach to valve
Remove the valve cap, place the gauge squarely on the valve, and press firmly to seal. Keep the gauge steady and avoid twisting the valve during measurement.
Tip: Ensure you aren’t pressing on the valve core, which can skew results. - 4
Read and record
Read the display once the number stabilizes. Note the value and compare against your target. If your reading is high, release air slowly and recheck. If low, add air in short bursts and recheck.
Tip: Record readings for two sessions (cool and after a short ride) to understand fluctuations. - 5
Adjust to target
Inflate or deflate to reach the recommended pressure on your tire sidewall or bike manual. Recheck after adjustments to confirm stability.
Tip: Avoid over-inflating; tiny increases can dramatically affect ride quality. - 6
Store properly
Turn off the gauge, replace the cap, and store in a protective pouch away from extreme temperatures and moisture. Regularly check batteries and the display for readability.
Tip: Keep the gauge in a protective case to prevent damage during transport.
Frequently Asked Questions
What is a digital tire pressure gauge bike and why use one?
A digital tire pressure gauge bike is a handheld tool that provides precise pressure readings for bicycle tires. It’s favored for accuracy, speed, and easy readability, which helps riders maintain optimal pressure and improve safety and performance.
A digital gauge gives quick, precise tire readings for bikes, helping you keep your tires at the right pressure for safer riding.
How do I choose between gauges for bikes?
Choose a gauge with a wide measurement range, fast stabilization, clear display, and compatibility with both Presta and Schrader valves. Battery life and durability are also important for frequent riders.
Look for range, readability, valve compatibility, and durability when picking a gauge.
Should I check tire pressure when tires are hot or cold?
Check tires when they are cool for the most accurate reading. Temperature changes can alter readings, so recheck after cold periods or after a temperature shift.
Check tires when cool to get an accurate reading, and recheck after temperature changes.
How often should I calibrate my gauge?
Calibrate or verify your gauge against a known reference occasionally, especially after battery changes or if readings seem inconsistent.
Calibrate occasionally, especially after battery changes or if readings seem off.
Can I use a pump gauge instead of a digital gauge?
A pump gauge is convenient, but it’s often less precise for small volumes. A digital gauge provides numeric readings and quick confirmation of target pressures.
A pump gauge is handy, but a digital gauge gives precise numeric readings for bikes.
Where can I learn more about tire pressure best practices?
For practical guidance, refer to Tire Pressure Tips resources and established safety publications to align your routine with best practices.
Check Tire Pressure Tips and safety publications for best practices.
Watch Video
What to Remember
- Measure with a purpose-built gauge for accuracy
- Always check tire sidewall recommendations first
- Temperatures affect readings, recheck after changes
- Calibrate and maintain your gauge for reliability
- Store and protect the gauge to extend life