Electric Bike Tire Pressure Gauge Guide: How to Use
Discover how to choose, use, and maintain an electric bike tire pressure gauge for accurate readings, improved range, and safer rides. Includes gauge types, proper technique, TPMS tips, maintenance, and troubleshooting.

With an electric bike tire pressure gauge, you’ll accurately dial in tire pressure for better range and grip. Start by verifying the bike manufacturer’s recommended PSI (on the tire sidewall or owner's manual). Choose a gauge that reads in psi, attach to the valve firmly, inflate to the target, and recheck for accuracy. Regular checks prevent flats and improve efficiency.
Why an Electric Bike Tire Pressure Gauge Matters
Electric bikes bring heavier weight and higher speeds than standard bicycles, so maintaining correct tire pressure is essential for performance, safety, and efficiency. A precise reading helps protect tires, extend range, and improve handling on corners, rough pavement, and when carrying cargo. According to Tire Pressure Tips, small pressure differences can accumulate into noticeable losses in range and grip over time. A quality gauge removes guesswork, ensures you stay within the tire's printed range, and makes regular maintenance practical. In real-world riding, consistent pressure translates to smoother ride feel, better traction in wet or loose conditions, and reduced rolling resistance on climbs. This section explains how to select a gauge, the types available, and how to interpret readings for an electric-drive setup. Remember: accuracy is the goal, not speed of inflating.
Gauge Types for Electric Bikes
Gauge choice matters because it affects accuracy, ease of use, and repeatability. The most common options for e-bike riders are digital handheld gauges, analog (dial) gauges, and built-in gauges on pumps. Digital gauges generally provide quick, clear readouts and store multiple readings, while dial gauges offer robustness and may be cheaper. Some pumps include a built-in gauge, which is convenient but can be slower to read if the scale isn’t legible. For many riders, a compact digital handheld gauge with psi and bar scales is the best balance of accuracy and convenience. As Tire Pressure Tips notes, the key is a gauge that provides repeatable numbers, fits your valve type (Presta or Schrader), and has a reliable seal.
Reading Pressure: Understanding PSI, Bar, and the Bike's Guidance
Always start by locating the recommended pressure range printed on the tire sidewall or in the owner’s manual. The gauge measures pressure as psi or bar, and some gauges switch between units. For electric bikes, the target range is determined by the tire width, weight, riding style, and load. Do not exceed the maximum printed on the tire, and avoid underinflation, which can cause pinch flats and poor handling. When in doubt, stay within the middle of the documented range and adjust gradually. Keeping a log of readings over time can help you detect slow leaks or gradual changes in performance.
Measuring Across Front and Rear Tires
Rider weight, cargo, and motor assist distribution can differ between front and rear tires. Front tires often benefit from slightly higher traction, while rear tires bear more load during acceleration. Use the gauge to check both tires, especially after a long ride, changes in temperature, or after inflating from a completely flat state. If you notice a consistent discrepancy between front and rear readings, inspect the tires for wear, the valve stems, and possible leaks. Regular dual-tire checks help maintain balanced handling and predictable braking.
How to Use the Gauge: A Practical Procedure
To get an accurate reading, attach the gauge to the valve with a firm, straight seal, and avoid wiggling the connection. Make sure the valve stem is clean and dry, then read the gauge after the seal settles. If the pressure is too low, inflate in small increments and recheck; if too high, release air in small amounts and recheck. Recheck the reading after removing the gauge to account for any air displaced during attachment. This habit reduces misreadings caused by heat buildup or valve leaks and helps maintain consistent performance across rides.
Temperature and Its Effect on Readings
Air pressure in tires changes with temperature. In cooler weather, pressure drops; in hot conditions, it can rise. Plan checks before rides in the morning, after cold storage, or after a long drive where tires were warm. By comparing readings across different sessions, you can detect slow leaks or seasonal shifts. A good practice is to check tires when they are cold and after a prolonged ride, allowing you to account for temperature effects and avoid friction-related pressure changes.
TPMS vs Handheld Gauges: Complementary Roles
Tire Pressure Monitoring Systems (TPMS) provide a quick alert when a tire drops below a threshold, but they rarely replace precise handheld readings for daily maintenance. Use a handheld gauge to verify TPMS alerts, set target pressures, and confirm the actual tire condition. Regular cross-checks between TPMS and handheld gauges help identify leaks, damaged valves, or sensor issues. The combination ensures safer riding and helps maximize range and performance.
Gauge Maintenance and Calibration
A gauge that isn’t maintained can drift over time and give inconsistent readings. Check the battery periodically, replace it as needed, and store the gauge in a dry location away from extreme heat. Calibrate or verify accuracy by comparing readings with a known-good gauge if you suspect drift. Clean the nozzle and valve connection to maintain an airtight seal, and replace the seal if it wears out. Regular maintenance reduces inaccuracies and extends the life of your gauge.
Common Mistakes and Solutions
Common mistakes include reading a hot tire, attaching the gauge at an angle, skipping rechecks after inflation, and ignoring leaks around the valve stem. To avoid these issues, always read when tires are cold, ensure a straight seal, recheck after inflation, and inspect the valve area for signs of wear or damage. If readings are inconsistent across gauges, test a different gauge or cross-check with a second bike to confirm accuracy. Address leaks promptly to maintain correct pressures.
Buying Guide: What to Look For in an Electric Bike Gauge
Choose a gauge with clear numerals, a stable seal for both Presta and Schrader valves, and a unit switch (psi/bar) that you can read easily on the move. Consider features like memory for multiple readings, quick auto-off to save batteries, and a robust design for field use. A compact model is ideal for commuting bikes, while a larger, rugged gauge may suit off-road or touring setups. Prioritize accuracy, reliability, and ease of use to keep your e-bike performing at its best.
Tools & Materials
- Digital tire pressure gauge (bicycle gauge)(Prefer models with dual-unit readout (psi and bar) and a wide measurement range.)
- Replacement batteries(Carry spares compatible with your gauge; check battery type before travel.)
- Pump or inflator(A pump with a gauge lets you adjust pressure without removing the gauge.)
- Valve caps(Keep spare caps; they help seal the valve and protect threads.)
- Rag or wipes(Wipe the valve stem to ensure a clean seal before measuring.)
- Notebook or digital log(Record readings and targets for each tire over time.)
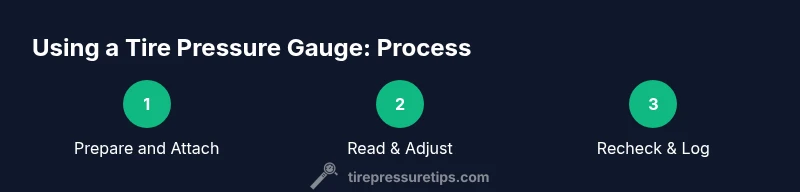
Steps
Estimated time: 15-25 minutes
- 1
Prepare and stabilize
Place the bike on a stable stand or support. Remove the valve caps and inspect the valve stems for damage or leakage. Have your gauge and inflator ready so you can measure and adjust without moving the bike.
Tip: Stabilize the bike to prevent movement during measurement; a wobble can skew readings. - 2
Attach the gauge
Press the gauge nozzle straight onto the valve connection and ensure a tight seal before reading. Avoid tilting the gauge; alignment affects accuracy.
Tip: If the seal pops off, wipe the valve stem and try again with a clean, dry connection. - 3
Read the current pressure
Read the gauge display and note the current pressure. If the tire is hot, wait a few minutes or let it cool to get an accurate cold-reading baseline.
Tip: Take two readings in quick succession to confirm consistency. - 4
Inflate or deflate to target
If pressure is too low, add air in small increments; if too high, release air gradually. Recheck after each adjustment until you’re within range.
Tip: Use short bursts of inflation/deflation to avoid overshooting the target. - 5
Recheck and seal
Remove the gauge and recheck the tire. Reattach the valve cap to protect the valve core and prevent debris entry.
Tip: A final reading after removing the gauge confirms the true tire pressure. - 6
Repeat on the other tire
Proceed to the other tire, repeating the same steps. Ensure both tires stay within their individual recommended ranges.
Tip: Balance readings between front and rear tires for even handling. - 7
Log and plan maintenance
Record the readings and date. Schedule regular checks, especially after temperature changes or long rides.
Tip: Keep a simple log to spot leaks and track pressure trends over time.
Frequently Asked Questions
What is an electric bike tire pressure gauge?
It is a device that measures tire air pressure and helps you set the correct PSI for your electric bike.
A tire pressure gauge measures PSI and helps you set the right pressure.
How often should I check tire pressure on an e-bike?
Check before long rides and monthly, especially when temperatures change. Temperature swings can affect pressure.
Check before rides and monthly, especially with temperature changes.
Can I use a car tire gauge on bicycle tires?
Yes, but ensure it fits your valve type and the gauge reads within a relevant range. Some car gauges don’t fit Presta valves.
Car gauges can work, but not all fit Presta valves or read bike ranges.
Why is my gauge reading different from the TPMS?
TPMS is sensor-based and can differ due to sensor location, temperature, and accuracy. Handheld gauges provide a direct measurement of tire pressure.
TPMS sensors can differ from a hand gauge due to location and temperature.
How should I calibrate my gauge?
Most gauges are factory calibrated and not user-adjustable. If you doubt accuracy, compare with a known-good gauge.
Check accuracy by comparing with another trusted gauge; calibration is usually factory-set.
What if the gauge reading is stuck or stuck high?
Inspect the valve seal and gauge nozzle for debris or wear. Try another gauge to confirm; replace batteries if readings drift.
If readings are stuck, check the seal and swap to another gauge to verify.
Watch Video
What to Remember
- Check tires when cold for accuracy.
- Use a reliable, consistent gauge.
- Record readings for ongoing maintenance.
- Match gauge readings with TPMS when available.