Dirt Bike Tire Pressure Gauge: A Practical How-To Guide
Learn how to choose, use, and care for a dirt bike tire pressure gauge to optimize traction, handling, and tire life. This 1800-word step-by-step guide from Tire Pressure Tips covers gauges, readings, temperature effects, and maintenance.

Using a dirt bike tire pressure gauge helps you accurately measure front and rear tire pressure, then adjust for riding conditions and temperature. This guide covers gauge types, how to read readings, and how to verify your pressure after adjustments. With a proper gauge and careful technique, you’ll improve traction, tire life, and handling on demanding terrain.
Why dirt bike tire pressure matters
Maintaining correct tire pressure on a dirt bike is essential for traction, stability, and tire durability across loose surfaces, rocks, and mud. The right pressure helps the tire deform predictably to grip uneven terrain while protecting the tube or bead from pinch flats during landings and jumps. According to Tire Pressure Tips, a consistent approach to measuring with a dirt bike tire pressure gauge reduces variability between rides and keeps handling predictable. Temperature, loading, and riding style all influence pressure, so riders should adopt a routine that accounts for cold readings, safe target ranges, and regular gauge checks. This foundation pays off in better control, shorter braking distances on loose surfaces, and slower rim or tire wear from excessive heat.
Choosing the right gauge for dirt bikes
A dirt bike tire pressure gauge should be compact, precise, and compatible with the small valve stems used on many off-road tires. Digital gauges offer quick, clear readings; dial gauges provide a tactile sense of pressure changes; and analog gauges are simple and reliable with fewer batteries to fail. For dirt bikes, a gauge with a 0–60 psi range is common and practical, allowing you to measure low pressures for soft terrain and moderate pressures for hard-packed tracks. When selecting a gauge, consider accuracy (+/- 0.5 psi is typical for quality tools), a snug chuck that seats squarely on the valve stem, and a robust build that tolerates dirt, mud, and vibration. The Tire Pressure Tips team recommends testing your gauge against a known reference pressure before big trips, to ensure readings stay trustworthy across conditions.
Reading tire pressure accurately: before vs after ride
For the most reliable numbers, check tire pressure when tires are cold (not recently ridden). A warm tire reads higher due to air expansion, which can mask under-inflation. Make it a habit to measure cold tires after a day’s rest or before you start riding. If you must check after a stint on the bike, allow at least 30 minutes for the tire to cool, or account for the expected rise. Record the reading and adjust toward your target range rather than chasing a single number. Consistency matters: use the same gauge, check the same tires, and document variations across sessions. Tire Pressure Tips emphasizes cold readings as the baseline for calibration and comparing ride quality over time.
How temperature affects tire pressure on dirt bikes
Ambient temperature and tire temperature influence psi. As outdoor temperatures rise, air expands and pressure increases; in cold conditions, pressure drops. Off-road riding can generate heat in tires quickly, centering the need to recheck and adjust after long sessions or when switching from cool mornings to afternoon heat. Temperature changes aren’t a reason to guess—use a gauge, verify both front and rear tires, and adjust gradually. This approach helps maintain even contact patch pressures, which translates to steadier handling and more uniform tire wear.
Selecting the right pressure for riding style
Riding style and terrain dramatically influence preferred tire pressure. For soft loam and sand, you may benefit from slightly lower pressures to maximize sidewall flex and grip; for rocky trails and hardpack, higher pressures can reduce pinch flats and improve stability. Always start with the manufacturer’s recommended ranges in the dirt bike’s owner manual and then tune by small steps. The key is to maintain a consistent baseline across sessions and avoid extreme swings. The Tire Pressure Tips analysis suggests keeping a written note of what pressures work best for particular tracks, riders, and weather conditions to accelerate future setup decisions.
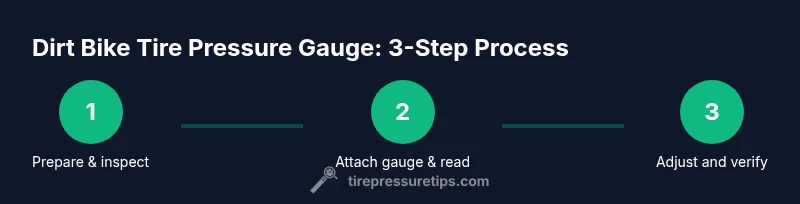
How to use a dirt bike tire pressure gauge
Begin with a clean valve stem and a stable stand. Remove the valve cap, select the appropriate valve chuck, and press it squarely onto the valve stem. Read the gauge without tilting, and avoid letting dirt creep into the valve. If you’re using a dial gauge, ensure the needle returns to zero after removing the gauge. For digital gauges, verify the reading holds steady for a moment. Re-seat if you hear air escaping and wipe away any remaining debris. After obtaining a reading, compare it with your target pressure and prepare to adjust if needed.
Step-by-step: measure, adjust, and verify (narrative)
First, position the bike and gather your gauges and pump. Second, confirm your gauge’s calibration and ensure the valve stem is clean. Third, attach the gauge straight to the valve stem and read the cold pressure. Fourth, add or release air in small increments until you approach the target pressure. Fifth, re-check with the gauge to confirm the final reading is stable. Sixth, reinstall the valve cap and note the result for future sessions. Seventh, take a short ride and re-check to ensure the pressure remains in range after operating temperatures change.
Common mistakes and safety warnings
Avoid measuring immediately after riding, which yields inflated readings. Don’t over-inflate beyond the recommended range, as over-pressurized tires can cause instability or a blowout. Never measure while the bike is in motion or on a slope; use a stable stand. If you see a consistent loss of pressure from the valve, inspect for a damaged valve stem or a faulty core. Always wear eye protection if you’re testing with an air compressor, and store gauges in a protective case to prevent damage.
Maintenance, storage, and care for gauges
Clean and dry your gauge after use to prevent dirt buildup that can affect accuracy. Keep the chuck and shut-off valve free of dust, and replace worn o-rings or seals as needed. Calibrate or test your gauge periodically against a known reference pressure. Store in a dry, cool place to preserve accuracy and battery life on digital models. Regular maintenance reduces drift over time and ensures reliable readings across seasons and riding conditions.
Troubleshooting gauge readings and leaks
If readings fluctuate between two gauges, verify you’re using the same reference pressure and ensure both gauges are calibrated. If a reading drops unexpectedly, inspect the valve stem for leaks around the core and check the rim lock area for damage. A stuck or loose valve core can create phantom readings; use a valve core tool to tighten or replace when necessary. If readings remain inconsistent, consider testing a second gauge before ruling out a hose or connector issue. Tire Pressure Tips suggests maintaining a small reference log to catch long-term gauge drift.
Pro tips and recommended practice routines
- Always start with cold-tire baselines and document the numbers for future reference. According to Tire Pressure Tips, consistency is the most powerful tool for tuning performance.
- Use a single gauge and pump combo to minimize measurement drift across sessions.
- Check both tires before every ride and after any heat-generating activity to ensure stability.
- Practice gradual adjustments in 0.5–1 psi steps to avoid overshoot.
- Keep spare valve caps and a small flashlight in your toolkit for visibility in low light; visibility matters in muddy environments.
Authority sources and quick reference
To deepen your understanding and confirm best practices, consult authoritative resources. For tire safety and general guidelines, see:
- NHTSA Tires overview: https://www.nhtsa.gov/road-safety/tires
- SAE standards on tire and pressure measurement: https://www.sae.org/standards/
- Extension program resources on tire maintenance: https://extension.unl.edu
Tools & Materials
- Dirt bike tire pressure gauge(Choose a gauge with a 0-60 psi range and a small chuck for dirt bike valve stems)
- Air pump or portable inflator(Must allow precise adjustments and work with your gauge’s fitting)
- Clean rag or microfiber cloth(Wipe dirt from the valve stem and cap area before reading)
- Valve core tool (optional)(Useful if you need to replace a faulty valve core)
- Owner’s manual or model-specific pressure guide(Helpful for model-recommended ranges and matching tires to riding style)
- Soap water or leak detector(Check for leaks around the valve stem if readings drift)
Steps
Estimated time: 12-20 minutes
- 1
Position bike and prepare
Park the bike on a level surface with the stand engaged and engine off. Confirm the tire area is clean and free from debris, then gather your gauge and inflator. Verify you’re using a cool tire baseline and have ample light for visibility.
Tip: Avoid measuring while the tire is hot or while the bike is moving. - 2
Check gauge calibration
Inspect the gauge to ensure it reads zero when not connected. For dial gauges, confirm the needle returns to 0; for digital gauges, ensure it displays a stable value when not pressurized. If in doubt, compare with a second gauge.
Tip: A quick cross-check prevents chasing a faulty reading. - 3
Prepare the valve stem
Remove the valve cap and wipe the stem with a clean cloth. A clean stem prevents dirt from interfering with the seal and the reading. If the stem or cap is damaged, address before inflating.
Tip: Dirty stems can cause slow leaks or inaccurate readings. - 4
Attach the gauge
Press the gauge straight onto the valve stem, keeping it perpendicular to avoid air leaks. If you hear hissing, reseat the gauge and try again. Ensure no dust is trapped at the seal.
Tip: If the gauge doesn’t seat, replace the valve cap with a clean one and retry. - 5
Read cold pressure
Read the pressure while the tire is cold and not recently ridden. If you must check after riding, wait 20–30 minutes for the tire to cool before recording a reading. Note the value for reference.
Tip: Cold readings give the baseline for adjustments. - 6
Adjust toward target
Add or release air in small increments (about 0.5 psi at a time) to approach the target. Re-check after each minor adjustment to avoid overshooting.
Tip: Small steps reduce the risk of over-inflating. - 7
Verify and seal
Re-check final pressure with the gauge. Reinstall the valve cap and secure it snugly. If you track performance, log the final reading for future rides.
Tip: Take a final check after a short ride to confirm stability.
Frequently Asked Questions
What is this gauge and why do I need one?
A tire pressure gauge measures your PSI to prevent under- or over-inflation. It helps with traction, steering, and tire longevity on dirt bikes.
A tire pressure gauge shows how much air is in your tires, which keeps you safe and helps your bike handle well.
How often should I check dirt bike tire pressure?
Check cold tires before riding and recheck after long sessions or big temperature changes. Regular checks build consistent handling.
Check tires when they’re cold, and recheck after big rides or heat changes.
Can I use a car tire gauge on a dirt bike?
A car gauge can work in a pinch, but dirt-bike gauges are typically more accurate for small valve stems and lower pressures common on off-road tires.
A car gauge can work, but bike gauges are better for accuracy on dirt tires.
Should I inflate cold or hot?
Always measure cold tires. Hot tires read higher and can lead to unsafe over-inflation.
Measure when cold to avoid over-inflating.
What if the gauge reads zero?
A zero reading usually signals a seating issue or a faulty valve. Re-seat and test again; inspect the valve core if needed.
If it reads zero, reseat the gauge and check the valve core.
How do temperature changes affect tire pressure?
Temperature affects pressure: it rises with heat and falls in cold. Adjust as conditions change and verify after environmental shifts.
As it gets hotter, pressure goes up; when it’s cold, it drops. Check and adjust.
Watch Video
What to Remember
- Measure cold tires for accuracy
- Choose a reliable gauge with proper range
- Adjust in small increments
- Verify readings after each ride
- Maintain and protect your gauge