How to Use an MTB Tire Pressure Gauge: A Practical Guide
A complete, practical guide to choosing, using, and maintaining an MTB tire pressure gauge for better traction, efficiency, and safety on mountain bike rides.

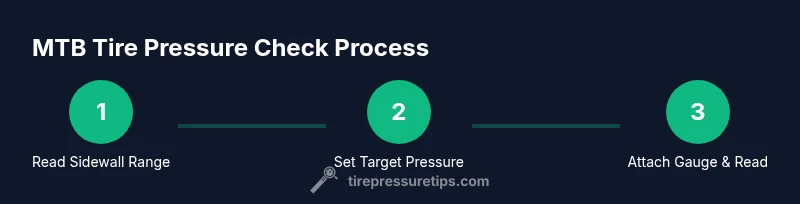
Using an MTB tire pressure gauge correctly unlocks traction, control, and comfort on rough trails. Start by reading the tire manufacturer's recommended pressure on the sidewall, then choose a target pressure based on terrain and rider weight. Calibrate your gauge if needed, attach it securely to the valve, and adjust in small increments (2–4 psi) until you reach the target. Check both tires and recheck after adjustments.
Why MTB Tire Pressure Matters
According to Tire Pressure Tips, accurate tire pressure is a foundational aspect of grip, rolling efficiency, and rider safety on mountain bike trails. The Tire Pressure Tips team found that small pressure adjustments can dramatically change how a bike corners, absorbs impacts, and handles technical sections. Proper pressure helps tires deform for grip without risking pinch flats, while overinflation reduces contact with the ground and increases bounce. For MTB riders, mastering your tire pressure is as important as tuning suspension or selecting the right tire compound. Start with the sidewall’s recommended range, then fine-tune based on weight, terrain, and riding style to achieve predictable handling and durable tires.
Understanding Your MTB Tire Pressure Gauge
There are several common gauge types used by riders: dial gauges with a spinning needle, digital gauges with a numeric display, and even smartphone-connected devices. Each type serves the same purpose—accurate pressure readouts—but they differ in how they feel, repeatability, and calibration needs. The MTB tire pressure gauge you choose should be easy to read, hold steady during measurement, and work across a wide range (roughly 15–60 psi for MTB tires, depending on width). When you’re evaluating gauges, consider how quickly they respond, how they seal at the valve, and how durable the stem is under muddy or dusty conditions. The Tire Pressure Tips team emphasizes testing your gauge in a known pressure and checking repeats to verify reliability.
Reading PSI: Units, Ranges, and Interpretation
Union units (psi) are standard in the United States, but some riders prefer bar or kPa readings. A gauge that’s easy to read quickly on the trail helps you avoid over- or under-inflating in tight situations. Start with manufacturer-recommended ranges printed on the tire sidewall, then select a target pressure based on terrain (rocky, loose, or technical sections) and rider weight. Remember that small changes in pressure affect tire shape and contact patch; a 1–2 psi difference can alter grip noticeably. If you ride on variable terrain, purposefully vary pressures by 2–4 psi between sections to find your optimal setup.
Choosing the Right Gauge for MTB Use
Your gauge should balance accuracy, durability, and ease of use. A rugged digital gauge with a clear readout can improve repeatability, especially in low-light or muddy conditions. Analog dial gauges are reliable and fast for quick checks, but require careful reading. Whichever you pick, ensure it has a secure valve connection, a long enough stem to avoid contact with rims, and a temperature-resistant display so readings aren’t skewed by cold mornings or hot sun. The right MTB tire pressure gauge stays accurate across multiple checks during a ride and stores well in your pack.
Gauge Calibration, Maintenance, and Storage
Calibrating occasionally against a known pressure source helps maintain accuracy. If readings drift, verify that the valve connection is clean, the stem isn’t bent, and that your gauge is within its service life. Store gauges with the protective cap on to keep dust out and protect the seals. If you ride in wet or muddy environments, dry the gauge and check for any moisture ingress after a ride. Regular maintenance reduces the risk of erroneous readings and keeps your measurements trustworthy for months.
Terrain, Weight, and Tire Pressure Dynamics
Terrain type and rider weight drive the same tire pressure decisions that terrain does for a car: more grip on technical, rough, or loose ground generally requires slightly lower pressures to deform the tire edge and create a larger contact patch. Heavier riders may start with higher end of the recommended range, while lighter riders can run lower pressures for plushness and traction. The goal is to balance traction, rolling resistance, pinch-flat risk, and tire wear. Keep a simple log of pressures you use on different trails to build a personal pressure map.
Trail-Side Checks: Quick Reference Procedures
On the trail, you’ll want a fast routine: (1) check current pressure, (2) compare to target range for the day, (3) adjust in small increments, (4) recheck after each adjustment, (5) note how the tire feels and handle adjustments for future rides. A reliable MTB tire pressure gauge makes this process smoother, especially when you’re outdoors and need to stay efficient. Remember that environmental conditions can cause quick changes, so periodic rechecks are part of consistent performance.
Maintenance and Care: Prolonging Gauge Life
Clean the valve stem and gauge stem after use to prevent dirt from entering seals. Dry out any moisture before storage, and keep the gauge capped when not in use. If a gauge becomes difficult to read, test it against a known pressure and consider replacement. A well-maintained gauge gives you reliable data and helps you avoid under- or over-inflation, which saves tire wear and improves ride quality.
Common Mistakes and How to Fix Them
Riders often neglect ambient temperature, ride hot tires, or forget to reset after a long descent. Another mistake is inflating to the wrong baseline by assuming street bike pressures apply to MTB tires. Always start with the tire sidewall’s recommended range and adjust slowly. If you consistently see inconsistent readings, recalibrate your gauge or replace it if readings vary by more than 1–2 psi across multiple checks.
Safety and Pre-Ride Checklists
Incorporate tire pressure checks into your pre-ride routine. Ensuring correct pressure reduces pinch flats and improves handling, especially on uneven terrain. While it’s tempting to chase exact numbers on every ride, prioritize consistency and staying within the manufacturer’s guidelines. A reliable MTB tire pressure gauge is a tool that supports safer, more confident riding.
Tools & Materials
- MTB tire pressure gauge (digital or analog)(Choose a model with a clear readout and secure valve connection)
- Air pump or compressor with gauge(Ensure it supports MTB tire range and has a stable hose)
- Valve core tool or multi-tool(Helpful for valve adjustments or fixing leaks)
- Tire sidewall spec sheet(Reference for manufacturer-recommended PSI range)
- Clean cloth or wipes(Clean valve stem before measuring to avoid debris)
Steps
Estimated time: 15-25 minutes
- 1
Check sidewall recommendations
Locate the tire’s printed pressure range on the sidewall and note the midpoint. This is your baseline for starts. By starting here, you align with the manufacturer’s guidance before fine-tuning for terrain and weight.
Tip: Use a pen and notepad to record the baseline for each tire. - 2
Set a target pressure
Choose a target pressure within the recommended range based on terrain and rider weight. For rough or technical trails, you may drop 1–2 psi for better grip; on smooth sections, you might increase by 1–2 psi for stability.
Tip: Record the day’s target in your ride log for future reference. - 3
Prepare the gauge and air source
Ensure your gauge is clean, zeroed, and ready. Attach the hose to your air source and verify the gauge reads zero when not connected. A clean, ready setup minimizes stray readings.
Tip: If using a CO2 cartridge, practice with a spare tire to avoid overshooting. - 4
Attach gauge to valve
firmly place the gauge on the valve stem and ensure a tight seal. A loose seal can cause air leaks and inaccurate readings. Hold steady while taking the measurement.
Tip: If you hear hissing, reseat the gauge to seal any leaks. - 5
Read and record the pressure
Take a reading and write it down for both tires. Check for consistency between front and rear where applicable. If readings are off, inspect the valve and gauge for issues.
Tip: Take a mental note of the surface you’re riding on to relate psi to traction later. - 6
Adjust to target pressure
Add or release air in small increments (2–4 psi at a time) until you approach the target. Recheck after each adjustment to confirm accuracy.
Tip: Avoid over-inflating; you can always add air back gradually. - 7
Recheck and finish
Recheck both tires after adjustments and ensure the tires sit evenly on the rim. Verify the readings with the gauge again to confirm accuracy before riding.
Tip: Finish with a quick wipe to keep the valve clean for the next ride.
Frequently Asked Questions
What is the best type of MTB tire pressure gauge for beginners?
For beginners, a digital gauge with a clear display and easy-to-seal valve connection is ideal. It provides repeatable readings and reduces guesswork. Practice with it at home to build confidence before trail rides.
A digital gauge with a clear display is best for beginners; practice at home to build confidence.
How often should I check MTB tire pressure?
Check pressure before every ride, and recheck after long descents or air temperature changes. If you ride frequently on varying terrains, log pressure adjustments to refine your personal map.
Check before every ride and after big temperature changes; log adjustments to refine your map.
Can TPMS readings replace a physical gauge?
TPMS provides a general alert but cannot replace precise readings from a gauge. Always verify with a dedicated tire pressure gauge for accurate numbers, especially when tuning performance.
TPMS alerts are helpful, but use a real gauge for precise numbers.
Why do gauge readings differ between gauges?
Different gauges can have small calibration differences. Always compare a new gauge against a known standard and test readings on the same tire to gauge consistency.
Gauges vary; test against a standard and compare readings on the same tire.
How does temperature affect tire pressure on a ride?
Temperature changes can raise or lower pressure; a cold morning versus a warm afternoon can shift readings. Recheck when temperatures change dramatically to maintain accuracy.
Temperature shifts air pressure; recheck when temps change a lot.
Should I zero or reset my gauge often?
Zeroing or refreshing the gauge helps ensure accuracy, especially after a long ride. If readings drift, recalibrate or replace the gauge.
Zeroing helps accuracy; recalibrate if readings drift.
Watch Video
What to Remember
- Check the sidewall range before adjusting.
- Choose a trail-appropriate target pressure.
- Calibrate and maintain your gauge regularly.
- Record pressures to build a personal MTB map.