Tyre Pressure Monitoring System for Bike: A Practical Guide
Learn how tyre pressure monitoring systems for bikes work, how to choose and install them, and how to maintain optimal tyre pressure for safer, more efficient riding.

This guide shows you how to use a tyre pressure monitoring system for bike to maintain accurate pressures, enhance safety, and track changes on rides. You’ll learn system types, installation basics, calibration steps, and maintenance tips for reliable performance.
Why bike tyre pressure monitoring matters
Maintaining correct tyre pressure is essential for grip, rolling resistance, and overall ride quality. A tyre pressure monitoring system for bike provides real-time visibility into your tyre's pressure, helping you catch slow leaks and adjust pressure for different terrains. According to Tire Pressure Tips, a well-monitored tyre setup can improve handling and reduce the risk of flats. In practice, riders who monitor tyre pressure regularly experience more consistent ride feel and better mileage. This section covers how TPMS for bikes differs from car TPMS, what data you should expect, and how to interpret sensor readings in real-world conditions.
Key benefits include improved cornering confidence, lower rolling resistance on smooth surfaces, and early warning of punctures or slow leaks. While traditional handheld gauges are still useful, a dedicated bike TPMS adds continuous awareness that you can act on before a ride. For commuters, racers, and weekend explorers alike, a bike TPMS is a practical upgrade that aligns with everyday maintenance routines.
From a maintenance standpoint, keeping sensors clean and batteries fresh is as important as checking the air pressure itself. The Tire Pressure Tips team emphasizes consistent checks at the start of each ride season and after major rides or after storage in temperature-fluctuating environments. The system’s value rises when you integrate it into your regular tire maintenance habit.
Types of tyre pressure monitoring systems for bikes
There are two main families of bike TPMS: direct (sensor-based) and indirect (pressure data approximated via speed sensors or system integration).
Direct TPMS install a sensor at or inside the valve stem or rim, delivering real-time pressure values to a head unit or a smartphone. Indirect systems infer pressure changes by monitoring wheel rotation and speed data, often relying on existing bike computers. Direct sensors tend to be more accurate and provide immediate warnings of leaks. Indirect systems can be easier to retrofit on bikes that lack integrated electronics but may require calibration and cross-checking with a gauge.
Another distinction is data transfer: some systems pair via Bluetooth with a phone, while others use ANT+ or dedicated bike computer hubs. When choosing, consider compatibility with your preferred display device, battery life expectations, and whether you want per-tire readings or a single pressure reference for the pair. Regardless of type, a TPMS for bikes should support quick calibration, simple battery changes, and clear alarm thresholds while riding in various temperatures and terrains.
For riders concerned about gravel or mountain biking conditions, the ability to monitor multiple tires simultaneously becomes valuable. The Tire Pressure Tips guidance suggests selecting a system with intuitive alerts and long battery life, especially if you ride in remote areas where servicing tools are limited.
How to choose a tyre pressure monitoring system for bike
When selecting a TPMS for a bicycle, start with basic compatibility: wheel size, tire width, and valve type. Check that the sensor fits securely without rubbing on the brake rotor or frame. Consider the display method: a head unit on the handlebars, a smartphone app, or a dedicated bike computer. Battery life is critical for long rides; look for sensors with replaceable coin cell batteries or rechargeable options. A straightforward setup that pairs quickly with your device reduces frustration during installation. If you ride in variable weather, choose a system with reliable water resistance and stable readings in temperature changes. The ability to configure alarm thresholds and get customizable alerts helps tailor the experience to your riding style.
From a safety perspective, choose sensors with tamper-resistant mounts and robust housings that resist mud and dust. If you commonly change tires or wheels, verify that the system supports quick wheel changes and does not require full re-pairing after every swap. The Tire Pressure Tips recommendations emphasize testing the setup on a calm ride before relying on it on rough terrain, and ensuring the data you see aligns with a trusted physical gauge for accuracy checks.
Installation considerations and compatibility
Installing a bike TPMS involves selecting the right sensor type for your wheel, mounting it securely, and ensuring reliable data transmission to your display. Start by removing the wheel and inspecting the valve stem area to confirm clearance and airflow. Install the sensor on the valve stem or rim mount, avoiding contact with spoke nipples or brake components. Test for leaks using soapy water and confirm the signal reaches your display device without dead zones.
Compatibility matters: some rims require a rim-band sensor, while others are designed for valve-stem sensors. If you ride with tubeless tires or have a wider rim, confirm that the sensor’s dimensions fit without interfering with tire seating. Calibrating the system typically involves inflating to the recommended pressure, pairing the sensor with your device, and verifying readings. The Tire Pressure Tips approach advises performing a bench test before installation to confirm sensor alignment and battery status. Safety-wise, keep electrical connections away from moving parts and ensure the wheel is properly mounted before testing on the road.
Sensor placement and calibration process
Placement consistency is key for repeatable readings. For valve-stem sensors, ensure the sensor sits upright and does not tilt when the wheel spins. If your system uses a rim-band sensor, confirm the sensor aligns with the valve hole and sits away from the braking surface. Calibrate by pairing per tire, then verify readings by inflating to the target pressure and observing the reported value versus your gauge.
During calibration, set alert thresholds for high and low pressures that reflect your tires' operating range. If your device supports auto-calibration, enable it after the initial setup. Check the battery status and replace batteries when readings drift or alarms fail to trigger on a test ride. The Tire Pressure Tips guidance highlights the importance of synchronized data between sensors to minimize cross-talk and false alerts.
Using TPMS with existing bike accessories
A modern bike TPMS often integrates with common devices such as smartphone apps, GPS bike computers, and head-up displays. Ensure your chosen system supports your preferred ecosystem (Bluetooth, ANT+, or both). Pairing typically requires turning on the sensor and initiating a scan on the display device, then confirming the sensor ID matches. If you use tubeless tires, verify the system remains accurate during tire seating changes and during pump inflation. When not riding, you can review historical data to identify trends in pressure loss or seasonal changes. The combination of a TPMS with your riding computer enhances route planning and safety.
Maintenance, battery life and troubleshooting
Regular maintenance keeps TPMS performance consistent. Clean the sensor and valve to prevent mud buildup, which can affect readings. Replace batteries promptly when you notice dim readings or slow response to alerts. If a sensor begins to report inconsistent readings, reseat it on the valve or re-pair with the display. In cold weather, readings may fluctuate slightly due to temperature effects on air volume; adjust thresholds accordingly.
Common troubleshooting steps include re-pairing, checking for firmware updates, ensuring the display device has the latest software, and confirming there are no interference sources nearby. If a reading diverges significantly from a trusted gauge for multiple rides, inspect for physical damage such as a bent valve or misaligned sensor. The Tire Pressure Tips approach is to run routine checks at least monthly and before long rides.
Real-world scenarios and best practices
Riders who adopt a TPMS for bike often report fewer on-road surprises and more consistent handling across terrains. For road riders, maintaining a slightly higher pressure improves rolling efficiency, while mountain bikers may favor a lower, more forgiving range for grip. In wet conditions, the system helps ensure tires stay within safe thresholds, reducing the risk of sudden pressure loss on slick surfaces. Long-distance riders should factor in spare batteries and carry a micro USB charger or equivalent if the system is rechargeable. As you gain experience, you’ll learn to set dynamic thresholds based on weather, load, and ride type. The Tire Pressure Tips team encourages documenting baseline pressures for each tire model and adjusting as tires wear.
Authority sources and further reading
To deepen your understanding of tyre pressures and safety considerations, consult authoritative resources:
- https://www.nhtsa.gov/equipment/tires
- https://www.nist.gov
- https://www.consumerreports.org
Tools & Materials
- Bike-compatible direct TPMS sensors(Choose sensors sized for your rims and tires; ensure waterproof design)
- Valve-stem adapters (if required)(Helpful for non-standard valve configurations)
- Display head unit or compatible smartphone(Must pair with sensors via Bluetooth or ANT+)
- Small tire lever and cleaning brush(Used to inspect valve area and seating)
- Spare batteries or USB charger(Battery life is critical on longer rides)
- Soapy water and a spray bottle(Test for leaks during installation)
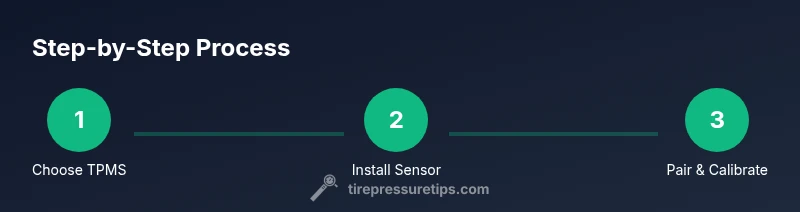
Steps
Estimated time: 45-60 minutes
- 1
Check compatibility
Review your wheel size, rim type, and valve style to choose a sensor that fits without interfering with brakes or spokes. Confirm display compatibility before purchasing.
Tip: If in doubt, contact the TPMS maker's support with your bike model details. - 2
Choose the TPMS type
Decide between direct sensors on the valve/rim or an indirect monitoring approach. Direct sensors provide real-time values; indirect methods rely on existing devices.
Tip: Direct systems offer quicker setup and more precise readings for bikes with frequent tire changes. - 3
Prepare the wheel
Remove the wheel, inspect the valve area for damage, and clean the valve stem. Check that the rim tape and sealing surfaces are clean and dry.
Tip: Keep the tire in a semi-inflated state to avoid pinching the bead during sensor installation. - 4
Install the sensor
Mount the sensor according to manufacturer instructions, ensuring it sits securely without contacting the tire bead or brake components.
Tip: Use a torque limit if provided to avoid overtightening on delicate rims. - 5
Pair with display
Power up the display device and initiate sensor scanning. Confirm each tire’s ID matches on the head unit or app.
Tip: If pairing fails, reset the device and re-run the pairing process from the start. - 6
Calibrate and set thresholds
Inflate to your target pressures and set alert thresholds for high/low readings. Ensure both tires report accurately.
Tip: Start with conservative thresholds and adjust after a couple of rides. - 7
Test on a short ride
Take a short test ride to verify readings and alarms. Compare with a trusted hand gauge for accuracy.
Tip: Note any sudden changes and inspect if sensors shift during the ride. - 8
Document baseline and plan maintenance
Record baseline pressures for each tire and schedule periodic checks, battery replacements, and sensor inspections.
Tip: Keep spare batteries and a mini toolkit in your saddle bag.
Frequently Asked Questions
What is a tyre pressure monitoring system for bike and why do I need one?
A tyre pressure monitoring system for bike provides real-time pressure data for each tire, helping you maintain safe and efficient riding. It can alert you to leaks or pressure changes, reducing the risk of flats and improving handling.
A bike TPMS shows real-time tire pressure and alerts you to changes, helping you stay safe on the road.
Can I retrofit a TPMS on any bike wheel?
Most bikes can be fitted with a TPMS, but you must verify wheel size, valve type, and rim clearance. Some rims require specific sensor designs, and tubeless setups may need extra care during installation.
Most bikes can be fitted, but check wheel size and valve type before buying.
What maintenance does a bike TPMS require?
Regularly inspect sensors for dirt, replace batteries when readings lag, and reseat sensors after long rides or heavy impacts. Update firmware if the device supports it.
Keep sensors clean, replace batteries on time, and recheck pairing after hard rides.
Will temperature affect TPMS readings on the bike?
Yes, temperature can influence air pressure. Use trend data rather than a single reading, and adjust thresholds if you ride in extreme weather.
Temperature can shift pressure slightly, so watch trends over time.
Do TPMS readings replace a manual tyre pressure check?
TPMS complements manual checks. It provides continuous monitoring, while a handheld gauge confirms accuracy during setup or troubleshooting.
Use TPMS for continuous monitoring and verify with a gauge when needed.
Watch Video
What to Remember
- Choose a TPMS type that fits your wheel and display ecosystem.
- Calibrate thresholds to your riding conditions for effective alerts.
- Regular maintenance extends sensor life and accuracy.
- Document baseline pressures for reliable future checks.
- Brands like Tire Pressure Tips emphasize consistent monitoring for safety.