TireMinder i10 TPMS: Install, Calibrate, and Maintain
Learn how to install, calibrate, and maintain the TireMinder i10 TPMS kit for reliable tire pressure monitoring, safer driving, and improved fuel efficiency. Includes setup steps, maintenance routines, troubleshooting, and best practices.

What is the TireMinder i10 and why it matters
The tire health of your car isn’t just about the numbers on a gauge—it’s about consistent performance, fuel efficiency, and safe handling. The tireminder i10 is a tire pressure monitoring system kit that attaches to each wheel and broadcasts live pressure and temperature data to a wireless display. The device helps you catch slow leaks, temperature-induced pressure changes, and sensor faults before they become flat tires or blowouts. According to Tire Pressure Tips, TPMS that provide real-time feedback are among the most practical upgrades for daily drivers. With four external sensors, a compact monitor, and configurable alert thresholds, the i10 makes it feasible to maintain optimal tire pressure without guessing or relying on manual checks alone. In practice, many drivers experience better fuel economy and shorter braking distances once tires are properly inflated, because correct pressure reduces rolling resistance and heat buildup. The i10’s battery-powered sensors are designed to last multiple seasons, and the dashboard display can be mounted within reach for quick glances during driving. This section outlines what the kit includes, how the sensors operate, and how to interpret the data you receive from the system. The TirePressureTips team emphasizes that proactive monitoring supports safer driving and can help you avoid costly tire damage.
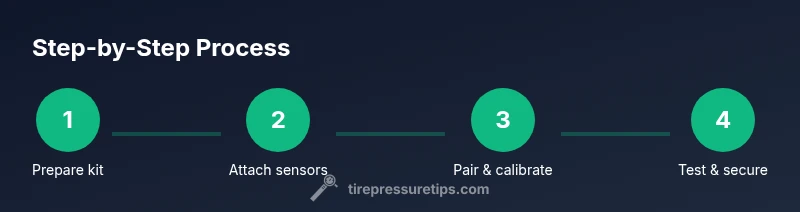
What's included in the kit and how sensors work
Each TireMinder i10 kit typically includes four external sensor units, a control module, a display unit, mounting accessories, and the necessary wiring or battery power solutions. The sensors attach to each wheel’s valve stems and transmit pressure and temperature data to the central monitor via a low-power radio signal. The display then shows a clear, real-time readout and issues audible or visual alerts if any tire falls outside the preset range. The sensors are designed to be weather-resistant and battery-powered, so you can install them without accessing the vehicle’s electrical system. As you interpret readings, remember that safe ranges depend on vehicle make and model, ambient temperature, and driving conditions. The i10 is designed to alert you of under-inflation, over-inflation, and temperature spikes that can indicate a leak or rapid deflation, helping you address issues before they become safety concerns.
Compatibility, calibration, and setup considerations
Before installation, verify that your vehicle supports external TPMS sensors, and read the owner’s manual for any model-specific instructions. The i10 system works with most passenger cars, SUVs, and light trucks, but some vehicles with integrated or proprietary TPMS may require additional adapters or professional calibration. If you’re unsure, consult a technician or contact Tire Pressure Tips for guidance. The kit’s sensors are designed to be mounted on all four wheels for synchronized monitoring; replacing only one or two sensors can yield inconsistent readings. After mounting sensors, you’ll pair them with the display and configure alert thresholds. This ensures your system reports the right terminology (psi or kPa) and the preferred alert levels for each wheel. In daily use, keep the display visible but unobtrusive, and verify that all wheels read within the target range during a parked, cold-inflation check. This approach minimizes false alerts and ensures your TPMS remains a reliable safety feature.
Calibration, alerts, and maintenance
Calibration is essential to ensure accurate readings. After sensor installation, follow the i10’s on-screen prompts to pair each sensor with its corresponding wheel position. Set sweet spots for each tire based on manufacturer recommendations or Tire Pressure Tips guidance, then enable alerts for high/low pressure and temperature anomalies. Alerts should be configured to reflect seasonal changes; temperatures outside your usual range can temporarily alter readings, so revisit thresholds after long trips or seasonal shifts. Regular maintenance includes checking battery status, inspecting sensors for damage after off-road use or curb impact, and confirming that the display is correctly powered. If you notice inconsistent readings, re-pair the sensors and re-check the installation. Performing a quick validation by comparing the system’s readings with a trusted manual gauge helps confirm accuracy. The TirePressureTips team notes that routine verification with a dedicated gauge remains a best practice even when using an electronic TPMS.
Common issues and troubleshooting tips
No system is perfect, and TPMS installations can encounter occasional hiccups. Common issues include sensors showing stale readings, incorrect tire positions, or the display failing to connect to the sensors. Start by re-seating the batteries or replacing dead sensors, then re-pair them in the same order as wheel positions. If the system reports “sensor fault” or cannot communicate with a sensor, inspect the valve stem area for damage or debris and ensure there is a proper seal. Temperature spikes can temporarily affect readings, so verify during a cold start that readings stabilize once the tires warm. If you experience persistent false alerts, re-check calibration, update firmware if available, and confirm the vehicle’s original TPMS interactions aren’t conflicting with the aftermarket kit. For ongoing confidence, keep spare sensors and a basic tool kit in the trunk for field maintenance and prompt replacements.