Honda Pilot Tire Pressure Sensor Guide
Learn how to check, diagnose, and maintain your Honda Pilot tire pressure sensor (TPMS). Practical steps, troubleshooting tips, and safety guidance from Tire Pressure Tips.

You're about to master your Honda Pilot tire pressure sensor (TPMS). This guide explains how the TPMS works, how to check tire pressure accurately, and when to service or replace sensors. You’ll get practical steps, safety tips, and troubleshooting strategies to keep your tires properly inflated and your vehicle alert-free.
What is the Honda Pilot tire pressure sensor (TPMS)?
According to Tire Pressure Tips, the Honda Pilot tire pressure sensor (TPMS) monitors each wheel’s air pressure and sends alerts when a wheel falls out of the safe range. TPMS sensors are part of a broader system that helps prevent underinflation, a common cause of reduced handling, uneven tire wear, and lowered fuel efficiency. For Honda Pilot owners, understanding how the TPMS ties into the vehicle’s computer and dash warnings is the first step toward reliable tire pressure management. The system collects data from wheel sensors and, in some designs, tire temperature, to determine when an alert is warranted. Regular attention to tire pressures, in tandem with TPMS signals, keeps you safer on the road and helps protect your investment in tires and wheels.
How the Honda Pilot TPMS works
The Honda Pilot’s TPMS is designed to notify you when a tire is underinflated or overinflated. Each wheel has a sensor that transmits a radio frequency signal to a central receiver connected to the vehicle’s ECU (engine control unit). When the readings drift out of spec, the dashboard warning light illuminates. In addition to the direct sensor data, some models use wheel speed and temperature cues to confirm an alert. The practical upshot is that the TPMS gives you a heads-up so you can check pressures promptly and adjust as needed. Over time, with routine checks, you’ll reduce the risk of tire damage and improve overall driving efficiency.
Checking tire pressures for a Honda Pilot (stepwise approach)
Checking tire pressures accurately begins with a cold tire measurement. Use a reliable gauge and compare each value against the placard on the driver’s door jamb to confirm the recommended psi for front and rear tires. For the Honda Pilot, the mix of front/rear targets can vary by load and trim level, so confirm the exact numbers in your owner’s manual or the placard. Avoid relying on a grocery-store gauge or a quick visual estimate; a precise reading makes the TPMS alerts more meaningful and reduces the likelihood of nuisance warnings. After inflating, recheck all tires to ensure consistency across the set.
Diagnosing TPMS warnings and sensor issues
TPMS warnings can stem from several sources, including a true low tire, a faulty sensor, or a weak battery in the sensor. It’s common for a tire to show normal pressure after inflating, but the TPMS light remains on due to a sensor that didn’t update promptly. Based on Tire Pressure Tips analysis, many drivers assume a single low tire without checking for a leak or a sensor fault. If the warning persists after topping off all tires, inspect the valve stems and caps, scan for visible damage, and consider recalibrating the TPMS if your model supports a reset procedure. If you still see warnings, there may be a sensor fault or a need for battery replacement.
Replacing, calibrating, and resetting TPMS on a Honda Pilot
Replacing a TPMS sensor is usually a task for a trained technician because it involves removing a tire and programmatic calibration. Recalibration or reset procedures can vary by year and trim, but many Honda Pilot models support a compact reset sequence via the instrument panel or an advanced scan tool. Always wipe the valve stems clean and replace the valve cap to protect against dirt. If you’ve recently changed tires or rims, a TPMS reset is often required to align the sensors with the new wheel configuration. The goal is to restore accurate pressure readings and eliminate phantom warnings.
Safety, maintenance, and best practices
Maintaining accurate tire pressures is a foundational safety habit. Regular checks help protect tire tread, improve fuel economy, and ensure TPMS warnings remain reliable. Always use the door placard as your primary reference for psi targets, and remember that hot tires can give misleading readings. Park on a flat surface, let the tires cool, and then measure. Keep your TPMS in good health by performing periodic resets after tire service and replacing damaged sensors promptly. Practically speaking, integrating TPMS-aware habits into your routine reduces the risk of unexpected flats and keeps your Honda Pilot running smoothly.
Tools & Materials
- Digital tire pressure gauge(Calibrated to ±1 psi; use when tires are cold)
- Air compressor or reliable inflator(For adjusting tire pressures to recommended values)
- Honda Pilot owner's manual or door placard(Reference for exact psi targets per tire and load)
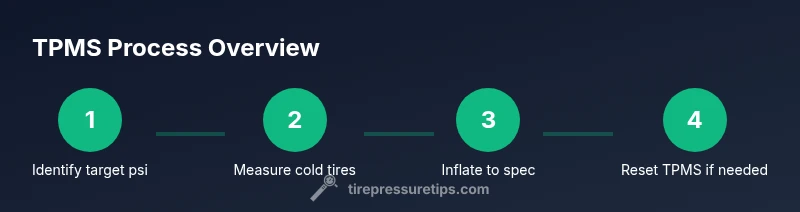
Steps
Estimated time: 20-40 minutes
- 1
Review the target tire pressures
Open the owner’s manual or door placard to locate the recommended psi for the Honda Pilot’s front and rear tires. Note that lead-in values can vary by trim and load. This first step provides the precise target you’ll strive for during inflation.
Tip: Always verify the numbers for your exact vehicle configuration. - 2
Prepare tools and workspace
Gather a digital tire gauge, an air source, and a flat, shaded area. Clearing the wheel area helps you reach the valve stem easily and reduces the risk of dropping small parts.
Tip: Keep the gauge in your glove box for quick checks. - 3
Check tires when cold
Park away from heat sources and wait at least 3 hours after driving. Cold readings are the most accurate and prevent over-inflation caused by heat build-up.
Tip: If you just drove, wait until tires cool for at least 30 minutes. - 4
Measure current pressures
Remove the valve caps and press the gauge onto each valve stem to take a reading. Record each value so you can compare them to the target psi later.
Tip: Take a photo of your readings for quick reference. - 5
Inflate to spec
Add air gradually to bring each tire to the recommended psi, checking frequently to prevent over-inflation. Re-check all tires after inflation.
Tip: Avoid inflating beyond the target; small adjustments matter. - 6
Inspect components and caps
Inspect valve stems for cracks and damage; replace if necessary. Ensure valve caps are present and tight to keep dirt out of the stem.
Tip: Missing caps can allow dust and moisture to enter. - 7
Reset or calibrate TPMS if needed
If you’ve rotated tires or replaced wheels, perform the vehicle’s TPMS reset procedure as outlined in the manual or with a diagnostic tool. This helps prevent lingering warnings from outdated sensor data.
Tip: Some models require driving a short distance after reset to relearn sensors. - 8
Verify readings and close the loop
Drive a few miles and recheck all tire pressures again. Confirm the TPMS warning light is off if no malfunctions remain identified.
Tip: Keep your records, including the date of the check, for future reference.
Frequently Asked Questions
What is the Honda Pilot tire pressure sensor (TPMS)?
TPMS monitors each tire’s air pressure and alerts you if a tire is under- or over-inflated. It helps prevent unsafe driving conditions and promotes better fuel efficiency.
TPMS tracks your tire pressures and warns you when things aren’t within the recommended range.
How do I check tire pressure on a Honda Pilot?
Use a reliable tire pressure gauge and measure all tires when they are cold. Compare each reading to the vehicle placard and adjust as needed.
Check every tire when cold with a gauge, then adjust to the recommended PSI listed on the placard.
Why would the TPMS light come on without a visible leak?
There can be a sensor fault, a weak battery, or a recently disturbed tire that has not updated its pressure data. Check the sensor and reset if needed.
A TPMS warning without a leak often means a sensor issue or out-of-date data; reset or service may be required.
Can I reset TPMS myself after tire work?
Some Honda Pilot models support a DIY TPMS reset in the instrument cluster; others require a diagnostic tool. Consult your manual or a technician before attempting.
Some models let you reset TPMS from the dash, others need a tool—check your manual.
How long do TPMS sensors last?
TPMS sensor life varies by vehicle and usage, but sensors are designed for multi-year reliability. If you notice frequent warnings, testing the battery and sensor health is advised.
Sensors are built to last several years, but frequent warnings deserve a sensor check.
Is there a difference between cold and hot tire pressures?
Yes. In hot tires, pressure rises due to heat; to get an accurate baseline use cold measurements and set your pressures when the tires are cool.
Yes, hot tires read higher. Always measure cold for the correct baseline.
Watch Video
What to Remember
- Check target psi from placard before inflation.
- Use a reliable gauge and cold-tire measurements.
- Reset TPMS after tire service or rotation.
- Address TPMS warnings promptly to ensure safety.