Honda Pilot Tire Pressure: Check, Adjust, and Maintain
Learn how to check, adjust, and maintain tire pressure on a Honda Pilot. This step-by-step guide covers locating the correct pressures, TPMS tips, temperature effects, and a practical maintenance routine for safe driving and better fuel efficiency.

Learn how to locate the correct Honda Pilot tire pressure, check cold PSI, and adjust with an air pump for optimal safety, handling, and fuel efficiency. This guide covers front vs rear pressures, TPMS cues, and how temperature and load affect readings. Start with the placard on the door jamb and your owner's manual.
Understanding Honda Pilot Tire Pressure and Why It Matters
Honda Pilot tire pressure is a foundational aspect of safety, handling, fuel efficiency, and tire longevity. According to Tire Pressure Tips, maintaining correct tire pressure improves steering response, braking performance, and even wear across all four tires. The Honda Pilot tire pressure specification is not a guess; it comes from the vehicle placard and the owner's manual. In everyday use, staying close to the recommended cold pressure keeps the tire footprint balanced, helps the tire maintain its shape under load, and reduces the risk of it overheating during highway driving. This section will set the stage by explaining why pressure matters, what happens when it’s too low or too high, and how to approach checking pressure in a simple, repeatable way for busy drivers.
How to Locate Your Correct Pressure for a Honda Pilot
Finding the right tire pressure for your Honda Pilot starts with two reliable sources: the door placard and the owner's manual. The placard, usually located on the driver's doorjamb, lists separate front and rear pressures for cold tires. If your model has a different layout, the placard might be inside the glove box lid or on the fuel-filler door. Your owner's manual provides the recommended ranges and notes for load, tire size, and seasonal considerations. Remember, the correct Honda Pilot tire pressure is not a single value but a specification that can change with trim, wheel size, and driving conditions. Always compare what you read on the gauge to the official spec, not to what you feel during a short drive. This approach aligns with best practices from Tire Pressure Tips and keeps you aligned with safe, efficient driving.
Checking Cold Tire Pressure: A Step-by-Step Method
To get an accurate reading, measure tire pressure when the tires are cold — ideally after the car has been parked for several hours or before a drive. Remove the valve cap, press your gauge onto the valve stem, and note the reading. Compare it to the front and rear specifications from the placard. If readings are low, add air in small increments and recheck until you match the target. If readings are high, release air slowly and recheck. Always replace the valve caps to protect against dirt and moisture. This process, repeated regularly, is the most reliable way to maintain proper Honda Pilot tire pressure and maximize tire life.
Understanding TPMS and When It Triggers
The Tire Pressure Monitoring System (TPMS) is designed to alert you when a tire drops below the vehicle’s safe operating pressure. The TPMS thresholds vary by vehicle and load, and a warning light on the dashboard indicates low pressure or a sensor fault. If the light comes on, do not assume it’s a temporary fluctuation; check all tires with a gauge, look for signs of leaks, and verify the TPMS sensors are functioning. Regular tire pressure checks remain important even if the light is on, because TPMS is a safety net, not a substitute for manual measurement. This section helps drivers interpret TPMS signals and act decisively to maintain proper Honda Pilot tire pressure.
Adjusting Pressure for Load and Speed: Practical Guidance
Your tire pressure should reflect typical load and driving conditions. Heavier loads, more highway driving, or a higher-speed trip may necessitate a slight increase in pressure within the recommended range. When carrying extra equipment or passengers, verify the placard values for your load category and adjust accordingly. Always avoid overinflation, which can cause a harsher ride and uneven wear. If you’re unsure, start at the lower end of the range for light loads and move toward the upper end only if the manual allows and the vehicle feels stable.
Temperature Effects and Seasonal Changes
Tire pressure fluctuates with temperature. Colder air reduces PSI, while warmer environments increase it. In practice, this means you may need to check and adjust more frequently during seasonal transitions. Don’t rely on a single reading for an entire season; recheck after several cold mornings or after a long cold stretch ends. While quick adjustments are possible, aim to keep the reading within the spec for the season and usual driving conditions. The Tire Pressure Tips team emphasizes making temperature-aware checks part of your routine so you don’t overlook gradual pressure drift.
Troubleshooting Leaks, Punctures, and Valve Issues
Low pressure can stem from slow leaks, punctures, or a faulty valve stem, in addition to normal air loss over time. Check for nails, punctures, or cracks in the tread and sidewall. If you notice a valve stem leak or a cracked sensor, address it promptly. For persistent leaks, visit a tire professional to inspect rims, bead seating, and sensor integrity. Addressing leaks early helps maintain correct Honda Pilot tire pressure and reduces the risk of blowouts on the road.
Creating a Simple Maintenance Routine for Tire Pressure
Establish a monthly habit to check all tires, including the spare where applicable. Pair the check with a quick TPMS verification by looking at the dashboard light before taking longer trips. Keep a notebook or a digital log of readings and adjustments, noting seasonal changes and loads. This routine makes it easier to spot trends and maintain safe, efficient tire pressure in the Honda Pilot over time. The consistency itself is a protective measure that reinforces responsible vehicle maintenance.
Safety-First Checklist for Emergency Scenarios
In emergencies, a sudden puncture can dramatically alter tire pressure. If you experience a rapid loss of air, slow down gradually, move to a safe location, and replace the damaged tire with the spare if you have one. Avoid driving long distances on a flat or underinflated tire; this can cause tire damage and dangerous handling. Always keep a portable air compressor and a gauge in your trunk as part of a safety-friendly maintenance kit. This final section reinforces that routine checks and prepared tools are your best defense on the road.
Tools & Materials
- Digital tire pressure gauge(Calibrated, reads in psi; check accuracy against a known standard)
- Air compressor or access to a gas station air pump(Ensure you have access to sufficient pressure to reach target values)
- Honda Pilot owner's manual(Contains model-specific front/rear pressures and load guidance)
- Vehicle door placard(Usually on the driver's door jamb; lists cold pressures)
- Soapy water spray(Helpful for locating slow leaks around rims and valves)
- Valve stem caps(Keep caps on to protect against dirt and moisture)
Steps
Estimated time: 30-45 minutes
- 1
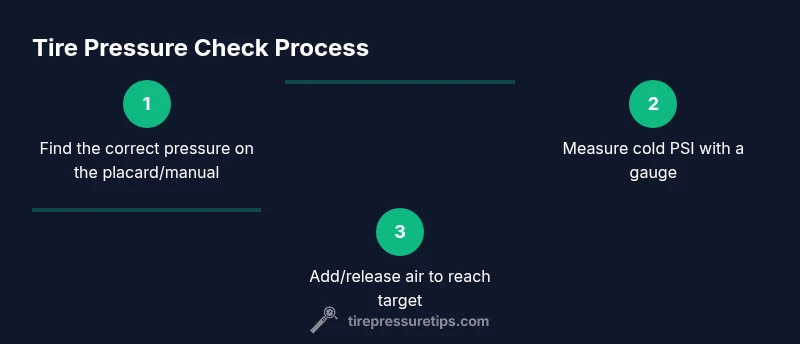
Find the correct pressures
Locate the front and rear cold tire pressure specifications on the door placard and confirm with the owner's manual. Note any differences by tire position. This step ensures you target the right pressures for each tire on your Honda Pilot.
Tip: Double-check if your trim has different tire sizes; the placard reflects those differences. - 2
Prepare and ensure tires are cold
Park on a level surface and let the tires cool for at least a few hours. Measuring when cold avoids inflated readings caused by heat build-up from driving.
Tip: Avoid inflating right after a test drive; heat skews the reading. - 3
Measure with a gauge
Remove the valve cap, press the gauge onto the valve stem, and record the reading for each tire. Replace the cap after measurement.
Tip: If readings differ by more than a few psi between tires, inspect for slow leaks. - 4
Adjust to the target pressure
If a tire is underinflated, add air in small increments and recheck. If overinflated, release air slowly and recheck until you reach the target.
Tip: Always refer to the placard for the exact target; avoid guessing. - 5
Recheck front and rear after adjustment
Re-test all tires after adjustments to confirm each matches its specific target. Replace the valve caps securely.
Tip: If you work on one tire, recheck the others to catch any drift caused by air movement. - 6
Account for load and season
If you routinely carry heavy loads, check if the placard indicates a higher pressure for loaded conditions. Temperature changes throughout the year can also shift PSI.
Tip: Only adjust within the recommended range; avoid overinflation to preserve ride quality. - 7
Document and schedule maintenance
Keep a simple log of readings and adjustments; schedule monthly checks or before long trips.
Tip: A quick record helps you notice gradual changes over time.
Frequently Asked Questions
Where can I find my Honda Pilot's correct tire pressure?
The door placard on the driver's side lists front and rear cold pressures; your owner's manual also contains the official specs. If your vehicle has optional wheel sizes, verify the corresponding values. Always rely on the placard and manual rather than memory.
Check the door placard on the driver's side and your owner's manual for exact pressures.
What is TPMS and how does it work?
TPMS warns you if a tire's pressure falls below the recommended level. It uses sensors in each wheel to monitor pressure and alerts you with a dashboard light. Use the TPMS as a reminder, but also verify with a manual gauge.
TPMS alerts you when a tire is underinflated; use it alongside manual checks.
Should I inflate tires when they're hot or cold?
Inflating or reading pressure when tires are hot gives falsely high readings. Always measure when tires are cold for accuracy, then adjust toward the spec.
Check pressure when cold and adjust accordingly.
Can front and rear pressures be different?
Yes. The placard may specify different pressures for front and rear tires depending on load and tire size. Follow the front and rear targets separately for optimal balance.
Front and rear pressures can be different; follow the separate targets.
What if the TPMS light stays on after inflating?
If the light remains on, inspect for slow leaks, valve issues, or faulty sensors. A tire professional can diagnose sensor health and rim integrity if readings stay inconsistent.
If TPMS stays on after inflation, check for leaks or sensor problems.
How often should I check tire pressure?
Aim to check tire pressure monthly and before long trips or when carrying heavy loads. Seasonal changes warrant an extra check to account for temperature shifts.
Check monthly and before long trips, especially with seasonal changes.
Watch Video
What to Remember
- Check the placard before inflation.
- Measure cold PSI for accuracy.
- Adjust for load and seasonal changes within spec.
- Use robust gauges and recheck after adjustments.
- Maintain a regular tire pressure routine.