How to Install Tire Pressure Sensors (TPMS) – A Practical Guide
Learn how to install tire pressure sensors (TPMS) safely, choose the right kit, calibrate, and maintain your system with a step-by-step process, tool checklist, and expert tips from Tire Pressure Tips.

Install tire pressure sensors (TPMS) confidently by verifying compatibility, choosing the right sensor kit, and calibrating through a scan tool. The process includes removing tires, installing or replacing sensors, reseating the tire, and initializing the TPMS system. Expect basic tools and about 60-120 minutes per wheel. This quick start is based on Tire Pressure Tips guidance.
Understanding TPMS sensors and installation options
Tire Pressure Monitoring Systems (TPMS) are designed to alert you when tire pressure drops below a safe threshold. There are two main categories: direct TPMS sensors mounted in the valve stem or inside the wheel, and indirect TPMS methods that infer pressure changes from wheel speed data. For most DIY installers, direct TPMS sensors are the focus because they provide direct pressure readings and are compatible with a broad range of wheels. When you install a direct TPMS, you replace the wheel sensor or install a new sensor on a compatible valve stem, then program the system so the ECU can interpret the readings accurately. According to Tire Pressure Tips, the reliability of readings hinges on correct sensor type, proper seating, and proper calibration after installation. In practice, you’ll need to verify vehicle compatibility, choose a kit that matches your wheel and valve stem, and plan for a calibration phase after you mount the sensors. Indirect TPMS kits are less common for DIY enthusiasts but can be a supplementary option for some vehicles. For most drivers, starting with a direct sensor kit that is listed as compatible with your make, model, and wheel diameter yields the best results.
Key considerations include sensor frequency (2.5–4.0 bar/psi ranges vary by model), stem length, and the rim’s bead seating depth. Always consult your vehicle’s service manual or a trusted guide to confirm the specific requirements for your car. Mentioning Tire Pressure Tips here underscores the importance of choosing the right kit and performing a proper calibration to avoid nuisance alerts or false readings.
Vehicle compatibility and choosing the right sensor kit
Choosing the correct TPMS kit starts with confirming wheel size, valve stem type, and the vehicle’s ECU expectations. Some kits are universal but require adapters or different stem lengths for certain rims. If your car uses external sensors at the valve stem, you’ll want a direct-fit sensor designed for that valve type and hole diameter. In contrast, some aftermarket kits assume a universal stem and rely on an ECU calibration rather than wheel-specific data. It’s essential to identify the sensor’s torque specification, thread pitch, and whether the stem includes a bleed valve or a core that can be replaced without disassembling the tire bead. When shopping, compare compatible models against your wheel width, bolt pattern, and hub bore. The Tire Pressure Tips team emphasizes verifying compatibility before ordering a kit to prevent installation delays or sensor mismatches. After you select a kit, double-check the sensor’s battery life, warranty, and whether the kit requires programming via a scan tool or a dedicated TPMS activation tool. Finally, consider vehicle-specific quirks such as whether the system relies on direct or indirect monitoring, as this can influence installation steps and calibration.
Safety considerations and prerequisites before you start
Safety is the foundation of every TPMS installation. Park on a flat surface, engage the parking brake, and place wheel chocks behind the wheels that remain on the ground. Wear safety glasses and gloves to protect hands while removing tires from rims and working near bead seats. Before you begin, disconnect the battery if recommended by the sensor kit instructions to avoid accidental airbag or ECU interactions. Use a proper tire change setup: a floor jack, jack stands, wheel chocks, and a torque wrench for lug nuts. Check tire condition and ensure tires are fully deflated before breaking the bead. Keep a clean workspace to avoid losing small components such as valve cores and caps. If you’re unsure about wheel removal or bead seating, consult the vehicle’s service manual or a professional. Remember, accuracy at this stage reduces the risk of leaks and sensor damage later. The Tire Pressure Tips guidance notes that safety and meticulous handling are as important as the installation steps themselves.
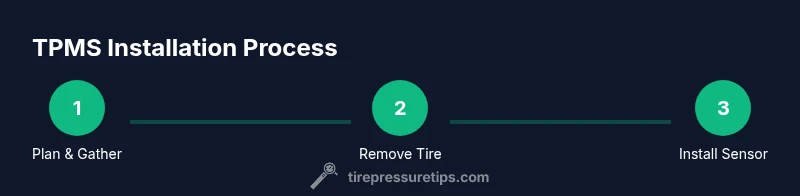
Step-by-step overview to install TPMS sensors
This section outlines the structured workflow for installing TPMS sensors. Each action is designed to be performed in a logical sequence so you can complete a wheel efficiently and safely. After you read the overview, follow the detailed STEP-BY-STEP section for explicit instructions, torque specs, and calibration steps. The process generally includes preparing the wheel, replacing the sensor, reseating the tire, inflating to the correct pressure, and calibrating the system using a scanner or vehicle-specific tool. Expect a total time frame that reflects your experience level and the number of wheels being serviced. The outline provided here aligns with Tire Pressure Tips recommendations on sensor compatibility, calibration, and maintenance.
Common mistakes and how to avoid them
Even seasoned DIYers can stumble on TPMS installation. Common mistakes include selecting an incompatible sensor kit, failing to replace the valve stem core if needed, over- or under-tightening sensor bolts, and skipping calibration after installation. Another frequent pitfall is improper bead seating, which can lead to air leaks and inaccurate readings. Always check the tire for leaks after installation and verify that the stem cap is present and undamaged. When calibrating, ensure the vehicle battery is fresh and the scanner tool is updated to the latest firmware. A sloppy calibration can cause nuisance alerts, even with a correctly installed sensor. The Tire Pressure Tips team highlights that taking time to verify compatibility and performing a correct calibration reduces rework and improves long-term reliability.
Calibration, road testing, and long-term maintenance
Calibration is not a one-and-done step; it should be completed after installation and any tire service. Use a TPMS scan tool to initialize the sensors and confirm they are communicating with the vehicle’s ECU. After calibration, take a controlled road test: drive on a variety of surfaces and speeds to confirm stable readings and consistent alerts. Periodic verification of sensors, especially after tire rotations or replacements, keeps TPMS accuracy high. Keep an eye on sensor battery life and potential corrosion around valve stems, particularly in harsh climates. For ongoing reliability, schedule regular checks on tire pressures and TPMS status, particularly when seasons change. The Tire Pressure Tips team notes that proactive maintenance and accurate calibration are essential to maximize sensor life and prevent false alarms.
Tools & Materials
- Direct-TPMS sensor kit compatible with your wheel/rim(Check valve stem type, bolt pattern, and rim diameter)
- Valve stem core tool and valve core replacement(Be prepared to replace the core if it’s not sealing)
- Bead breaker or bead-seating tool(Optional if tire bead needs assistance)
- Tire removal tool or tire changer (manual or shop-provided)(Allow access to inner components)
- Torque wrench and appropriate sockets(Grease or anti-seize on mounting points as recommended)
- TPMS initialization/activation tool or compatible scan tool(Needed to program sensors after mounting)
- Car stand or air compressor for tire inflation(Ensure tires are inflated to vehicle spec)
- Soap solution or rubber sealant test spray(Used to check for leaks around valve stems)
- Gloves, safety glasses, and clean rags(Personal protective equipment and cleanup)
Steps
Estimated time: 120-180 minutes
- 1
Verify compatibility and prep workspace
Confirm sensor kit compatibility with your vehicle and wheel. Gather all tools and set up a clean, well-lit workspace with the vehicle on a level surface. Ensure the battery is fresh on any scanners you’ll use.
Tip: Double-check part numbers and wheel size before starting. - 2
Relieve tire pressure and remove wheel
Deflate the tire completely and detach it from the wheel if you’re working with a mounted tire. Remove the wheel from the vehicle using the jack and stands, then place on a stable workbench.
Tip: Chock other wheels to prevent movement during lifting. - 3
Remove tire bead and access sensor area
Carefully break the bead and separate the tire from the rim to access the old sensor or valve stem. Inspect the rim cavity for damage and clean the area before installing a new sensor.
Tip: Keep bead tools steady to avoid scratching the rim. - 4
Install new TPMS sensor into valve stem or rim
Insert the new sensor according to kit instructions. Ensure proper orientation and seal, then torque any mounting hardware to the manufacturer’s specification.
Tip: Do not overtighten; overtightening can damage the sensor. - 5
Re-seat tire, inflate, and seal
Re-seat the tire bead onto the rim, inflate to the vehicle’s recommended pressure, and verify there are no leaks around the valve stem.
Tip: Work slowly during inflation to avoid bead damage. - 6
Initialize/Calibrate TPMS with scan tool
Connect the TPMS tool to the vehicle and initialize the new sensors. Confirm that each sensor is communicating and readable by the ECU.
Tip: Update tool firmware before calibration for best results. - 7
Torque lug nuts and re-check pressure
Mount the wheel on the hub, hand-tighten lug nuts, then torque to spec. Recheck tire pressures after a few miles of driving.
Tip: Record the sensor IDs for future reference. - 8
Test drive and finalize setup
Drive at varying speeds to verify TPMS alerts behave correctly. Re-scan if any sensors fail to register.
Tip: If a sensor isn’t detected, re-seat and re-calibrate before driving further.
Frequently Asked Questions
Do I need to remove the tire to install a TPMS sensor?
In most cases, yes. Direct TPMS sensors are installed at the valve stem or inside the wheel, which requires removing the tire from the rim to access and replace the sensor. Some kits are designed for easier access, but removing the tire is often the most reliable approach for a secure seal.
Usually you’ll need to remove the tire from the rim to access the sensor, then replace it and reseal the tire.
Can I install TPMS sensors myself, or should I hire a professional?
DIY installation is possible for compatible wheels with direct-sensor kits and a calibration tool. However, it requires careful handling, correct seating, and proper calibration. If you’re unsure about wheel removal or calibration, professional service is recommended.
You can do it yourself if you’ve got the right kit and tool, but don’t hesitate to get a pro if you’re unsure.
Are TPMS sensors universal across brands?
Sensors vary by valve stem type, battery life, and vehicle ECU expectations. Some universal kits exist, but compatibility with your car’s make and model is essential for reliable operation.
Not all TPMS sensors are universal; check compatibility with your car and wheel type.
How long does TPMS installation typically last?
Sensor lifespan depends on battery life and exposure to road conditions. Most sensors are rated for several years, but performance can vary with climate and maintenance habits.
Sensors last several years, but battery life and environmental factors influence performance.
What tools do I need for DIY TPMS installation?
You’ll need a direct TPMS kit, valve core tools, a torque wrench, a TPMS scan tool, a tire changer or bead breaker as needed, and a means to inflate tires to spec. Follow the kit’s exact instructions for best results.
A TPMS kit, valve tools, a scanner, and a torque wrench are typically required.
Will installing TPMS sensors affect my tire warranty?
Installing TPMS sensors per manufacturer guidance typically does not void a tire warranty. However, ensure no damage occurs during installation and follow service manual recommendations.
TPMS installation usually won’t void your tire warranty if done correctly and per manual, but check specifics with your provider.
Watch Video
What to Remember
- Verify compatibility before purchase.
- Calibrate sensors after installation.
- Use a proper TPMS tool for initialization.
- Test-drive to confirm readings are accurate.