Tire Pressure Tester: Complete Guide to Accurate Tire Pressure Readings
Learn how to select a tire pressure tester, calibrate it, read psi accurately, and troubleshoot common issues to keep tires properly inflated and safe.

With a tire pressure tester, you can measure your tire pressure accurately and maintain optimal performance. This guide helps you choose the right tester, understand analog versus digital gauges, and perform a reliable check from cold tires. You'll learn calibration basics, how to read readings, and common mistakes to avoid so you keep tires safe and fuel-efficient.
What a tire pressure tester does and why it matters
According to Tire Pressure Tips, a tire pressure tester is the primary tool for verifying inflation: it converts the pressure inside each tire into a readable value you can act on. Accurate readings help with fuel efficiency, tire wear, and overall handling. Regular use of a tester reduces the risk of underinflation, which can compromise braking distance, traction, and ride comfort. This section covers how these devices work, the differences between common types, and how to interpret readings in the context of your vehicle’s recommended psi. The goal is to move you from guesswork to precise inflation that keeps you safe, saves money, and extends tire life.
Types of tire pressure testers: analog vs digital
Analog testers use a dial or needle to display pressure, while digital models show a numeric value on a screen. Analog gauges can drain battery-free energy and are extremely durable, but readability depends on the dial scale. Digital testers offer quick readings, unit conversion (psi, bar, kPa), and often a hold function to lock a reading. However, they rely on batteries and may require calibration checks if readings drift. In practice, many drivers prefer digital testers for speed and clarity, while enthusiasts value the reliability of a good analog model in all weather conditions.
Choosing a tester: features to look for
When selecting a tire pressure tester, consider range (it should cover at least 0–60 psi), unit options (psi, kPa, bar), and resolution. Look for a tester with a built-in bleed feature to fine-tune pressure without removing the valve stem. A durable build, comfortable grip, and a readable display are essential for quick checks on the go. If you drive multiple vehicles, ensure the tester is compatible with different valve stems and wheel configurations. A simple calibration check using a known reference is a big plus.
Preparing to test: prerequisites and settings
Begin on a level surface with the vehicle off and cooled tires for an accurate reading. If you’ve just driven, wait at least three hours before testing, or test first thing in the morning. Remove the valve caps, inspect the valve stems for damage, and keep a clean working area to prevent dirt from entering the valve. If you’re using an inflator with a gauge, pre-set the target pressure to reduce the number of adjustments needed.
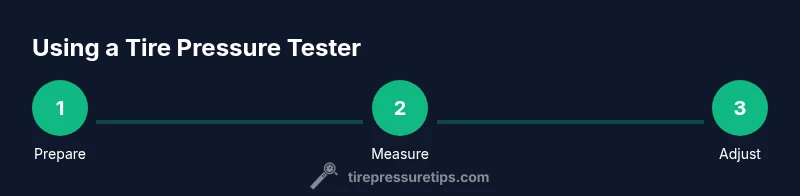
Step-by-step: how to test your tires
- Gather your tester, inflator, manual, and a clean rag to wipe stems. 2) Find the correct cold PSI for your vehicle from the placard or manual. 3) Attach the tester firmly to the valve stem and read the pressure. 4) If low, inflate in small increments and recheck after a moment. 5) If high, bleed air using the tester’s bleed function and recheck.
Tip: Always recheck after inflation to ensure accurate readings, and replace valve caps securely afterward.
Reading the numbers: understanding PSI and temperature effects
PSI varies slightly with ambient temperature. Readings are most accurate when tires are cold (not driven for at least three hours). After heating, air expands, showing higher pressure than the actual cold value. Use the vehicle’s recommended cold PSI as the target for inflation. If you’re inflating for a specific load or climate, consider minor adjustments and recheck.
Common mistakes and how to avoid them
Common mistakes include using a tester with uncalibrated accuracy, inflating or deflating without rechecking, and testing hot tires. Always test cold tires, verify against the manufacturer’s spec, and ensure the gauge is reading correctly by comparing to a known reference. Don’t forget to seal the valve caps after testing to protect the valve from dirt.
Maintenance and calibration for lasting accuracy
Store your tester in a clean, dry place and avoid extreme temperatures. Periodically calibrate using a known reference gauge or a calibration kit if available. Replace batteries promptly in digital models and keep the display protected from impact. A quick wipe-down after each use helps maintain readable numerics and prevents corrosion on connections.
Daily-use tips and maintenance routine
Keep a small toolkit in the car with your tester, an inflator with gauge, and a small notebook to log readings by tire position. Check tires on a monthly basis and before long trips, especially in extreme temperatures. Regular checks help catch leaks early and maintain optimal fuel efficiency and safety.
Tools & Materials
- Tire pressure tester (digital or analog)(Choose a model with a built-in gauge and, if possible, a bleed feature for precise adjustments.)
- Vehicle owner’s manual or door placard(Find the recommended cold psi per tire size and load.)
- Air compressor or inflator with gauge(Prefer a gauge on the inflator for accurate topping up.)
- Valve core tool/valve cap remover (optional)(Helpful for hard-to-reach stems.)
- Cleaning rag(Wipe nozzle and valve stem before and after testing.)
- Calibration reference gauge (optional)(Use to verify tester accuracy periodically.)
- Notebook or app for logging readings(Track tire pressure over time and seasons.)
Steps
Estimated time: Estimated total time: 25-40 minutes
- 1
Prepare tools and venue
Gather your tester, inflator, manual, and a clean area. Park on level ground and ensure the vehicle is off before testing to avoid readings influenced by heat or movement.
Tip: Keep valve stems clean and remove the cap to inspect for damage. - 2
Check the target psi
Locate the vehicle’s recommended cold psi from the placard on the door frame or owner's manual. Write the numbers down for quick reference during inflation.
Tip: Remember to test when tires are cold for accuracy. - 3
Attach and read the tester
Remove the valve cap and securely attach the tester to the valve stem. Read the displayed pressure and compare to the target psi.
Tip: If the gauge is difficult to read, adjust your body angle or switch to a digital display. - 4
Inflate or deflate as needed
If low, inflate in small increments and recheck after a short wait. If high, use the tester's bleed function or release air gradually and recheck.
Tip: Aim for within 1–2 psi of the target before final check. - 5
Recheck to confirm
After any adjustment, reattach or recheck all tires to ensure consistency. Record the final numbers for your records.
Tip: A quick log helps spot leaks early. - 6
Seal and store
Replace valve caps securely to protect stems and prevent dirt entry. Store the tester in a clean, dry place in your vehicle.
Tip: A protective case reduces wear on the gauge. - 7
Calibration check (optional)
If you have a reference gauge, perform a quick calibration check to verify accuracy. Repeat if discrepancies are found.
Tip: Calibration should be done periodically, especially if readings drift. - 8
Log and plan next check
Record the date and psi readings for each tire and plan your next check, particularly before trips or seasonal changes.
Tip: Regular checks catch leaks early and keep tires in good condition. - 9
Clean up and safe disposal
Wipe surfaces and close the valve caps. Dispose of any used materials responsibly if present.
Tip: Return the tools to your car kit for easy access.
Frequently Asked Questions
What is a tire pressure tester and why do I need one?
A tire pressure tester is a handheld device that measures air pressure inside tires. It provides a numeric reading you can act on to ensure proper inflation, which improves safety, fuel efficiency, and tire life.
A tire pressure tester measures your tire pressure so you can inflate to the right level, improving safety and fuel economy.
Analog vs digital: which tester is best for beginners?
For beginners, a digital tester offers clear, quick readings and unit options, while analog gauges can be more durable and battery-free. Both can be accurate if calibrated properly.
Digital is easier to read, but an analog gauge can be very reliable with proper care.
How do I calibrate a tire pressure tester?
Calibration involves comparing your tester against a known reference gauge or standard. If readings differ, adjust per the manufacturer’s instructions or replace the device.
Calibrate by checking against a known gauge and adjust as needed.
Can I rely on TPMS instead of a gauge?
TPMS provides a warning when pressure is low but does not display exact psi. Use a dedicated tester to verify exact inflation and ensure compliance with spec.
TPMS warns but doesn’t give exact psi; use a tester for precise inflation.
How often should I check tire pressure?
Check tires monthly and before long trips, especially in temperature changes. Always verify against the manufacturer’s cold-psi spec.
Check your tires monthly and before trips to stay safe.
What should I do if readings vary between tires?
A small variation is normal, but large differences may indicate leaks, slow punctures, or sensor issues. Inspect valves and tires, and recheck with a tester.
If readings vary a lot, inspect tires and valves and recheck to rule out leaks.
What to Remember
- Test cold tires for accuracy
- Use the built-in bleed function when needed
- Always compare to manufacturer PSI
- Log readings to track leaks
- Calibrate periodically