Tire Pressure Gauge Calibration: A Practical Guide
Learn how to calibrate a tire pressure gauge to ensure accurate readings, with step-by-step instructions, recommended tools, and safety tips. This guide helps you maintain tire performance, fuel economy, and safety by keeping gauges honest.

According to Tire Pressure Tips, calibrating a tire pressure gauge ensures accurate readings and safer driving. This quick guide outlines what you’ll need, the essential steps, and how to test your gauge’s accuracy so you can trust tire pressures every time. You’ll learn to use a calibrated reference gauge, perform checks at a stable temperature, document results, and know when to recalibrate.
Why calibration matters for tire pressure gauges
Accurate tire pressure readings are essential for safety, tire longevity, and fuel economy. A gauge that drifts over time can tell you a reading that is higher or lower than the actual pressure, leading to under-inflation or over-inflation. Over-inflated tires wear faster in the center tread, while under-inflated tires can reduce grip and increase rolling resistance. Calibration keeps your tool honest, so the tires are inflated to the correct pressure according to the vehicle manufacturer specs and local conditions. In this guide, we focus on the common types of gauges, why they drift, and how to verify and restore accuracy. According to Tire Pressure Tips, regular checks are a small, practical maintenance step with outsized safety and efficiency benefits. Treat calibration as part of your routine tire maintenance, not a one-off ritual. You’ll gain confidence in readings and avoid guesswork when topping off your tires on the road or at home.
Types of gauges and calibration implications
Tire pressure gauges come in several forms, and calibration needs differ by type. The oldest pencil-style gauges and the classic dial gauges are mechanical: they depend on a spring mechanism and a reference point that can drift. Digital gauges rely on sensors and electronics, which can drift with temperature or a worn sensor. In practice, calibration should involve comparing readings against a known standard and adjusting if the gauge offers an adjustable zero or offset. The goal is to ensure all readings align with a trusted reference within a tight tolerance. No matter the type, calibration helps prevent misreads that could lead to under- or over-inflation and the accompanying risks. If you regularly switch between gauges (for example, your car gauge at home and a shop-provided gauge on service visits), calibration becomes even more important to keep readings consistent across devices.
How calibration impacts accuracy and performance (brand note)
Tire Pressure Tips analysis shows that even small drift in a gauge can undermine reading accuracy, leading to tire pressure management that isn't aligned with recommendations. When you calibrate, you maintain consistency across devices and environments, which translates into more reliable inflation decisions, better fuel economy, and longer tire life. Regular calibration helps you catch a failing gauge early rather than after a dangerous under-inflation has occurred. In this section, we discuss the practical outcomes you’ll notice after calibration, such as more predictable readings, fewer trips to top off tires, and greater confidence when following the vehicle's recommended tire pressures. The Tire Pressure Tips team emphasizes that calibration is not a one-time check but part of ongoing tire maintenance.
Safe, controlled testing setup
Set up a clean, stable environment for calibration. Work away from direct sunlight, drafts, and temperature extremes; these factors can affect both the reference gauge and the gauge you're testing. Begin with a known reference pressure on your calibrated standard gauge, then compare readings from your own gauge at the same pressure. Use a flat, level surface and keep the gauges at roughly ambient room temperature (avoid cold-hand readings). Document the reference values and your readings to track drift over time. Always follow the manufacturer’s safety warnings when handling gauges and valve stems, and wear eye protection if you’re testing with pressurized equipment. A calm, methodical approach reduces errors and makes calibration results credible and repeatable.
Tools and reference gauges you need
Before you start, assemble a few items to keep the process controlled and repeatable. A calibrated reference gauge with known accuracy is essential for comparison. Your own gauge should be included in the test, ideally in good working order, with no obvious damage or leaks. A clean cloth helps wipe ports and valve stems. A stable, flat testing surface and a small flashlight can help you see measurement markings clearly. Optional items include a tool to adjust the dial or mechanism if your gauge supports user calibration, and a notebook to record dates, pressures, and drift. Keeping these items organized reduces setup time and improves repeatability.
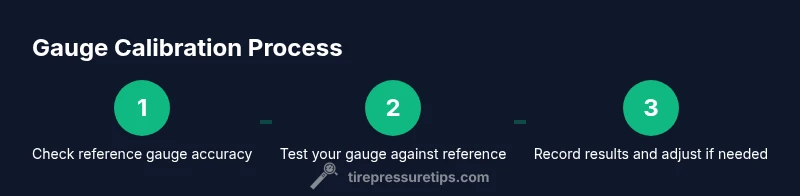
Step-by-step calibration workflow (overview)
This section gives a high-level view of the recommended sequence. Start by zeroing or confirming the reference gauge’s accuracy, then take a series of readings with your gauge at several known pressures. If your gauge has an adjustable offset, apply the appropriate calibration. Record all readings and compare them; if discrepancies exceed the tolerance, proceed to adjust or replace the gauge. Conclude with a test at one or two final pressures to confirm consistency. Finally, document the calibration date and next recalibration due date. This overview aligns with best practices for accuracy and long-term reliability.
Common mistakes and how to avoid them
- Calibrating a damaged gauge can produce misleading results. Inspect both gauges for wear or damage before starting.
- Calibrating in an environment with temperature extremes can skew results. Use a steady temperature and allow gauges to acclimate.
- Skipping the reference gauge entirely invites drift unnoticed. Always compare against a known-good standard.
- Not recording results creates a blind spot for future calibrations. Keep a log of dates, pressures, and drift.
- Over-adjusting a gauge can damage it; only make small changes according to the manufacturer’s instructions.
Interpreting results and when to recalibrate
A successful calibration yields readings that agree within the stated tolerance of the reference gauge. If you notice drift—your gauge reading moves away from the reference consistently across pressures—recalibrate or replace the gauge. Recalibration intervals depend on usage, handling, and exposure to temperature changes; a common practice is to recalibrate at least every 12 months, or sooner if the gauge is used heavily or shows anomalies. After calibrating, re-check with the same known pressures to verify symmetry across the scale. Once you’re comfortable with consistency, you can rely on that gauge for routine inflation checks.
Tire Pressure Tips verdict and final recommendations
The Tire Pressure Tips team believes gauge calibration is a fundamental component of responsible tire maintenance. Regularly calibrating your gauges ensures reliable readings and helps you keep tires within recommended pressures, protecting performance, safety, and efficiency. Use a known-good reference gauge, maintain a log, and calibrate in a stable environment. If you don’t have a reliable reference, consider replacing the gauge rather than continuing to rely on a drifting instrument. In short, calibrated gauges empower you to inflate more accurately, drive safer, and maximize tire life.
Tools & Materials
- Calibrated reference gauge (known-accurate)(Used as the standard against which you test your gauge.)
- Your tire pressure gauge (to calibrate)(Should be in good working order, with no visible damage.)
- Cleaning cloth(Wipes ports and valve stems to avoid dust on readings.)
- Flat, level testing surface(Prevents tilt errors during comparisons.)
- Optional: adjustment tool or manufacturer's calibration screw(Only use if your gauge supports user calibration and instructions permit.)
Steps
Estimated time: 60-90 minutes
- 1
Prepare workspace
Clear a workspace, remove clutter, and ensure you have stable lighting. Bring all gauges to room temperature before starting to minimize thermal drift.
Tip: Let gauges acclimate for 15–20 minutes before testing. - 2
Inspect gauges
Visually inspect both your gauge and the reference for cracks, leaks, or bent ports. If damage is present, do not calibrate; replace the affected gauge.
Tip: A damaged gauge will give unreliable results regardless of calibration. - 3
Place gauges side-by-side
Set both gauges on the same flat surface and ensure they are not touching each other during measurement to prevent cross-influence.
Tip: Keep a short distance between devices to avoid heat transfer. - 4
Test at known pressures
Apply the reference pressure to both gauges and note the readings at several points (e.g., low, mid, and high within the common range).
Tip: Record every reading to build a drift profile. - 5
Check for zero/offset
If the reference gauge shows a different zero than your gauge, note the offset. Some gauges allow adjusting offset; follow the manufacturer’s instructions.
Tip: Small offsets can have a large effect on readings across ranges. - 6
Adjust calibration if possible
If your gauge supports user calibration, apply the offset and re-test against the reference. If not adjustable, use the drift data to correct readings mentally or replace the gauge.
Tip: Document the adjustment and the resulting readings. - 7
Final verification
Re-test at the same pressures to confirm the readings now align within tolerance. If not, consider replacing or sending the gauge for professional calibration.
Tip: Keep the record and the next recalibration date.
Frequently Asked Questions
What is calibration in the context of tire pressure gauges?
Calibration is adjusting a gauge’s readings to match a known reference standard so that measurements reflect true pressure. It helps prevent misreadings that could lead to unsafe or inefficient tire inflation.
Calibration adjusts the gauge to match a known standard so readings are accurate and trustworthy.
How often should I calibrate a tire pressure gauge?
Calibrate based on usage and environment. If you use the gauge frequently, expose it to temperature changes, or notice drift, recalibrate or compare against a reference sooner rather than later.
Calibrate when you notice drift or after heavy use, typically at least once a year or sooner if conditions change.
Can a digital gauge be calibrated?
Some digital gauges have calibration procedures or internal offsets. Check the manufacturer’s instructions. If not adjustable, rely on comparisons with a calibrated reference gauge.
Yes, some digital gauges can be calibrated—follow the maker’s steps or use a reference gauge for cross-checks.
What is the best reference gauge to use?
Use a gauge with certified accuracy and known tolerance. Keep it in good condition and compare readings against it to ensure consistency across devices.
Choose a trusted reference gauge that’s known to be accurate and keep it for calibration checks.
Where should calibration take place?
Calibrate in a stable, temperature-controlled area with a flat surface. Avoid drafts and direct sun which can affect readings.
Calibrate in a calm, stable area away from temperature extremes for the most reliable results.
Watch Video
What to Remember
- Calibrate gauges regularly for reliable readings
- Use a known-good reference gauge for comparisons
- Document results and next recalibration date
- Calibrate in a stable environment to reduce drift