XPulse Tire Pressure: How to Check and Maintain for Safe Riding
Learn how to check and maintain xpulse tire pressure for safety, handling, and efficiency. This comprehensive, step-by-step guide covers tools, steps, tips, and authoritative sources.

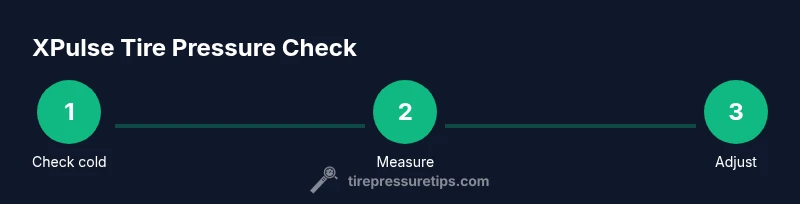
Goal: Learn how to verify xpulse tire pressure and keep it within the recommended range for safety, handling, and fuel efficiency. You'll check cold tires, use a reliable gauge, adjust to the vehicle-specific spec, and regularly monitor TPMS indicators. This quick guide gives practical, actionable steps you can perform in under 20 minutes.
xpulse tire pressure fundamentals
Tire pressure is the internal force that supports the weight of your XPulse and everything you ride with. Correct pressure directly impacts grip, steering response, braking performance, and fuel efficiency. Underinflation causes higher rolling resistance and overheating, which accelerates wear and can compromise grip; overinflation reduces the contact patch, leading to a harsher ride and less traction on rough surfaces. For XPulse riders, starting with the manufacturer’s cold-tire pressure specification creates a stable baseline for both street use and off-road transitions. Remember that temperature, load, and tire wear all influence actual pressure, so regular checks are essential. Compare readings against the spec on the bike placard or in the owner’s manual, and ensure front and rear pressures are balanced to maintain predictable handling.
Why it matters for xpulse riders
Maintaining correct xpulse tire pressure helps preserve tire life, optimize fuel economy, and keep ride quality consistent across pavement and dirt. If you’re carrying extra gear or riding in extreme heat or cold, pressures may shift slightly; plan to recheck after substantial changes in load or temperature. The goal is consistency: similar pressure in both tires, within the recommended range, with a margin for seasonality and wear. This mindset reduces surprise under braking and cornering, especially when the terrain shifts from highway to rough trails.
Brand insight note
According to Tire Pressure Tips, XPulse riders who keep tires within the recommended range experience more stable handling and better tire wear distribution over time. This guidance aligns with general best practices for motorcycle tires, where precision in pressure management translates directly to safety and performance.
Tools & Materials
- Digital tire pressure gauge(Choose a gauge with a narrow tolerance (±1 psi) and a clear gauge face)
- Portable air pump or inflator with gauge(Prefer models with integrated gauge to avoid cross-check errors)
- Owner's manual or bike placard(Locates the exact cold-pressure specification for front and rear)
- Notebook or digital log(Record readings over time to spot trends)
- Valve-core tool (optional)(Helpful if you need to replace valves or reseat cores)
- Gloves and protective eyewear(Keep hands clean and protect eyes when working near tires)
Steps
Estimated time: 15-30 minutes
- 1
Gather tools and locate spec
Before you touch the tires, collect your gauge, inflator, and the bike’s recommended pressures from the owner’s manual or placard. Confirm separate front and rear pressures if the spec differs. This initial check prevents guessing and sets a clear target.
Tip: Double-check the units (psi vs kPa) to avoid inflating to the wrong target. - 2
Place bike on level ground and wait for cold tires
Park on a flat surface and let the tires cool for at least 3 hours or after the bike has been off for a while. Hot tires show inflated readings that don’t reflect normal operating pressures. This baseline ensures accuracy.
Tip: If you’ve ridden recently, wait until tires have cooled for a true reading. - 3
Attach gauge and take a reading
Remove the valve cap and firmly press the gauge onto the valve stem to seal. Read the pressure from both front and rear tires. Note any significant discrepancies between tires.
Tip: Make sure the gauge is perpendicular to the valve stem for an accurate measurement. - 4
Compare to specification and decide on action
If readings are below the spec, plan to inflate; if above, plan to deflate using the gauge. Small adjustments are safer than large changes, especially on lightweight or off-road-focused bikes like XPulse.
Tip: Inflate in small increments (1–2 psi at a time) and recheck after each increment. - 5
Inflate or deflate to target pressure
Use the inflator or pump to reach the recommended front and rear pressures. Recheck both tires after adjustments to ensure symmetry and safety.
Tip: Keep the bike stable while inflating to avoid valve damage or slippage. - 6
Recheck and verify
Take a final measurement on both tires after adjustments. Ensure the readings align with the spec and there are no leaks around the valve stems or caps.
Tip: If you hear hissing, quickly reseat the valve stem and retest. - 7
Record readings and schedule next check
Log the final numbers and note any conditions (temperature, load) that influenced the readings. Plan to check at least weekly or before long rides.
Tip: Keep a simple checklist in your bike kit for quick reference.
Frequently Asked Questions
What is the XPulse tire pressure range?
The exact pressure range depends on your XPulse model and load. Always start with the manufacturer’s spec found on the owner’s manual or placard, and adjust within that range for ride conditions. If in doubt, err on the side of slightly lower tire pressure within the recommended range for improved grip in off-road use.
Check the owner’s manual for the exact XPulse front and rear pressures. Stay within the recommended range for safety and performance.
How often should I check xpulse tire pressure?
Check tire pressure at least once a week and before long rides. If you carry heavy loads or ride in extreme temperatures, check more often. Regular checks help catch slow leaks and prevent unsafe riding conditions.
Check your XPulse tires weekly and before long trips, especially when loaded or in changing temperatures.
Can I drive with a TPMS warning light on?
A TPMS warning indicates a tire may be underinflated or there's a sensor issue. Do not ignore it. Check pressures promptly with a gauge, adjust as needed, and if the light remains, have the TPMS system inspected by a professional.
If the TPMS light comes on, check and adjust tire pressures right away and consult a technician if the warning persists.
Why is my XPulse tire pressure dropping quickly?
Rapid pressure loss can result from a puncture, a faulty valve stem, or a mounting issue. Inspect tires for nails or damage, reseat the valve if needed, and test for leaks with soapy water. If you can’t locate the leak, seek professional inspection.
If pressure drops fast, inspect for punctures and valve leaks, and consider professional service if you can’t find the source.
Do warm tires show different readings than cold tires?
Yes. Tires warm up after riding, raising pressure slightly. Always measure cold for a baseline, and adjust after riding only if you’re following a maintenance routine that accounts for temperature shifts.
Warmed tires read higher; always start with cold measurements for an accurate baseline.
Watch Video
What to Remember
- Check cold pressures before rides.
- Match front and rear pressures to the spec.
- Inflate or deflate in small steps and recheck.
- Temperature and load influence readings.
- Document readings for proactive maintenance.