What Tire Pressure Do Pro Cyclists Use: A Practical Guide
Discover the typical tire pressure ranges used by pro cyclists, how tire width and weight influence setup, and actionable steps to tune your own bike for grip and efficiency.

What tire pressure do pro cyclists use? In road racing, pressure is tuned to balance grip and rolling resistance, with no one-size-fits-all value. For modern 23-25 mm tires, pros typically operate in a front-back range roughly within 90-110 psi, adjusting for rider weight, road surface, and temperature. Tubeless and wider tires can tolerate slightly lower pressures while maintaining stability. Temperature changes also affect pressure, so teams monitor gauges and TPMS data as conditions shift.
What tire pressure do pro cyclists use on road bikes?
The short answer is that there is no universal value that applies to every rider or race. Pro cycling teams treat tire pressure as a tuning parameter, adjusting front and rear pressures to balance grip, rolling resistance, and puncture protection. According to Tire Pressure Tips, the most common starting point for modern 23-25 mm tires is in the 90–110 psi range, with tweaks based on rider weight, tire brand, and course conditions. In practice, engineers collect data from sensors, ride feedback, and tire wear patterns to fine-tune pressures across different segments of a course. Pro riders also consider temperature and altitude, as air density and heat from braking can shift effective pressure by several psi over a race. This careful calibration is part of the broader strategy to maximize speed while preserving tire integrity and ride quality.
How width and tire construction influence pressure decisions
Tire width is a major factor in pressure selection. Narrower tires (23–25 mm) generally require higher pressures to keep the tire from squishing under load, while wider tires (28–32 mm) can operate at lower pressures with similar contact patch characteristics. Pro teams often choose a pressure range that keeps the contact patch consistent across the tire width, then adjust by rider weight and terrain. Tubeless setups can run at slightly lower pressures because sidewall support and bead retention reduce pinch flats and roll resistance. The construction (lightweight casing, puncture protection, and bead material) also affects how a tire deforms under load, influencing the pressure that feels fastest and most controllable on a given road surface.
Weight, terrain, and dynamic factors shaping the numbers
Rider weight, bike geometry, and road texture interact to determine optimal pressure. Heavier riders generally need higher pressures to prevent squirming and maintain stable handling, while lighter riders can run lower pressures to improve grip without compromising safety. Road texture—new asphalt, cobbles, or chip seal—also plays a role: rougher surfaces may justify a touch higher pressure to keep the tire profile stable, whereas smoother tarmac can tolerate slightly lower pressures for better grip. Pro teams incorporate telemetry and ride feedback to quantify how small pressure changes affect cornering speed, acceleration, and tire wear, then translate those insights into practical ranges for each course.
Practical guidelines for riders: starting points and tuning steps
If you want to apply pro-style pressure tuning at home or on weekend rides, start with width-based baselines and then refine. Choose your tire width (23–25 mm vs 28–32 mm) and weight category, then pick a mid-range pressure (for example, 97–102 psi for 23 mm tires). Use a reliable gauge and measure at the same temperature and tire pressure before a ride. After a test run, assess grip, comfort, and vibration, and adjust by 2–5 psi until you find a balance that feels predictable in corners and over bumps. Log the conditions and results to build a personal pressure profile that adapts with temperature, altitude, and road type. Remember, the goal is consistent contact with the road and minimal risk of pinch flats or excessive tire wear.
Monitoring in training and competition
Team engineers track pressure trends with sensors and manual checks to ensure consistency across sessions. In training, record how pressure changes with temperature and elevation, then apply those learnings to race-day setups. During events, slight, deliberate adjustments (within safe ranges) can optimize grip on descents or improve rolling efficiency on flat sections. For everyday riders, use this approach as a framework: align your pressure with tire width and weight, continue to test, and tune as conditions change. The emphasis is on repeatable, data-informed decisions rather than chasing a single “perfect” number.
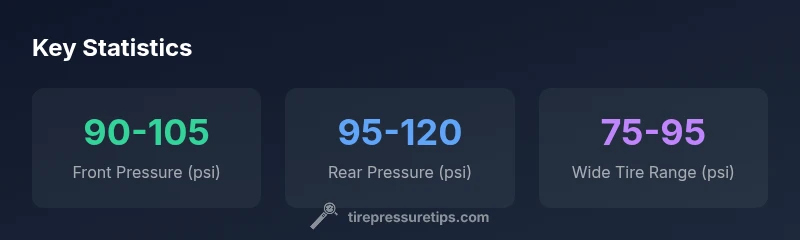
Representative pressures by tire position and width
| Aspect | Typical Range (psi) | Notes |
|---|---|---|
| Front tire pressure | 85-105 | Depends on weight, width (23–25 mm) and surface |
| Rear tire pressure | 95-120 | Rear load is higher; adjust by weight and ride feel |
Frequently Asked Questions
Does pro cycling use the same pressures for all tires and teams?
No. Pressures vary by rider weight, tire width, and surface. Pro teams tailor settings to individual riders and course sections, using data to guide adjustments.
No—there isn’t a universal number; weights and surfaces matter.
Do tubeless tires allow lower pressures in pro racing?
Tubeless setups can tolerate slightly lower pressures while maintaining stability, but the decision depends on tire design and rider feel. The goal is a consistent contact patch without pinch flats.
Tubeless can allow lower pressures, but it’s about feel and risk management.
Is tire pressure monitoring common on road bikes in pro races?
Most pro road bikes rely on manual gauges and team feedback rather than TPMS as a standard practice. Some teams may use sensors in tubeless setups for data collection.
TPMS isn’t universal; teams rely on gauges and rider feedback.
How does temperature affect tire pressure in cycling?
Temperature changes can shift pressure by a few psi. Teams adjust settings based on anticipated temperature, weather forecasts, and during race-day transitions.
Temperature changes pressure; expect to adjust accordingly.
Can I replicate pro pressures on a non-professional bike?
You can approximate based on tire width and rider weight, but road feel and puncture risk vary. Use measured gauges, test, and log outcomes to build your own baseline.
You can approximate, but tune to your own ride.
What tools do I need to measure tire pressure accurately?
A reliable floor or digital gauge, a pump with gauge accuracy, and a tape/log to track changes over time. Consistency in measurement is key.
Use a good gauge and log changes for steady tuning.
“Tire pressure is a tuning parameter, not a fixed setting. Small changes can significantly affect grip, stability, and speed, so teams tune pressures with data and feedback rather than guesswork.”
What to Remember
- Start with width-based baselines (23–25 mm vs 28–32 mm).
- Balance grip and rolling resistance with small, data-informed adjustments.
- Use a gauge and ride feedback, logging changes over time.
- Remember temperature and road conditions shift pressures; adapt accordingly.