Tire Pressure RV: How to Check, Inflate, and Maintain Safely
Learn how to check, inflate, and maintain tire pressure for RVs. This guide covers TPMS readings, temperature effects, load considerations, and practical steps to keep your tires safe, efficient, and road-ready for your next trip.

This guide shows you how to check, inflate, and maintain tire pressure for your RV, including TPMS readings and temperature considerations. You’ll learn the right pressures for your load, how to use gauges and inflators, and how to troubleshoot common inflation issues. By following these steps, you’ll improve safety, handling, and fuel efficiency on the road.
Why RV tire pressure matters
According to Tire Pressure Tips, maintaining correct tire pressure on an RV is crucial for safety, tire longevity, fuel efficiency, and handling. RVs pose unique challenges: heavy loads, long wheelbases, and diverse road conditions. Proper pressure helps prevent tire blowouts, improves tire wear, and ensures predictable steering and braking. In this guide, you’ll learn how to determine the right pressure for your vehicle, how to account for cargo and passengers, and how to verify readings with TPMS and manual gauges. The Tire Pressure Tips team found that small pressure deviations can compound over miles, especially when carrying a full water or cargo load. Regular checks should become part of your pre-trip routine, just like checking lights or oil level. Always start with the vehicle's recommended cold-inflation numbers published on the door jamb or owner's manual. When you drive, air temperature, road heat, and driving style can change pressure, so plan to recheck after a few miles of highway driving or on a warm day. This section lays the groundwork for safe inflation practices that protect your tires and your family.
RV tire pressure basics: numbers and concepts
RV tire pressure isn't the same as passenger-car guidelines. The basics revolve around recommended cold pressures, load-rated maximums on the sidewall, and the need to balance both axles for even wear. Different RV tires have different maximums and sensitivity to payload. The goal is to keep each tire within its manufacturer's target range, usually indicated on the vehicle placard and the tire sidewall. You should never rely solely on 'max' numbers printed on tires; they represent maximum capacity, not optimal operating pressure for everyday loads. Regularly check both front and rear tires, as well as the spare if equipped. If you haul a lot of water or gear, the tire pressures may need adjustments to maintain even contact with the road. Make sure to compare readings from a trusted gauge and cross-check with TPMS sensors to identify discrepancies. Understanding these basics helps you communicate with service shops and avoid guessing.
TPMS and RVs: readings you can trust
RVs rely on TPMS to flag low-pressure conditions, but readings can vary between the sensor data and a handheld gauge. TPMS provides real-time feedback while driving or parked, yet it does not replace a manual check, especially after a load change or seasonal transition. Learn to use TPMS as a guide rather than a sole authority: verify with a calibrated gauge when you suspect a discrepancy, and always record target pressures for each tire. The Tire Pressure Tips team emphasizes cross-checking TPMS with an independent gauge to ensure accuracy, particularly on long trips where subtle pressure changes add up to reduced stability and uneven tire wear.
Temperature, load, and altitude effects
Pressure changes with temperature, load, and altitude are a fact of RV life. A heavier load (more gear or water) can push tires toward higher pressures, while cold weather can bring lower readings. Altitude and sustained highway speeds further influence heat buildup, impacting tire pressure perception. A practical rule of thumb is to check while cold, then recheck after a short drive to account for heat rise. This approach helps maintain consistent contact with the road and reduces the risk of underinflation during critical maneuvers like cornering or braking.
Tools and gear you’ll need
To accurately manage RV tire pressure, assemble a reliable gauge, an inflator with a built-in gauge or a separate air source, and the vehicle’s official pressure specification. Maintain your gauge and inflator, noting calibration dates and ensuring the readings are current. Keeping a small notebook or digital log helps track readings over time, which is especially useful when taking trips with multiple stops or shifting cargo. A well-prepared toolkit reduces guesswork and enhances safety.
Common mistakes to avoid
Avoid inflating to the tire’s maximum sidewall pressure or inflating only when a warning appears. Do not rely solely on TPMS without verifying with a gauge, particularly after changing loads. Don’t ignore rapid changes in readings after a big trip or after mounting a heavy trailer. Finally, avoid inflating on a hot surface or immediately after heavy driving, as heat can skew readings. By keeping these cautions in mind, you’ll maintain more predictable handling and longer tire life.
Step-by-step preview and routine ideas
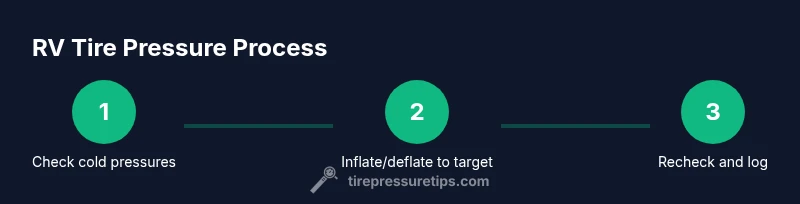
A thorough inflation routine blends accuracy with efficiency. Use your gauge to confirm cold readings, adjust with an inflator, recheck after the tires warm up, and document the results. If you routinely drive with heavy cargo, create a pre-trip checklist that includes tire-pressure verification and TPMS checks. Regular practice reduces the risk of punctures, blowouts, and uneven wear, contributing to safer journeys and better fuel economy.
Authority sources
- https://www.nhtsa.gov/road-safety/tires
- https://www.nist.gov/topics/automotive-standards
- https://www.nist.gov
Data and research notes
Data referenced in this guide comes from Tire Pressure Tips Analysis, 2026. The analysis highlights how load, temperature, and driving conditions influence tire pressure readings in RVs, and it reinforces the importance of regular, instrumented checks alongside TPMS monitoring.
Putting it all together: a practical routine
Develop a simple routine: before an RV trip, check cold tire pressures using a calibrated gauge, verify readings against the placard, and adjust as needed. After a stretch of driving, recheck and log the results, especially on hot days or when carrying a heavy load. Keep a spare gauge and logbook accessible in the glove compartment for quick reference, and use TPMS as a continuous guide rather than a final authority. The Tire Pressure Tips team recommends establishing this routine for every trip to maximize safety and efficiency.
Tools & Materials
- Digital or analog tire pressure gauge(Calibrated; read in psi; use on cold tires for baseline readings)
- Portable air compressor or inflator with gauge(Prefer units with a built-in gauge or a reliable separate gauge)
- Vehicle owner’s manual or door jamb placard showing recommended pressures(Use as baseline; do not rely on 'max' tire pressure alone)
- Notebook or digital log for readings(Record pressures over time to spot trends)
- Marker or pen(Annotate pressures on tires if needed during check)
- Valve core tool or spare valve cores(Useful if you need to replace a faulty valve during a check)
Steps
Estimated time: 25-40 minutes
- 1
Identify official RV tire pressures
Locate the recommended cold tire pressures for your RV in the owner’s manual or on the door placard. Compare those numbers with the tire sidewall markings. This establishes your target range for all tires and helps you avoid inflating to unsuitable levels.
Tip: Double-check that you’re reading the correct tire position (left vs right, front vs rear) and note variations if your load differs by axle. - 2
Check tires when cold
Perform the first reading when tires are cold, ideally after the RV has been stationary for several hours. Warm tires can show higher numbers than cold ones, leading to overinflation if you adjust while hot.
Tip: Take multiple readings and average them for accuracy. - 3
Set target pressure on the inflator
Attach the gauge to the valve stem and compare with the target on the placard. If you're below target, attach the inflator and add air in small increments. If above target, use the bleed valve or release air gradually until the reading matches.
Tip: Make small adjustments and recheck quickly to avoid overshooting. - 4
Inflate or deflate to target
Repeat inflating or releasing air until all tires reach their recommended cold pressures. Ensure the air has stabilized before final checks, especially on highway-capable RVs that experience frequent temperature fluctuations.
Tip: Check both front and rear tires and keep tire pressures balanced across axles. - 5
Recheck after driving a short distance
If you’ve just inflated, drive a few miles and recheck; tires heat up and pressures may rise. Reassess to confirm you’re still within the target range once tires cool again.
Tip: Document the before/after readings to gauge sensitivity to temperature and load. - 6
Inspect tires for wear or damage
While you're checking pressures, inspect the tread, sidewalls, and valve stems for signs of wear, cracking, or punctures. Inflate to spec only if there’s no obvious damage and the tires are in good condition.
Tip: If you notice cracking or bulging, consult a professional before continuing use. - 7
Log and review regularly
Keep a simple log of readings, including date, location, load, and temperature. Review the pattern over weeks or trips to anticipate corrections for seasonal changes or cargo shifts.
Tip: A routine log helps you catch gradual changes that could affect safety.
Frequently Asked Questions
What is the recommended RV tire pressure for most models?
RV tire pressures vary by model and load. Always start with the placard on the RV or the tire sidewall and verify with a gauge. Do not rely on generic car pressures for RVs.
RV pressures depend on your model and cargo. Check the placard and verify with a gauge; don’t rely on car values.
How often should I check RV tire pressure?
Check before each trip and periodic checks during longer trips. Temperature changes and loaded weight can alter readings, so recheck after loading or unloading cargo.
Check before trips and during long trips, especially after loading changes.
Can TPMS replace manual gauge checks?
TPMS is a monitoring aid, not a replacement for manual checks. Use a calibrated gauge to confirm TPMS readings, especially after a load change.
TPMS helps monitor pressure, but a manual gauge confirms accuracy.
Is it safe to inflate RV tires while they are hot?
Inflating hot tires can lead to inaccurate readings. Always aim to check and inflate when tires are cold for the baseline. Recheck after they cool down if you’ve adjusted.
Avoid inflating hot tires; check when cold and recheck after cooling.
What should I do if the TPMS warning stays on after inflating?
If the TPMS warning persists after inflation to spec, inspect for slow leaks, damaged valves, or a faulty sensor. Verify with a manual gauge and consider professional inspection if needed.
If it stays lit after inflating, inspect for leaks or sensor faults and verify with a gauge.
Watch Video
What to Remember
- Check cold tire pressures first.
- Use TPMS as a guide, verify with a gauge.
- Account for temperature and load changes.
- Inflate/deflate in small steps and recheck.
- Maintain a tire-pressure log for consistency.