Tire Pressure Quick Release: A Practical Guide to Bleeding and Setting PSI
Learn how to use a tire pressure quick release to bleed air and dial in PSI precisely and safely. This 2026 guide covers tools, step-by-step actions, safety, and TPMS considerations for accurate tire pressure management.

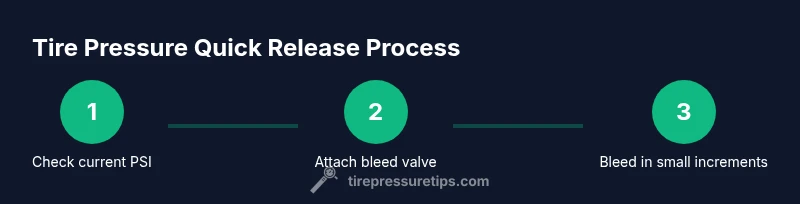
With a tire pressure quick release, you can bleed air from a tire to dial in PSI precisely. This method uses a bleed valve connected to the Schrader stem to vent small amounts of air, enabling fast, controlled adjustments on cold tires. According to Tire Pressure Tips, using a dedicated bleed tool reduces over-inflation risk and improves accuracy. This guide walks you through the setup, steps, and safety.
What is a tire pressure quick release and why it matters
A tire pressure quick release refers to a bleed valve accessory that threads onto a Schrader valve stem to vent small, controlled amounts of air from a tire. The goal is precise pressure adjustment, especially when a tire sits slightly above or below the target PSI. This method is particularly helpful for maintaining even tire wear, improving fuel efficiency, and ensuring optimal traction. The Tire Pressure Tips team emphasizes that a dedicated quick-release bleed valve can improve measurement accuracy and reduce the risk of over-inflation when you need to fine-tune pressure on cold tires. For many drivers, this tool is a practical complement to a standard tire gauge, giving a tactile, controllable way to dial in exact PSI rather than guessing with bulk inflation. Remember: PSI targets vary by vehicle and load, so always confirm your manufacturer specifications before adjusting.
When to use a quick release vs traditional gauge
Using a tire pressure quick release makes sense in scenarios where small PSI adjustments are needed after a baseline check with a gauge. If your tires are only slightly off target, a quick-release valve allows you to vent increments of air without removing the valve core or disconnecting equipment. Traditional gauges alone can lead to overshoot, especially if you’re inflating in a warm environment after driving. Quick-release tools shine in settings where you want immediate, incremental control and a quick return to desired PSI without more involved procedures. For high-precision work, pair the bleed valve with a reliable digital gauge and log your readings for future reference.
Essential tools and safety considerations
Before starting, assemble a bleed valve tool, a calibrated tire pressure gauge, an air source, and basic safety gear. Inspect tire valve stems for damage and replace worn caps. Work in a well-lit, dry area to prevent slips or misreads. Always start at the vehicle’s cold PSI specification; heat can temporarily increase tire pressure, skewing readings. The bleeding process should be incremental—vent 1–2 psi at a time and recheck after each adjustment. Maintain a clean tie-off area to avoid dirt entry into the valve stem, which could cause leaks. Finally, never exceed the tire’s maximum PSI printed on the sidewall. If you’re unsure, consult your vehicle manual or seek a professional technician.
How to set up and attach the bleed valve
Attach the bleed valve firmly to the tire’s Schrader valve stem after removing the valve cap. Ensure the connection is snug but not forced. If your bleed valve has a locking mechanism, engage it to prevent accidental release. With the valve attached, keep one hand on the wheel and the other on the gauge to monitor changes as you vent air. If you notice any hissing or leaks, stop and inspect the connection for dirt, cross-threading, or damaged components. Once secure, open the bleed valve slowly to begin venting, watching your PSI readout closely as you approach the target.
Bleeding air in small increments to approach target PSI
Begin with a conservative vent: release air in 1–2 psi steps, pause, and recheck with the gauge. Recheck after every few psi vented because tire temperature can influence readings. If your target PSI differs significantly from the current value, continue venting in small steps until you’re within 1 psi of the target. After reaching the approximate target, switch to inflation to fine-tune rather than continuing to bleed. Always keep the vehicle stationary and chocks in place during this process.
Best practices for accurate PSI after bleeding
After bleeding, recheck the tire pressure multiple times to ensure consistency. Temperature changes can cause minor fluctuations, so check when tires are cold and have rested for a few hours if possible. Compare readings from a reliable gauge and, if needed, use a second gauge to validate results. Document the final PSI per tire, then inflate only if necessary. Calibrate your gauge annually and whenever you notice inconsistent readings. If you use TPMS, verify that the TPMS readings align with the measured PSI and consider resetting the system if instructed by your vehicle manual.
TPMS and modern vehicles: considerations when bleeding
Tire pressure sensors (TPMS) can indicate low pressure even when the gauge shows near target values, particularly after a bleed or heat cycling. After using a bleed valve, recheck both the gauge measurement and the TPMS reading. If a TPMS warning persists, dimly reinflate or bleed slightly to align with the recommended PSI range, then drive short distances to allow the system to reinitialize. Some vehicles require a manual TPMS reset in the settings menu or after servicing; check your owner’s manual for the correct procedure. Remember, TPMS is a safety feature, but it should confirm, not replace, a direct tire pressure measurement.
Troubleshooting common issues with quick release bleeding
If air won’t bleed, inspect the valve stem for dirt or corrosion, and ensure the bleed valve threads are clean and undamaged. A stubborn core or a cross-threaded connection can prevent venting. If you hear constant hissing after closing the valve, you may have over-tightened or damaged the stem; back off slightly and reseat the valve. Leaks after venting? Reapply a light layer of soapy water to the connections and look for bubbles indicating an air escape. If the tire rapidly loses air after bleeding, the tire bead or rim may be compromised and require professional inspection.
Long-term maintenance and calibration of your tire pressure tools
Keep your bleed valve and gauge clean and dry; store in a protective pouch to avoid damage. Calibrate gauges every 6–12 months depending on usage and environmental conditions. Replace worn caps and inspect the Schrader valve stems for cracks or debris. Consider replacing the bleed valve if it shows signs of corrosion or consistent leaks. Regular checks help maintain measurement accuracy and prolong your tools’ life. Ongoing practice with careful notes improves reliability and confidence when dialing in PSI.
Tools & Materials
- Tire pressure quick release bleed valve tool(Bleed valve with compatible Schrader valve stem threads; include gauge port)
- Digital tire pressure gauge(Calibrated recently; reads in psi)
- Air compressor or reliable air source(To inflate to target PSI after bleeding)
- Valve core removal tool(Optional if you need to release a stuck core)
- Safety gear (gloves and eye protection)(Keep hands and eyes protected during inflation/bleeding)
- Vehicle owner’s manual or OEM PSI range(PSI per tire; include cold-weather adjustments)
- Soap water spray(To check for leaks at connections)
Steps
Estimated time: 30-45 minutes total for a full set of four tires
- 1
Prepare tools and inspect tires
Lay out the bleed valve, gauge, air source, and safety gear. Inspect all tires for visible damage or including cracks in valve stems. Ensure the tires are cold or have cooled for at least three hours to avoid heat-related PSI fluctuations.
Tip: Keep a dedicated workspace and verify you have the correct PSI range for each tire. - 2
Measure current pressure
Use a calibrated digital gauge to record the current PSI for each tire. Compare readings to the vehicle’s specified cold PSI. Log all numbers for reference and to track any changes after adjustments.
Tip: Take multiple readings on each tire and note variations to avoid errors. - 3
Attach bleed valve to valve stem
Remove the tire’s valve cap. Clean the valve stem threads and thread the bleed valve onto the Schrader valve securely. If your unit has a locking feature, engage it to prevent accidental venting.
Tip: Do not overtighten; cross-threading will cause leaks and inaccurate bleed. - 4
Bleed air in small increments
Open the bleed valve slowly and vent 1–2 psi at a time. Pause to recheck the PSI with the gauge after each increment. Continue until you’re within 1 psi of the target.
Tip: Vent slowly; rapid bleeding can overshoot the target and waste time. - 5
Recheck and adjust to target PSI
Close the bleed valve and confirm the final PSI with your gauge. If under-inflated, use the air source to reach the exact spec; if over, bleed again in small steps.
Tip: Cross-check with a second gauge if readings seem inconsistent. - 6
Repeat for all tires and verify
Proceed to the remaining tires, repeating the measurement and bleeding steps as needed. After all tires are adjusted, recheck all four pressures and confirm alignment with the vehicle’s recommendations. Consider a TPMS reset if your vehicle requires it.
Tip: Do not forget to replace valve caps and store your tools properly. - 7
Document and monitor
Record final PSI per tire and note any environmental conditions that might influence readings. Schedule monthly checks or before long trips to maintain consistent performance.
Tip: Keep a running log of PSI and tool calibrations for future reference.
Frequently Asked Questions
What is a tire pressure quick release and when should I use it?
A tire pressure quick release is a bleed valve accessory that vents air from a tire's valve to fine-tune PSI quickly. It helps when small adjustments are needed without removing the valve core. Use it when you want precise pressure and to correct over-inflation quickly.
It's a venting tool attached to the valve to allow small air releases for precise pressure tuning.
Can I bleed air without a gauge?
Yes, but it's risky. Without a gauge, you can't measure accuracy reliably, increasing the chance of under- or over-inflation. Always pair a bleed valve with a calibrated gauge for safe adjustments.
You can vent air, but you won't know exactly how much without a gauge.
How much air should be bled at a time?
Bleed in 1–2 psi increments and recheck after each increment. This minimizes overshoot and keeps adjustments within a safe range.
Bleed in small 1–2 psi steps and verify with a gauge.
Will bleeding affect TPMS readings?
TPMS reflects current tire pressure, so after bleeding or inflating you may need to reset or reinit the TPMS on some vehicles. Always compare TPMS readings with direct gauge measurements.
TPMS shows current pressure, but you may need a reset after adjustments.
How often should I check tire pressure with a quick release?
Check monthly and before long trips, ensuring tires are cold at the time of measurement. Regular checks help maintain safety and efficiency.
Check at least once a month and before trips, when tires are cold.
Watch Video
What to Remember
- Bleed air in small increments to reach target PSI.
- Always recheck with a calibrated gauge after adjustments.
- Follow your vehicle’s specified cold PSI ranges for each tire.
- Verify TPMS readings align with measured PSI after adjustments.