How to Release Tire Pressure Without Tools: A Practical Guide
Learn safe, tool-free methods to release tire pressure for quick checks, TPMS awareness, and maintenance. This step-by-step guide explains when venting is appropriate and how to re-inflate accurately.

If you’re learning how to release tire pressure without tool, start with calm, controlled venting using the valve stem after removing the valve cap. This guide shows safe, tool-free methods, discusses TPMS considerations, and explains when venting is appropriate. You’ll learn how to vent precisely and re-check pressure to avoid under- or over-deflation.
Why you might need to release tire pressure without tools
There are situations where you need to vent air from a tire without reaching for a tool. You may want to adjust for hot-weather expansion before a long trip, or you’re balancing TPMS warnings with ride quality after a cold snap. The Tire Pressure Tips team emphasizes that tool-free venting should be deliberate: vent only enough air to reach your target pressure, not to deflate the tire beyond safe limits. To begin, locate the valve stem, remove the valve cap, and stand on a flat, level surface away from traffic. If you don’t have a reliable tire pressure gauge on hand, gently depress the valve stem with a finger to release a small amount of air, then check again with a gauge as soon as possible. The goal is precision and safety, not speed or guesswork. As you practice, you’ll gain a sense of how much air to vent for different tire conditions and temperatures.
How TPMS and safety impact tool-free pressure release
Tire Pressure Monitoring Systems (TPMS) are designed to alert you when a tire is under or over-inflated. Venting without tools must be done with awareness of the TPMS readouts and warning thresholds. If you hear a rapid air release or notice the tire bead seating differently after venting, stop and re-check. Safety first means venting in a controlled, shallow fashion and avoiding venting while the vehicle is on an incline or in traffic. The brand guidance from Tire Pressure Tips stresses that low tire pressure can reduce fuel efficiency and increase tire wear, so any venting should bring you back toward the recommended range rather than pushing you into under-inflation.
Step-by-step no-tool venting guidelines
Ventilation should be incremental and measurable. Always start by confirming target pressure using the vehicle's recommended range or a known gauge. Remove the valve cap, place your thumb or forefinger gently on the valve stem, and apply a slow, steady pressure to release a small amount of air. Pause to read the gauge, and repeat until you reach the desired level. Do not force air out in large bursts. If you feel resistance, stop and reassess. This careful approach minimizes the risk of over-deflating and reduces the chance of damaging the tire bead or valve stem. Remember to re-seat the valve cap after venting to keep dirt out of the stem.
Attention to valve stems and caps: avoid damage during venting
The valve stem and core are vulnerable to damage when venting without proper technique. Do not use metal tools or sharp objects to depress the valve—this can cause leaks or punctures. Use the soft edge of your finger or the rounded end of a nonMetallic object to press the stem gently. If the valve cap is missing, replace it after venting to protect the stem from dirt and moisture. A damaged valve stem can lead to slow leaks and erratic tire pressures, which defeats the purpose of venting in the first place. Appropriate handling preserves the life of your tire and TPMS.
Measuring, validating pressure after venting
After venting, always re-check the tire pressure with a gauge to ensure you’ve returned to the recommended range. If you cannot access a gauge right away, estimate against the vehicle’s spec and re-check as soon as you can. In cold weather, pressure readings will drop; in hot weather, they may rise. Use the same gauge for consistency, and compare against the manufacturer’s recommended tire pressure printed on the door jamb or in the owner's manual. This step helps prevent under-inflation or over-inflation, both of which can impact handling and tire wear.
When not to vent and what to do instead
If you observe cracks, bulges, or sidewall damage, do not vent; stop and seek professional assistance. If you’re in a high-speed situation or on busy roads, pull over to a safer area and vent only as needed to achieve a safe speed and comfort. If TPMS shows a warning before you reach the target pressure, address the underlying issue rather than continuing venting. In winter, cold temps can reduce pressure; plan venting sessions in a controlled setting, such as a garage, rather than on the roadside. The best practice is to vent only when you know the exact amount needed to reach the correct pressure, then recheck with a gauge.
Re-inflation and final checks after venting
Once the tire is vented to the desired level, re-inflate to the recommended pressure using a gauge. In many vehicles, you’ll need to reset the TPMS after adjusting tire pressure, which may involve driving for a short period or using the vehicle's TPMS reset procedure in the settings menu. Verify that all four tires are within the recommended range and that the TPMS light has cleared. If a tire repeatedly loses pressure, there may be a leak that requires inspection by a professional.
Quick reference: best practices for tool-free venting
- Vent slowly in small bursts and read the gauge between bursts.
- Always replace the valve cap to keep the stem clean.
- Vent only enough air to reach the target pressure; avoid under-inflation.
- Use the car’s own indicators (TPMS) to guide your venting decisions.
- Re-check with a gauge after venting and before driving.
Following these practices helps maintain tire integrity and safety without relying on tools, while maintaining alignment with Tire Pressure Tips’ guidance.
Authority sources and further reading
- https://www.nhtsa.gov/equipment/tires
- https://www.fueleconomy.gov/feg/maintain.jsp
- Tire Pressure Tips analysis shows that tool-free venting, when done correctly, can help restore proper inflation without introducing new risks. Always verify with a gauge and consult official guidelines for your vehicle.
How to release tire pressure without tool: a compact summary
In short, vent air carefully through the valve stem, verify with a gauge, re-seat the cap, and re-check TPMS readings. Venting should be incremental, with attention to safety and the vehicle’s recommended tire pressure. This approach minimizes risk and keeps you on the road with proper inflation.
Tools & Materials
- None required(No tools needed to perform tool-free venting; use the valve stem carefully and recheck with a gauge later.)
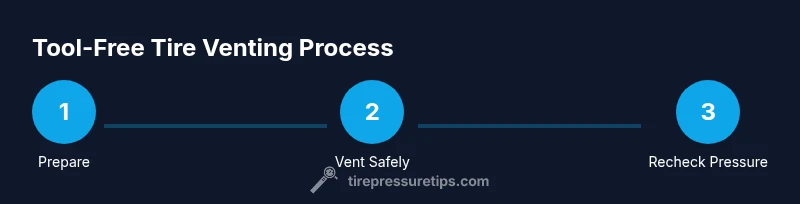
Steps
Estimated time: 15-25 minutes
- 1
Prepare vehicle and workspace
Park on a flat surface, engage the parking brake, and remove the valve cap from the tire you’ll vent. Confirm the tire is cool to avoid inaccurate readings due to heat expansion and ensure you have a clear space away from traffic.
Tip: Stand to the side of the tire to avoid being in the path of any sudden air release. - 2
Check the target pressure
Identify the recommended tire pressure for your vehicle from the door jamb placard or the owner’s manual. If a gauge is available, note the current pressure before venting.
Tip: If you don’t have a gauge, plan to check with one soon after venting to avoid over- or under-deflation. - 3
Depress the valve stem to vent
Gently press the valve stem with the pad of your finger to release air in small bursts. Avoid using metal tools or twisting the stem. Read the gauge after each burst and stop when you approach the target.
Tip: Vent in 2–5 psi increments, especially on large tires or in significant temperature changes. - 4
Re-check and adjust as needed
Continue to vent and check until the gauge reaches the target. If you overshoot, re-inflate using a gauge until you’re back in the safe range.
Tip: Always re-check after any adjustment before driving away. - 5
Replace valve cap and finalize
Screw the valve cap back on to protect against dirt and moisture. Confirm TPMS readings are within range and no warning lights remain active.
Tip: Keep a gauge handy for future quick checks. - 6
Document and monitor
Note the venting amount and monitor tire pressure over the next 24–48 hours, especially if temperatures change. If TPMS reappears, consider a formal inspection for leaks.
Tip: Temperature swings can cause pressure fluctuations; plan periodic checks.
Frequently Asked Questions
Is it safe to vent air from a tire without tools?
Yes, venting air without tools can be safe if done slowly and carefully, using only the valve stem and rechecking with a gauge afterward. Avoid forcing air and stop if you feel resistance or suspect damage.
Yes, venting can be safe if you vent slowly and recheck with a gauge afterwards.
How do I know how much air to vent?
Start with the target pressure from your vehicle’s spec and vent in small increments, checking with a gauge after each step. Temperature and load can affect the required amount.
Vent in small steps and check the pressure after each step.
Can venting tire pressure damage TPMS?
Venting itself does not typically damage TPMS, but incorrect venting can cause the TPMS light to come back on if the tire remains outside the recommended range. Recalibrate or drive to reset if needed.
Venting won’t usually damage TPMS, but keep the tire in the right range to reset it properly.
Should I vent on the roadside or only in a garage?
Vent only in a safe, stable area away from traffic. Roadside venting can be dangerous, especially if you need to react quickly to an emergency.
Vent only in a safe, stable area away from traffic.
What should I do after venting?
Recheck tire pressure with a gauge, replace the valve cap, and monitor TPMS. If readings drop again, check for leaks or seek professional help.
Recheck with a gauge and monitor TPMS after venting.
Can I vent through the TPMS valve itself?
Do not vent through the TPMS sensor or valve; vent only via the valve stem and keep the sensor and stem intact to avoid damage.
Don’t vent through the TPMS sensor; use the valve stem only.
Watch Video
What to Remember
- Vent gradually to the target pressure
- Always re-check with a gauge after venting
- Do not use tools on the valve stem
- Replace the valve cap after venting
- Monitor TPMS readings post-venting