Tire Pressure Guide for Kawasaki KLR 650
Learn how to check, adjust, and maintain tire pressure on your Kawasaki KLR 650 with practical steps, TPMS guidance, and safety reminders.

Goal: Learn how to check, adjust, and maintain tire pressure on your Kawasaki KLR 650 using the vehicle manual, a reliable tire gauge, and a portable inflator. You’ll verify cold pressures, account for load, terrain, and riding style, and follow safety reminders to prevent flats, improve handling, and extend tire life.
Why correct tire pressure matters for the KLR 650
Maintaining the correct tire pressure on your Kawasaki KLR 650 is more than a numbers game. Proper pressure affects handling, traction, tire wear, and fuel economy, especially when you ride on mixed pavement and dirt. Underinflation can lead to sluggish steering, increased rolling resistance, and overheating, while overinflation reduces the contact patch, diminishing grip and comfort on rough surfaces. For adventure touring and dual-sport use, a precise balance supports stability when braking, cornering, and absorbing shocks from uneven terrain. According to Tire Pressure Tips, consistent tire pressure management also helps prevent pinch flats on rims and protects the tire carcass from sidewall damage during off-road sections. Always consider load weight (rider, luggage, and passenger), tire type (street, dual-sport, or off-road), and tire wear state when evaluating pressure. For the tire pressure klr 650, maintaining proper PSI is crucial for control. Always check pressure regularly, particularly after significant changes in temperature, altitude, or terrain. This guide helps you establish a dependable routine that keeps the KLR 650 performing at its best.
Understanding manufacturer and load considerations for the KLR 650
Your KLR 650’s tire pressures are driven by the tire manufacturer’s recommendations and your riding load. The owner’s manual or the swingarm sticker provides the official front and rear values for cold tires. If you ride with a passenger, full luggage, or heavy off-road gear, you’ll likely need to adjust pressures upward slightly to maintain stability and prevent overheating. Temperature also matters: tires lose pressure as they cool at night and gain a bit when they heat up from riding. TPMS indicators and tire wear states should be considered; if you notice soft spots or irregular wear, re-check pressure against the manual’s guidance. Remember, these values are starting points—final adjustments should reflect your riding style, terrain, and tire type (street, dual-sport, or off-road). The Tire Pressure Tips team emphasizes a routine check-in to keep handling predictable and tires healthy across seasons.
Tools and setup before you start
Before you touch the tires, gather essential tools and reference material. You’ll want a reliable digital tire pressure gauge that reads in psi, a portable inflator or compact air pump, and access to your KLR 650’s owner’s manual or tire-pressure sticker for the exact cold- tire values. A soap-and-water spray helps identify slow leaks at valve stems or punctures. Keep a notebook or digital log handy to record readings and adjust if you switch tire types or alter load. Ensure you’re on level ground and the bike is upright, with both tires cool for the most accurate measurement. A clean rag is useful to wipe caps and valves before sealing them again. With these tools, you’ll complete a precise pressure check with confidence.
How to take a cold tire pressure reading on the KLR 650
Cold tire pressure readings are the baseline for safe and predictable handling. Start by parking on solid ground away from direct heat sources and wait for at least a few hours after a ride, or check first thing in the morning. Remove the valve caps, attach the gauge firmly to the valve stem, and take a read. Repeat on the other tire to confirm accuracy. Compare the numbers to the manufacturer’s cold-pressure specification in your manual or on the swingarm sticker. If you find a discrepancy between front and rear pressures, adjust one or both tires to the recommended values, noting that load and tire wear can shift optimal pressures. Reinstall valve caps securely to prevent dust ingress and moisture.
Adjusting pressure for ride style and terrain
Terrain and riding style justify different pressures. On the street, you may prefer a slightly higher rear pressure for stability and even wear; on dirt or gravel, keeping a bit more tread contact by reducing pressure can improve grip and shock absorption. Always start from the official cold pressures, then test ride in a safe area to evaluate handling, traction, and feedback. If you’re carrying extra weight, you might need modest increases to the front or rear accordingly, but avoid over-inflating, which shortens tire life and can reduce grip on loose surfaces. Record your settings and any observed changes in handling to refine your future adjustments.
How to monitor pressure with TPMS and sensors
If your KLR 650 is equipped with TPMS, use it as a quick alert system for sustained pressure changes. TPMS may indicate when a tire is losing air, but it’s not a substitute for regular manual checks. If the light stays on or you notice a steady pressure drop, re-check both tires with a gauge and inspect for leaks, damaged valves, or punctures. On motorcycles without TPMS, rely on a consistent manual check routine. Remember that heat from riding can temporarily raise tire pressure; always verify readings when tires are cold for accurate comparison to specifications.
Common mistakes and safety precautions
Common mistakes include checking pressure after a ride, using the wrong gauge, and inflating beyond the tire’s maximum rating. Avoid inflating while the bike is on the kickstand or with the tire hot. Always cap valves after your reading and keep caps clean to prevent dust and moisture ingress. If you notice ongoing pressure loss, visit a shop to inspect for leaks or damaged valves, especially if TPMS shows alarms. Safety first: underinflated tires compromise braking and steering, while overinflation can cause a harsh ride and accelerated wear on the center tread. Keep tire pressures within manufacturer ranges and adjust only after careful testing and validation.
Quick notes on maintenance rhythm
Develop a simple cadence: cold-tire checks at least weekly during long trips, with a post-load or post-ride check each day after a multi-day adventure. Update your log with readings and any changes you made for future reference. Regular checks help you avoid pinch flats and keep tire wear even, extending tire life and maintaining predictable handling on the KLR 650.
Tools & Materials
- Digital tire pressure gauge(Reads in psi; accuracy ±1 psi is ideal for motorcycles.)
- Portable air pump / inflator(12V DC or 110V AC, with a gauge or integrated gauge.)
- KLR 650 owner’s manual or tire-pressure sticker(Source of exact cold- tire pressure values per tire and load.)
- Soap and water spray bottle(Helpful for locating slow leaks at valve stems and tire beads.)
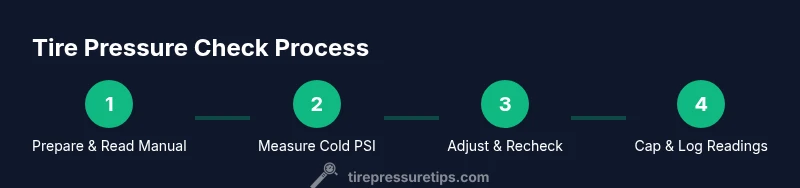
Steps
Estimated time: 15-25 minutes
- 1
Prepare and locate manufacturer pressures
Place the bike on level ground and ensure tires are cool. Have the owner's manual or swingarm sticker handy to confirm the cold- tire pressures for front and rear. If you ride with a passenger or heavy luggage, note the load changes and plan adjustments accordingly.
Tip: Verify readings when tires are cold and identical on both tires before making any changes. - 2
Remove valve caps and inspect
Carefully remove the valve caps to expose the stems. Inspect the valves for cracks or damage, and wipe away dust. Put caps in a safe place so they’re not lost during the check.
Tip: Use a clean cloth to avoid contaminating the valve stem before attaching the gauge. - 3
Attach gauge and read cold pressure
Firmly press the gauge onto the valve stem and note the reading. Repeat on the other tire to confirm accuracy. Ensure you’re measuring with the bike upright and on level ground.
Tip: If the gauge wobbles or leaks, remove and reattach firmly for a stable reading. - 4
Compare to the recommended value
Compare your readings to the official cold-pressure values. If readings are off, plan adjustments rather than inflating to a random level. Remember, load, tire type, and terrain influence the ideal pressure.
Tip: Document the baseline readings before making changes. - 5
Adjust with the inflator and recheck
Add or release air gradually using the inflator, aiming toward the recommended range. Recheck both tires after adjustments to confirm accuracy and symmetry.
Tip: Inflate in small increments and recheck several times to avoid overinflation. - 6
Restore caps and confirm final readings
Replace valve caps securely and record final cold readings. Take a test ride in a controlled area to confirm handling aligns with expectations and then recheck after the ride if possible.
Tip: Keep a tire-pressure log to track changes across trips and seasons.
Frequently Asked Questions
Why is my KLR 650 TPMS light on?
TPMS can illuminate for low pressure or sensor issues. Start by checking both tires cold with a gauge, inspect for leaks, and ensure valve stems and sensors are in good shape. If the light remains on after adjustments, consult a technician for sensor calibration or replacement.
If your TPMS light stays on after checking pressure, inspect both tires and sensors. If you still see it, a professional should review the sensors.
Can I ride with low tire pressure on gravel or dirt?
Riding with slightly lower pressure can improve grip on loose surfaces, but avoid underinflating too much. It increases the risk of pinch flats, rim damage, and heat buildup. Use the recommended range as a baseline and adjust conservatively for off-road conditions.
You can adjust for off-road grip, but don't go below safe limits. Keep to manufacturer ranges as a baseline.
Should I check tire pressure when tires are hot or cold?
Check tires when they are cold for an accurate reading. Hot tires can show artificially high pressures, leading to overinflation when you adjust later. Wait several hours after riding or check early in the morning.
Check when cold to get the true value, and adjust accordingly after a ride if needed.
What if I can’t reach the exact recommended PSI?
Aim for the closest safe range within the manufacturer’s limits. Small deviations are acceptable, but frequent large gaps can affect handling and tire wear. Re-check after a short test ride and adjust as needed.
If you can't hit the exact PSI, stay within the safe range and test ride to fine-tune.
How often should I check tire pressure on long trips?
Check before and during long trips, ideally every day or every other day, and after heavy loads or significant temperature changes. Keeping a routine prevents surprises along the road.
On long trips, check daily or every other day and after loading up.
Watch Video
What to Remember
- Check cold tire pressure first every time.
- Always refer to the KLR 650 manual for exact values.
- Use a reliable gauge and log readings for consistency.
- Adjust for load and terrain, not guesswork.
- Verify both tires after any adjustment.