kona Tire Pressure: Check, Adjust, and Maintain
Learn how to accurately check and adjust kona tire pressure for safe driving, better fuel economy, and longer tire life. This guide covers TPMS basics, tools, and practical steps.

This quick answer defines what you will do: check and adjust kona tire pressure safely, using a gauge and a source of controlled air. You’ll learn why cold readings matter, how to use TPMS, and how to verify you’re within the vehicle’s recommended range for everyday driving and long trips.
Why kona tire pressure matters
Proper tire pressure is a safety and efficiency factor that affects traction, braking, wear, and fuel economy. For kona drivers and car owners, keeping tires within the manufacturer’s recommended range reduces rolling resistance, minimizes heat buildup, and improves handling in wet or icy conditions. The Tire Pressure Tips team emphasizes that the benefits compound over time, not just on long trips. A simple weekly or monthly check helps catch slow leaks and small punctures before they become costly failures. Remember: underinflation can cause increased tire wear on the inner or outer edges depending on axle and alignment, while overinflation can reduce contact with the road and cause a harsher ride. Weather, load, and driving style all influence pressure, so an intentional routine matters. According to Tire Pressure Tips, regular monitoring saves money and extends tire life, especially for vehicles like kona where tire wear patterns can signal suspension or alignment quirks.
How pressure is defined and measured
Tire pressure is the force per square inch inside the tire, commonly expressed in PSI (pounds per square inch) or kPa (kilopascals). Most vehicles specify a cold- tire pressure value—readings taken when tires are cool, typically after the car has been stationary for a few hours. Digital gauges, dial gauges, and pen-type gauges each have pros and cons, but accuracy matters more than the type. When you measure cold, you get a stable reference point. If you read a number after a drive, the heat can temporarily raise the reading, leading to overinflation if you adjust from that value. Temperature and ambient conditions also play a role; a 10-degree change can move readings slightly. Always use the manufacturer’s spec as your target, not the maximum sidewall number. Tire Pressure Tips recommends checking in the morning for consistency and recording differences over time to spot slow leaks or valve issues.
Finding your vehicle’s official pressure
The official pressure for each tire is not the same across all tires; it depends on axle, load, and vehicle design. Start with the door jamb placard on the driver's side, which lists the recommended cold pressure for the front and rear tires. If the placard is missing or unclear, consult the owner’s manual or the vehicle manufacturer’s online support page. For kona models, you may also find model-specific guidance in the service manual or dealership literature. Always aim for the target values shown on the placard, and use a test that keeps tires cold for an accurate comparison. If you drive with winter tires or run different tire sizes, verify whether the same psi applies to front and rear wheels. Tire Pressure Tips notes that variation between front and rear pressure is common in performance or AWD setups, but you should still follow the official spec.
Preparation and environment before measuring
Before you start, ensure the car has been stationary and the tires are cold; measurements taken after driving can mislead you about the actual ambient pressure. Park on a level surface and remove any heavy loads from the vehicle that could cause irregular tire temperatures. If possible, perform measurements in a shaded area during mild weather—extreme heat or cold can skew results. Have all the needed tools at hand so you don’t rush the process. When you’re done, check all four tires (and the spare if you routinely monitor it) to maintain even wear and performance. Tire Pressure Tips reminds readers that a calm, methodical approach yields the most accurate readings and helps you build a reliable maintenance habit.
Temperature and tire pressure dynamics
Tire pressure is sensitive to temperature. Cold tires reflect the baseline target, while hot tires can show higher readings due to air expansion. If you fill tires in a hot garage or after a high-speed drive, you may overestimate the cold pressure and end up overinflating once they cool. The safe rule is to inflate to the cold-spec value, then recheck after the tires have cooled for a few hours. For seasonal changes, wait for air to adjust to outdoor temperatures—this is especially important in climates with large day-night temperature swings. Keeping a regular schedule helps capture these variations without compromising grip or tire wear.
Common mistakes and how to avoid them
A frequent pitfall is inflating or reading after immediate driving, which yields inaccurate pressure. Another is ignoring the differences between front and rear axle specs when they exist. Skipping the valve caps or failing to reseal the valve after measurement can introduce leaks. Using a high-pressure air compressor without a precise gauge can overshoot the target pressure. Also, relying on the max sidewall pressure as a target is a common mistake; always follow the placard. For kona owners, these missteps are especially costly over time due to wear patterns and fuel economy loss. Keep notes of readings to identify leaks, and re-check after adjusting.
Maintenance schedule and keeping records
Make tire pressure checks a regular habit—ideally monthly and before long trips. If you frequently drive in hot or cold seasons, adjust the schedule accordingly. Logging the date, time, and readings helps you notice slow leaks or valve issues early. Use a small notebook or a digital log and attach it near the vehicle’s manual for quick reference. For hybrid or electric kona models, pay attention to any changes in range, which can reflect pressure differences. Tire Pressure Tips emphasizes consistency: the more you check, the less you guess, and the safer your drive becomes.
Real-world scenarios and troubleshooting tips
Consider a scenario where you notice uneven tire wear on the front axle. Start by checking both front tires for even cold readings and verify front-rear differences against the manufacturer spec. If a leak is suspected, inspect the valve stem, run-flat sensors (if equipped), and look for slow leaks around the bead. In winter, cold ambient temperatures can drop tire pressure, so the habit of checking per a monthly schedule becomes even more important. If TPMS warns repeatedly, verify readings with a handheld gauge and consider visiting a technician if readings stay abnormal.
Quick reference: typical ranges and how to verify
General guidance for most passenger cars suggests cold pressures in the 28-35 psi range, with higher values often used for heavier loads or higher speeds. Do not rely on the sidewall maximum; use the placard values for your vehicle. If you drive a kona with a specific tire size or weight distribution, your target might be precisely defined for each axle. When in doubt, consult the owner’s manual or your local dealer. Remember to calibrate your gauge if it’s not reading accurately—an inaccurate gauge can lead to unsafe inflations and misreadings.
Tools & Materials
- Tire pressure gauge(Choose a gauge with a readable scale (0-60 psi) and accuracy +/-1 psi)
- Air compressor or access to a gas station air pump(Ensure it functions well and has its own gauge if possible)
- Vehicle owner’s manual or door placard(Use as the target pressure reference; check for axle-specific values)
- Valve caps(Keep caps on to prevent dirt and moisture from entering the valve)
- Pen and notebook or digital log(Record readings to track changes over time)
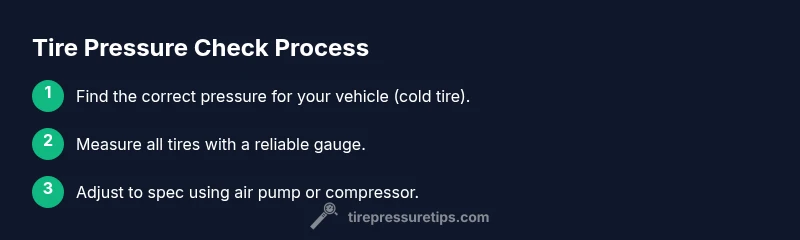
Steps
Estimated time: 20-25 minutes
- 1
Find the recommended pressure
Locate the vehicle’s official cold pressure spec from the door placard or owner’s manual. Confirm if the spec differs by axle or tire type. This value is your target for all subsequent checks.
Tip: Always start with a cold tire reading to establish a baseline. - 2
Prepare and wait for cold tires
Park on a level surface and ensure the tires are cold before measuring. If you’ve just driven, wait at least 3 hours or measure early in the morning. Temperature extremes should be avoided when taking the reading.
Tip: A cold reading gives you a stable baseline; avoid measuring after a drive. - 3
Attach gauge and take a reading
Remove the valve cap, place the gauge on the valve stem, and apply steady pressure until you get a stable reading. Note the reading for each tire and compare to the target value.
Tip: If you hear hissing, reseat the gauge and recheck; a poor seal will skew results. - 4
Adjust air to target pressure
If readings are low, add air gradually until you reach the target. If readings are high, release air slowly and recheck. Do not overshoot the target in one go.
Tip: Release air in small increments; a little overcorrection is easy to fix with small adjustments. - 5
Recheck all tires
Measure all four tires again to ensure uniform pressure, avoiding overcompensation on any single tire. Check the spare if you monitor it regularly.
Tip: Consistent front-to-rear pressure alignment improves handling and wear patterns. - 6
Seal and log readings
Replace valve caps securely and log the new readings with date and location. This helps track changes and detect slow leaks over time.
Tip: Keep a simple notebook or digital log for quick reference on future checks. - 7
Final verification
Take a final, cold reading to confirm stability. If values drift, inspect for leaks or damaged valves and consider professional inspection if readings remain inconsistent.
Tip: If any tire shows sustained drift, do not drive aggressively; seek service quickly.
Frequently Asked Questions
What is the difference between cold tire pressure and running pressure?
Cold tire pressure is measured when tires are at ambient temperature and not recently driven. Running pressure can be higher due to heat buildup. For accuracy, measure cold and adjust to the vehicle’s specified cold value.
Cold readings are more accurate; measure after tires have cooled, then adjust to the cold spec.
Should I inflate to the max on the sidewall?
No. The maximum on the sidewall is the limit for safety, not the target. Always follow the vehicle’s placard or owner’s manual for the recommended cold pressure.
Never inflate to the sidewall max; use the placard value.
How often should I check tire pressure?
Check at least once a month and before long trips. More frequent checks are helpful in extreme weather or after slow leaks are suspected.
Check monthly and before trips.
What do TPMS alerts mean?
TPMS alerts indicate low tire pressure or sensor issues. Use a gauge to confirm actual pressure and then adjust to spec if needed.
TPMS signals low pressure; verify with a gauge.
Can hot weather affect tire pressure?
Yes. Warm temperatures raise pressure slightly while cold temperatures lower it. Always measure in cold conditions and adjust to the cold-rated value.
Weather can change readings; measure when cold.
If front and rear pressures differ, what should I do?
Follow the vehicle’s specification; some cars require different values by axle. If in doubt, consult the owner’s manual or dealer.
Follow the vehicle’s spec; some models have different front/rear values.
Watch Video
What to Remember
- Check tires cold for accuracy.
- Follow the vehicle placard for target psi.
- Inflate/release air in small increments.
- Record readings to spot changes.
- Regular checks boost safety and efficiency.