Tire Pressure Guide for Honda HR-V: Check and Maintain
Practical, step-by-step tire pressure guidance for Honda HR-V owners, including how TPMS works, where to find the PSI, and ongoing maintenance tips from Tire Pressure Tips.

You’ll learn how to check and adjust tire pressure on a Honda HR-V, including how TPMS works, where to find the recommended PSI, and safe maintenance steps. This guide from Tire Pressure Tips outlines needed tools and a clear, step-by-step process to keep your HR-V tires properly inflated.
Tire Pressure Basics for Honda HR-V
Tire pressure is a core safety and performance setting for every Honda HR-V. If you search for tire pressure honda hrv, you’ll see that the target varies by tire size, load, and season. The HR-V's recommended PSI is not a single number printed on the tire; it's the value listed on the driver’s door placard or in the owner’s manual. According to Tire Pressure Tips, the most important practice is inflating tires to this specified value and keeping all four tires within a close range to maintain balanced handling, even wear, and predictable braking. Underinflation can compromise grip and fuel economy, while overinflation can cause harsh rides and uneven tread wear. Measure tires when they’re cold for accuracy, and record readings so you can notice slow leaks over time. This section sets the stage for practical checks, tools, and steps you’ll use to maintain optimal pressure in your HR-V.
How to Find the Correct Tire Pressure for Your HR-V
Your Honda HR-V’s correct tire pressure is not guesswork. The placard on the driver’s door jamb lists the recommended cold psi for both the front and rear tires, and it may differ by trim or tire size. If you can’t locate the placard, consult the owner’s manual or contact a Honda dealer for the model-year specific value. Tire pressures can vary with load and driving conditions, so always use the value that corresponds to your current setup (e.g., with passengers or cargo). The Tire Pressure Tips team notes that many drivers forget to inflate to the correct level because they rely on the tire’s maximum pressure printed on the sidewall, which is not the target for daily driving. When you fill to the right pressure, you’ll notice steadier steering, even tire wear, and better fuel economy. Remember: HR-Vs with different tire sizes may have different recommended pressures—so check the exact spec for your car.
Understanding TPMS and How It Helps
Tire Pressure Monitoring Systems (TPMS) are designed to alert you when a tire is underinflated or overinflated, helping prevent unsafe driving conditions. On many HR-V models, the system will trigger a warning light or message in the instrument cluster if a tire falls below the recommended pressure by a noticeable margin. TPMS is most effective when you combine its alerts with a manual PSI check using a gauge. This dual approach ensures you know both when a tire is diverging from the target and by exactly how much. The Tire Pressure Tips team emphasizes that TPMS is a safety net, not a substitute for regular manual checks, especially after temperature swings, long trips, or seasonal changes.
Tools and Methods: Manual Gauges vs TPMS Readouts
TPMS provides quick alerts, but a reliable tire pressure gauge gives you an exact reading. Digital gauges are fast and easy to read, while dial gauges offer a tactile indication of pressure. For best results, use the same gauge consistently to track changes over time. Always compare gauge readings to the vehicle’s recommended PSI from the placard. If your HR-V uses an indirect TPMS, inflation changes may be inferred through wheel speed or ride feel, but a direct measurement with a gauge remains the gold standard for accuracy. This section helps you pick a tool and a method that fits your routine and your comfort level with tire maintenance.
Step-by-Step Overview of the Check-and-Inflate Process
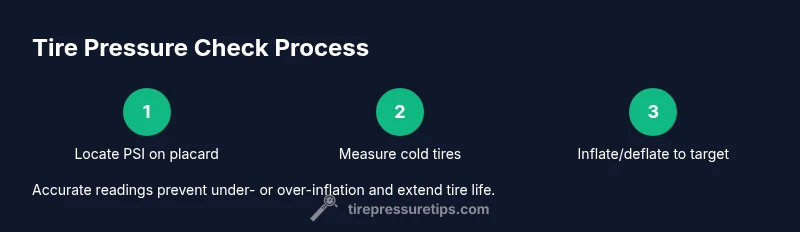
Below is a high-level walkthrough to frame the steps you’ll perform in the dedicated STEP-BY-STEP block. Start with cold tires and end with records you can reference on future checks. The process covers locating the correct PSI, measuring each tire, inflating or deflating to target, and rechecking all readings to ensure uniform pressure across the four tires. Keeping a small log helps you notice slow leaks and seasonal fluctuations before they become a problem.
Common Pitfalls and How to Avoid Them
Common mistakes include inflating or deflating tires when they’re hot, guessing a target from the sidewall, and neglecting the spare tire. Temperature extremes can cause pressure swings of several PSI, so always measure tires when cold for accuracy. Overlooking the spare, or treating all tires as identical, can lead to uneven wear and last-minute tire problems during trips. The best practice is to establish a routine: check monthly, check before long trips, and log changes over time.
Temperature, Seasonal Effects, and Tire Pressure
Temperature has a direct effect on tire pressure. In cold weather, pressures drop; in hot weather, they rise. For HR-V owners, this means you may need to adjust more frequently during winter or summer transitions. Use the placard as your baseline, and remember that a reading on a cold morning may not equal a reading after a highway drive. By understanding the temperature-pressure relationship, you can set expectations and avoid letting pressure drift away from the target during seasonal shifts.
Maintenance Schedule and When to Check Tire Pressure
A good maintenance habit is to check tire pressure at least once a month and before any long journey. Additionally, check when temperatures have recently changed or after you rotate tires. Regular checks help you sustain even tread wear and predictable handling. For HR-V drivers, consider a quick quarterly check after seasonal changes or after heavy cargo loading. Keeping the tires at the recommended PSI protects your investment and improves safety, fuel economy, and ride quality.
Quick Reference Checklist for HR-V Tire Pressure
- Locate the correct PSI on the door placard or owner’s manual.
- Check cold tires with a reliable gauge.
- Inflate or deflate to the recommended PSI for each tire.
- Recheck all readings after adjustment.
- Replace valve caps and log readings for future reference.
Consolidated FAQ Preview and Final Notes
This section can serve as a quick wrap before you head out, but the detailed FAQ is provided at the bottom for deeper questions. The Tire Pressure Tips team recommends developing a habit of monthly checks and keeping your TPMS alerts in view as part of preventive maintenance for your HR-V.
Tools & Materials
- Tire pressure gauge (digital or dial)(Calibrated and within 0-80 psi range for passenger tires.)
- Owner's manual or door placard(Shows the exact PSI for front/rear tires based on trim and tire size.)
- Air compressor or access to an air pump(Needed to adjust pressure; ensure an adequate compressor or station nearby.)
- Valve caps(Keep caps on to protect valve stems from dirt.)
- Notebook or mobile device for readings(Record readings over time to detect slow leaks.)
Steps
Estimated time: 15-25 minutes
- 1
Locate the recommended pressure
Find the exact target PSI on the HR-V door placard or in the owner’s manual. This value varies with tire size and load, so use the spec that matches your setup. Ensure tires are cold before measuring.
Tip: Use cold tires for the baseline reading to avoid inflated results from recent driving. - 2
Check all tires
Take PSI readings on all four tires, and include the spare if your setup uses one. Front and rear tires may have different targets depending on the placard.
Tip: Do not assume equality—different tires can require different pressures. - 3
Remove valve caps and attach gauge
Remove the valve cap from each tire and firmly press the gauge onto the valve stem to obtain a reading. Note the PSI on the gauge.
Tip: If the stem is dirty, wipe it to ensure an accurate reading. - 4
Inflate or deflate to target
Add or release air to bring each tire to its target PSI. Inflate gradually and recheck after a moment to confirm accuracy.
Tip: Avoid the temptation of “close enough”—precision matters for safety and wear. - 5
Recheck readings
After adjusting, recheck all tires to confirm they are at the target PSI. Temperature and recent driving can cause minor drift.
Tip: If readings differ by more than a few tenths of a PSI, recheck again after tires cool. - 6
Refit caps and log results
Replace valve caps and record the current readings for future reference. A quick log helps detect gradual leaks over time.
Tip: Keep the log in your glove compartment or notes app for easy access.
Frequently Asked Questions
What is the recommended tire pressure for Honda HR-V?
Check the door placard or owner’s manual for the exact PSI; it varies by tire size and load.
Look at the door placard for the exact HR-V tire pressure values.
How often should I check tire pressure?
Check monthly and before long trips, and more often in extreme temperatures.
Check tires monthly and before long trips.
Does TPMS show the exact PSI?
TPMS usually warns when a tire is underinflated and may display a psi value on some displays; use a gauge for precise pressure.
TPMS can warn you; use a gauge for precise pressure.
Can over-inflating tires cause problems?
Yes. Over-inflation can lead to reduced traction and uneven wear, especially on HR-V tires.
Over-inflating can hurt grip and wear.
How does weather affect tire pressure?
Cold temperatures lower tire pressure; warm tires rise. Measure when tires are cold for accuracy.
Temperature changes affect pressure; measure cold.
Should I check the spare tire pressure?
Yes. If you carry a spare, ensure it’s properly inflated too.
Don’t forget the spare if you have one.
Watch Video
What to Remember
- Check all HR-V tires when cold against the placard
- Use a reliable gauge and confirm readings
- Inflate to the recommended PSI for each tire
- Monitor TPMS alerts and log readings for trend detection