How to Check Tire Pressure on Honda CR‑V
Learn how to check tire pressure on Honda CR‑V with a practical, step-by-step method. Includes TPMS tips, tools, safety, and maintenance to keep tires at the correct pressure.

By following these steps, you’ll accurately check tire pressure on a Honda CR‑V using a gauge and the door placard. Start with cold tires, read each tire’s pressure, and compare to the CR‑V’s recommended values found on the door jamb sticker or in the owner's manual. According to Tire Pressure Tips, correct tire pressure improves safety, fuel efficiency, and tire longevity.
Why Checking Tire Pressure on Honda CR‑V Matters
Keeping correct tire pressure is essential for safety, handling, fuel economy, and tire longevity on every vehicle, including the Honda CR‑V. Whether you own a small CR‑V or a family SUV, under- or overinflated tires can increase stopping distances, reduce grip in wet weather, and accelerate tread wear. According to Tire Pressure Tips, maintaining proper tire pressure not only lowers risk of blowouts but also improves miles per gallon and steering precision. For the Honda CR‑V, the recommended cold pressure values are published on the door jamb sticker and in the owner's manual, and they can vary by trim level, wheel size, and load. This guide focuses on the practical, car-owner oriented approach to checking those pressures routinely and safely. If you're wondering how to check tire pressure on honda crv, this guide walks you through.
Locate the Correct Pressure for Your Honda CR‑V
The starting point for any tire pressure check is knowing the target value. For the Honda CR‑V, there are separate values for front and rear tires, and these can change with wheel size, trim, and whether the vehicle is loaded. The door jamb placard is the quickest source, but you can also consult the owner's manual or a dealer if you work with different wheels or seasonal setups. Remember that the readings refer to a cold tire, meaning the car has been off for several hours and hasn't been driven recently. Checking hot tires will give inflated readings and trigger unnecessary adjustments. In practice, always verify the exact numbers for your specific build to avoid over- or underinflation.
Essential Tools and Setup
Before you start, gather the right tools and prepare your workspace. You’ll need a reliable tire pressure gauge (digital is convenient for most drivers), a portable air compressor or access to air at a service station, and the door jamb placard or the owner's manual for the CR‑V’s recommended pressures. Optional but helpful items include a notebook or mobile app to log readings, spare valve caps, and a small flashlight for reading gauges in dim conditions. Set aside a clean, level area and ensure the vehicle is off and cool to ensure accurate readings. A tidy setup minimizes mistakes and speeds up the process.
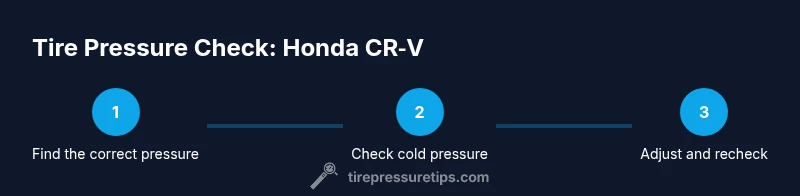
Step-by-Step Guide to Reading Cold Tire Pressure
- Park on a level surface and let the tires cool for at least 3 hours or after a drive, ensuring you’re measuring cold pressure. 2) Remove the valve caps from each tire to access the valve stems. 3) Attach your gauge and take a reading for each tire, recording the numbers. 4) Compare the readings to the CR‑V’s recommended cold pressures listed on the door jamb placard or in the manual. 5) If a tire is underinflated, add air in small increments and recheck after each addition; if overinflated, release air gradually and recheck. 6) Reinstall the valve caps and, if needed, reset or calibrate the TPMS after any adjustments. Total time: about 20–30 minutes.
How to Adjust and Recheck Tire Pressure
Adjusting tire pressure is a precise operation that rewards patience. When a tire is underinflated, add air slowly, pausing to recheck the measurement. If a tire is overinflated, release air in small amounts until the gauge shows the correct reading. After each adjustment, recheck all four tires to ensure uniformity and balance. Don’t forget to reinstall the valve caps—these tiny caps prevent dust and moisture from entering the valve stem. Finally, inspect for any signs of leakage around the valve stem or tread edge that could indicate a slow leak.
TPMS and Calibration for Honda CR‑V
The Honda CR‑V’s Tire Pressure Monitoring System (TPMS) helps alert you to changes in tire pressure, but it does not replace manual checks. If you adjust pressures after a tire rotation, replacement, or seasonal change, you may need to reset the TPMS so the system recalibrates with the new readings. Some CR‑V models require a button or menu sequence to reset TPMS, while others may calibrate automatically after a few miles of driving. Tire Pressure Tips analysis shows that many drivers assume TPMS alone keeps tires safe, but combined with manual checks, it offers the best protection against underinflation.
Maintenance Schedule and Common Mistakes
To keep tire health optimal, check tire pressure at least once a month and before long trips. Always read cold pressures, and recheck after any air addition or removal. Common mistakes include checking after driving, ignoring manufacturer specs, and failing to reseal valve stems after inflation. Use the correct gauge and store it clean and calibrated. If you notice persistent underinflation, inspect for slow leaks from nails, punctures, or damaged valves, and address them promptly. Consistency matters for safety and efficiency.
Verdict: Practical Advice from Tire Pressure Tips
The Tire Pressure Tips team recommends adopting a simple, repeatable routine for Honda CR‑V tire pressure checks. Start with the door jamb placard values, use a reliable gauge, and verify readings when tires are cold. After any adjustment, ensure TPMS is reset if required and recheck all four tires to confirm uniform pressure. Regular checks reduce the risk of flats, improve fuel economy, and help tires wear evenly over time. The Tire Pressure Tips team’s recommendation is to make this a monthly habit and to log readings for ongoing maintenance.
Quick Reference: Final Checklist for Honda CR‑V Tire Pressure
- Park on level ground and verify tires are cold.
- Locate the correct pressures on the door jamb placard/manual.
- Use a reliable gauge to measure all four tires (plus spare if applicable).
- Adjust in small increments and recheck after each change.
- Reinstall valve caps and recalibrate TPMS if required.
- Log readings and plan the next check date.
Tools & Materials
- Digital tire pressure gauge(1 psi resolution; suitable range for passenger tires)
- Portable air compressor or access to air(Ensure it can deliver steady pressure without overheating)
- Honda CR‑V owner’s manual and door jamb placard(Source of exact cold pressure values)
- Notebook or mobile app to log readings(Helpful for tracking measurements over time)
- Valve caps and a valve-core tool(Keep caps on to protect vents; replace if damaged)
Steps
Estimated time: 20-30 minutes
- 1
Verify cold tires and locate target pressures
Park on level ground with the engine off and wait for the tires to cool for several hours. Find the exact cold pressures for your CR‑V on the door jamb placard or in the owner's manual and note any differences between front and rear tires or wheel sizes.
Tip: Cold tires give the most accurate reading; avoid checking after a short drive. - 2
Prepare the tires and gauge
Remove each valve cap and inspect the valve stem for damage. Keep caps in a safe place to avoid losing them, and ensure the gauge is reset to zero before taking a measurement.
Tip: Check all four tires in one session to avoid missing a weak tire. - 3
Read the pressure with the gauge
Attach the gauge to each valve stem and read the displayed pressure. Record the numbers for all four tires and the spare if you rotate tires regularly.
Tip: Take multiple readings for accuracy, especially with older gauges. - 4
Compare against the recommended values
Compare each reading with the CR‑V’s recommended cold pressure. If a tire is low, add air gradually and recheck. If it’s high, release air in small increments and recheck.
Tip: Avoid overinflation; small adjustments make a big difference in ride quality. - 5
Recheck and finalize
After adjustments, recheck all tires. Reinstall valve caps and verify the TPMS warning light behavior; if you changed pressures significantly, it may take a short drive for recalibration.
Tip: Keep a simple log of readings and adjust your maintenance schedule accordingly. - 6
Consider TPMS calibration
If your TPMS warning persists after inflation, follow the CR‑V reset procedure in the manual or contact a service professional for calibration.
Tip: Some CR‑V models require a dedicated TPMS reset step; consult the manual for exact instructions.
Frequently Asked Questions
What is the correct tire pressure for my CR‑V?
The correct pressures are listed on the door jamb placard and in the owner’s manual; values vary by trim, wheel size, and load. Always verify model-specific numbers rather than guessing.
Check the door sticker or manual for your exact CR‑V pressure values, as they vary by model.
Can I check tire pressure when the tires are warm?
No. Measuring warm tires gives higher readings and can lead to overinflation. Always read cold pressures for accuracy.
Wait until the tires are cold to measure.
What tools do I need to check tire pressure?
A reliable tire pressure gauge, an air source for adjustment, and the door jamb placard or manual for target pressures. Optional: notebook to log readings.
Get a gauge and an air source; keep track of readings.
How do I reset the TPMS after adjusting pressure?
Follow the Honda CR‑V’s TPMS reset procedure in the manual or vehicle settings. Some models reset automatically after a short drive; others require a button sequence.
Reset steps vary by model—check the manual.
What if the TPMS warning stays on after inflation?
Double-check all four tires for proper pressure and look for leaks or damaged valves. If the warning persists, have the system inspected by a professional.
If the light stays on, inspect tires and TPMS; seek service if needed.
Is it safe to drive with slightly low tire pressure?
Driving with low tire pressure increases heat and wear, and can reduce control. It’s best to inflate to the recommended level before long trips.
Avoid driving long distances with low pressure; inflate to spec first.
What to Remember
- Check cold tires to match placard values.
- Use a reliable gauge and recheck after adjustments.
- Reset TPMS if required and recheck all tires.
- Log readings for ongoing maintenance.