Tire Pressure Gauge Slime: Safe Use and Maintenance
Learn how to safely use a tire pressure gauge with slime sealant, maintain proper tire pressure, and avoid common mistakes. Expert guidance from Tire Pressure Tips helps you stay safe on the road.

By the end of this guide, you'll confidently check tire pressure, assess when slime sealant is appropriate, and perform basic maintenance with a tire pressure gauge. You'll learn how to choose a gauge, interpret readings for common tire types, and verify TPMS signals. This practical approach helps prevent flats and improves fuel efficiency.
Understanding tire pressure gauge slime and why it matters
Maintaining correct tire pressure is critical for safety, fuel efficiency, and tire life. The combination of a tire pressure gauge and slime sealant represents two distinct tools in vehicle maintenance: one measures air, the other seals punctures. The phrase tire pressure gauge slime captures this integrated approach. According to Tire Pressure Tips, staying on top of tire pressure while using sealants properly can reduce flats and improve handling on wet roads. In this guide, we’ll explain how to use a tire pressure gauge, when slime may be appropriate, and how to monitor TPMS readings without risking over- or under-inflation.
Tools and measurement basics
Choosing the right tire pressure gauge is the first step in reliable maintenance. There are three common types: pencil gauges, dial gauges, and digital gauges. Digital gauges reduce parallax errors and are easier to read in low light, while dial gauges can be very accurate when calibrated. For most drivers, a digital gauge with a wide PSI range and a clear display is ideal. Always check that your gauge reads zero when not in contact with a tire stem, and store it in a clean, dry place. The red thread on the valve stem and the gas cap area must be free of dirt, so you get a true measurement. Remember: tire pressure gauge slime is a separate tool; use it only as directed and never substitute a gauge for necessary inflation checks.
Reading tire pressure accurately and avoiding common mistakes
To get accurate readings, measure tire pressure when the tires are cold, ideally before driving more than a mile. Remove the valve cap, press the gauge onto the valve stem, and take a steady reading without twisting. If the reading seems inconsistent between repeats, re-seat the gauge and wipe the valve stem. Do not rely solely on TPMS readings; TPMS is a warning system, not a replacement for a dedicated gauge. The phrase tire pressure gauge slime appears frequently in informal guidance, but you should treat slime as a separate maintenance step rather than a pressure-management tool. After inflation, recheck the reading again to confirm stability.
Slime sealant basics: when and how to use it safely
Slime sealant is designed to seal punctures and prevent air loss. It is not a substitute for a proper tire repair or for maintaining correct pressure with a gauge. If you decide to use slime, follow the product instructions exactly: inject the recommended amount via the valve stem, drive to distribute the sealant, and then recheck the pressure. Some slime products may interfere with tire balancing or TPMS sensors if overused or misapplied. In general, use slime only for temporary repairs on minor punctures within the allowed guidelines. Always remove the cap and reseat the tire valve after application to avoid spills.
Compatibility, safety, and what to watch for when using slime with a gauge
Because slime changes the interior of the tire, it can affect road feel, noise, and fuel economy if used incorrectly. Slime remains inside the tire until the next professional service, and you should monitor for changes in tire performance. For TPMS-equipped vehicles, avoid relying on the sealant to stabilize tire pressure; TPMS will warn you if the pressure drifts. Tire pressure gauge slime discussions online often misstate the interactions between sealant and pressure measurements. The Tire Pressure Tips team emphasizes following the vehicle manufacturer’s guidance for sealants and gauge use; if in doubt, consult a professional.
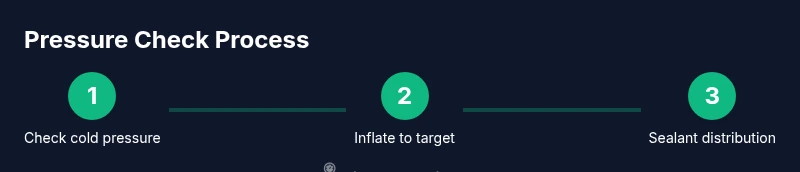
Maintenance workflow: check, inflate, seal, and recheck
A practical workflow helps ensure you maintain safe pressures over time. Step one is to check the cold tire pressure with a reliable gauge. Step two is to inflate to the recommended level if low, then recheck. Step three is to apply slime only if needed and per the product’s instructions. Step four is to recheck the tire pressure after sealing and drive a short distance to distribute the sealant. Finally, record the readings and inspect the tire for any signs of damage or leakage.
Ready for the road: final reminders and proactive maintenance
Regularly checking tire pressures helps you avoid flats, improve handling, and optimize fuel efficiency. Keep a small gauge in the glove box and use the slime product only when you have punctures that qualify as safe temporary repairs. For vehicles with TPMS, use the gauge to confirm readings and not just rely on the dashboard light. Tire Pressure Tips recommends performing a quick weekly check during temperature extremes and before long trips; this habit reduces surprises and keeps you safer on the road.
Tools & Materials
- Digital tire pressure gauge(Calibrated to read in psi; ensure accuracy within +/- 1 psi)
- Slime tire sealant(Use according to product directions; compatible with tubeless tires)
- Valve core tool(Useful for valve stem maintenance and removing cores)
- Tire inflator/air compressor(Needed to adjust pressure after checking)
- Rags or towels(Clean valve area and catch any sealant spills)
- Owner’s manual or vehicle placard(Locate the recommended tire pressure for your vehicle)
- Notebook or digital log(Record readings and maintenance dates)
Steps
Estimated time: 30-45 minutes
- 1
Gather tools and prepare workspace
Collect the gauge, slime sealant, inflator, towels, and the vehicle’s documentation. Park on a flat surface and turn off the engine. Ensure tires are cold to get an accurate baseline reading.
Tip: Lay a towel under the valve area to catch any spills and keep the stem clean. - 2
Inspect tires and look for visible issues
Before testing, inspect tires for cuts, bulges, or embedded objects. Remove the valve cap and check for dirt around the stem. Clean if necessary to avoid false readings.
Tip: A dirty valve stem can cause a slow leak; clean it and reseat the cap snugly. - 3
Attach the gauge and take a reading
Place the gauge on the valve stem firmly and press straight down to seal. Note the pressure reading and repeat on the same tire to confirm.
Tip: If the gauge wobbles or leaks, re-seat and wipe the stem before retrying. - 4
Inflate if needed to the recommended level
If readings are below the recommended level, inflate gradually and recheck after each adjustment to avoid over-inflation.
Tip: Recheck after inflation to confirm the reading remains stable. - 5
Decide on slime application (if needed)
Only use slime if you have a puncture that qualifies for temporary repair, and follow the product directions exactly. Sealant is not a substitute for proper tire repair.
Tip: Apply via the valve stem, then drive a short distance to distribute the sealant. - 6
Recheck pressure and TPMS status
After applying sealant, recheck the tire pressure and ensure TPMS readings reflect the current pressure. Do not rely solely on dashboard warnings.
Tip: If TPMS reads abnormally after sealing, schedule a professional inspection. - 7
Document results and inspect again
Log the final readings and inspect tires for damage. Repeat the check during temperature changes or before long trips.
Tip: Keep a small log for each tire and note any changes over time.
Frequently Asked Questions
Do I still need to check tire pressure if my TPMS shows a value?
Yes. TPMS provides warnings, but it isn’t a precise gauge. Always verify readings with a dedicated tire pressure gauge especially after sealing or inflation.
Yes. TPMS warns you, but you should still verify with a gauge, particularly after sealing or adjusting pressure.
Is slime compatible with all tires and TPMS sensors?
Slime is intended as a temporary puncture sealant and should be used only as directed. It can affect tire balance and may interfere with TPMS sensors if overused.
Slime is for temporary repairs and should be used as directed. It can affect balance and sensors if overapplied.
How often should I check tire pressure?
Check tire pressure at least once a month and before long trips, or when temperatures change significantly. Use a reliable gauge and refer to the vehicle placard for recommended pressures.
Check at least monthly and before long trips, especially when the weather changes.
Where can I find the recommended tire pressure for my vehicle?
The recommended pressure is listed on the door jamb placard or in the owner's manual. Use that value as your inflation target and adjust for load and temperature if advised.
Check the door placard or manual for your recommended tire pressure.
What safety steps should I follow when working with slime?
Read and follow the product instructions carefully. Wear protective gloves if recommended and avoid inhaling any aerosols. After use, clean the valve stem and reseal the cap.
Follow the product instructions, wear gloves if advised, and reseal the valve after use.
Watch Video
What to Remember
- Check tires when cold for accuracy
- TPMS is a warning, not a precise gauge
- Sealant is supplementary, not a fix for every puncture
- Recheck pressure after any slime use
- Keep a tire pressure log for consistency