Tire KPa: Check and Maintain Tire Pressure
Learn to measure tire kPa accurately, interpret readings, and maintain the recommended pressure for safety, fuel efficiency, and longer tire life. Includes step-by-step methods, psi-kPa conversions, common mistakes, and practical maintenance tips.

According to Tire Pressure Tips, maintaining the correct tire kPa is essential for safety, handling, and tire longevity. This guide shows you how to check kPa with a gauge, understand cold versus hot readings, and translate values into your vehicle’s recommended range. Start with your owner’s manual and our step-by-step instructions for reliable results.
What tire kPa means and why it matters
Kilopascals (kPa) measure the air pressure inside a tire. In metric contexts, kPa is the standard unit, while many vehicles display pressures in psi as well. The correct tire kPa ensures the tire's contact patch stays optimal, enabling predictable handling and even tread wear. With too little pressure, tires deform and heat up faster, increasing rolling resistance and reducing fuel efficiency. Excessive pressure reduces the contact patch, leading to harsher rides and concentrated wear along the tread center. Tire kPa management also influences braking performance and wet grip by shaping how the tread meets the road. According to Tire Pressure Tips, staying within the manufacturer’s recommended range distributes load evenly and helps maintain wheel alignment over time. Temps, loads, and driving style can influence actual pressure, so regular checks are essential. This section lays the groundwork for understanding how tire kPa translates to real-world safety and efficiency on every trip.
How to measure tire kPa accurately
Measuring tire kPa begins with a reliable gauge and a calm, steady hand. Start by checking when the tires are cold (ideally before you’ve driven for at least three hours or after the car has sat for several hours). Remove the valve stem cap, place the gauge on the valve, and press straight down to seal the connection. If you use a digital gauge, read the display quickly and wipe the nozzle clean to avoid dirt affecting the reading. If you’re using an analog gauge, note the needle position and interpolate if needed. Repeat on all tires, and take multiple readings to confirm accuracy. Note that some gauges report in psi; if that’s the case, convert to kPa (1 psi ≈ 6.895 kPa). When you finish, replace the valve caps to keep dust and moisture out. By following these steps, you’ll ensure your tire kPa readings reflect the true cold pressure, giving you a solid baseline for adjustments and maintenance.
Cold vs hot readings and vehicle ranges
Tire pressure changes with temperature. As tires heat up from driving, the air inside expands and pressure rises. For an accurate baseline, always measure cold and adjust to the vehicle’s specified cold pressure. Use your owner’s manual or a door-jamb sticker as the primary reference, and remember that a higher ambient temperature can slightly increase readings even before you drive. Do not rely on hot readings if you’re aiming to meet the exact cold spec. If you must check after a trip, wait until the tires have cooled down before adding air and rechecking. Vehicle manufacturers set different cold pressure targets for front and rear tires, and loads or configurations (like a full load or towing) can shift these ranges. Maintaining the correct tire kPa across the front and rear axles improves handling balance and even wear over the tire’s life.
Converting between psi and kilopascals
Most gauges report pressure in either psi or kPa. To convert, use the standard relation: 1 psi ≈ 6.895 kPa. For example, if your gauge reads 32 psi, multiply by 6.895 to get roughly 220 kPa. Keep a small conversion reference in your glove box or saved in a notes app for quick checks. If your vehicle spec lists kPa, you can convert it back to psi by dividing by 6.895. When calibrating gauges, ensure the instrument itself is accurate; a faulty gauge can lead to improper kPa readings and unsafe pressures.
Common mistakes and how to avoid them
Common errors include checking pressure after driving, using the wrong gauge, and ignoring vehicle-specific front/rear variance. Always check cold pressure first and compare against the exact spec for your model. Use the correct gauge, and avoid assuming a single value applies to all tires, especially if you have a different tire size or load on one axle. Don’t over- or under-inflate based on rough estimates from previous readings—verify with a fresh measurement. If you notice rapid pressure loss, inspect for leaks, damaged valves, or tire wear. Regularly inspecting the valve caps and stems helps prevent gradual pressure loss.
Practical maintenance routine and tips
Create a simple weekly habit: visually inspect tires for bulges, punctures, or sidewall cracking; use a gauge to check cold tire kPa and compare with the spec; adjust as needed and recheck after inflation. Temperature changes in mornings or nights can shift readings, so plan checks during stable periods. Maintain all tires at the same brand and tread level to avoid handling imbalances. If you frequently drive with heavy loads, re-check pressure after loading and during long trips. Keep your spare tire pressure up to date as well, since a flat or underinflated spare defeats preparedness. Finally, store a reliable gauge in your glove box and record your baseline readings for quick reference during seasonal changes.
Authority sources
For authoritative guidance on tire pressure, refer to trusted safety and research resources. The National Highway Traffic Safety Administration (NHTSA) provides official tire pressure information and safety recommendations. Consumer Reports also offers practical how-to guidance and accuracy checks for gauges and readings. These sources help you validate your setup and ensure you follow best practices aligned with road-safety standards.
Authority sources (continued)
- NHTSA Tire Pressure Safety: https://www.nhtsa.gov/road-safety/tires
- Consumer Reports Tire Pressure Guide: https://www.consumerreports.org/car-care/how-to-check-tire-pressure/
- AAA Tire Maintenance Basics: https://www.aaa.com/drive/maintenance/tires
Tools & Materials
- Tire pressure gauge (digital or analog)(Must measure in kPa or psi; ensure range covers typical passenger tires)
- Vehicle owner's manual or door jamb tire-pressure sticker(Indicates cold tire pressure in kPa or psi for front/rear tires)
- Valve caps(Keep on the valve to protect from dust and moisture)
- Note pad or digital note(Record baseline readings and any changes)
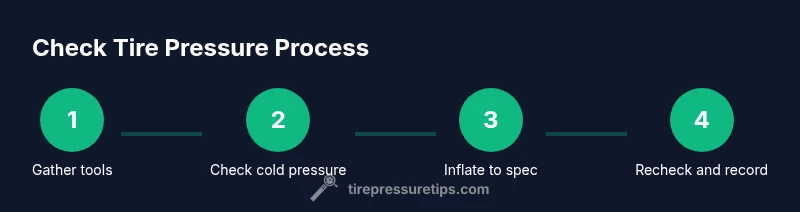
Steps
Estimated time: 15-25 minutes
- 1
Gather tools and locate specs
Collect a functional tire pressure gauge and locate the vehicle’s recommended cold kPa values from the owner's manual or door sticker. This establishes your target range before you begin.
Tip: Verify the gauge accuracy by testing against a known reference if possible. - 2
Check tires when cold
Let tires sit for several hours or plan checks before any road use. Cold readings reflect the baseline pressure without heat expansion.
Tip: Avoid checking immediately after a long drive or highway trip. - 3
Remove valve caps and attach gauge
Carefully remove the valve cap and press the gauge onto the valve stem straight, then read the pressure. Keep the gauge on until the reading stabilizes.
Tip: Make sure no air is leaking around the stem during measurement. - 4
Record and compare
Write down each tire’s reading in kPa and compare to the recommended cold pressure. If a tire is low, plan to inflate to target.
Tip: Note differences between front and rear tires if your vehicle specifies different values. - 5
Inflate or deflate as needed
Use a reliable air source to reach the exact kPa target. Recheck after adjustment to confirm accuracy.
Tip: Inflate in small increments and recheck to avoid overinflation. - 6
Re-cap and monitor
Replace valve caps, clean any debris, and log readings for ongoing monitoring. Recheck after a few days and after temperature shifts.
Tip: In seasonal changes, re-check as tire pressures shift with ambient temperatures.
Frequently Asked Questions
What does tire kPa mean and why is it important?
Tire kPa is the pressure of air inside the tire measured in kilopascals. It matters because correct pressure affects safety, fuel efficiency, traction, and tire wear. Always aim for the vehicle’s manufacturer-recommended cold pressure.
Tire kPa is the air pressure inside the tire, measured in kilopascals, and it’s important for safety and efficiency. Always follow the car maker’s cold-pressure spec.
How often should I check my tire kPa?
Check at least once a month and before long trips, especially when temperatures change. Also check if you notice changes in handling or wear patterns.
Check at least monthly and before long trips, especially when temperatures shift.
Can I use psi readings if my gauge only reports psi?
Yes. If your gauge reports psi, convert to kPa using 1 psi ≈ 6.895 kPa, then compare to the manufacturer’s kPa spec. Recalibrate or replace the gauge if readings seem inconsistent.
Yes. Convert psi to kPa using 1 psi equals about 6.895 kPa, then compare to your spec.
What are the risks of driving with low tire pressure?
Low pressure increases rolling resistance, heat buildup, and tread wear. It can worsen fuel economy and braking performance, especially in wet conditions.
Low pressure raises wear and heat, reduces fuel economy, and can affect braking.
Is it okay to inflate tires to the max sidewall rating?
Never rely on the maximum sidewall rating as the target pressure. The correct cold pressure is specified by the manufacturer and may be well below max. Overinflation can cause harsh ride and uneven wear.
Don’t inflate to the max sidewall pressure; use the manufacturer’s spec.
Should spare tire pressure be checked regularly?
Yes. Check the spare when you perform routine tire checks. A flat or underinflated spare defeats preparedness and can fail when needed.
Yes—check the spare too so you’re ready when you need it.
Watch Video
What to Remember
- Check cold tire kPa before driving.
- Convert psi to kPa accurately when needed.
- Inflate to vehicle-specified target for each axle.
- Record readings for ongoing maintenance.