Silca Tire Pressure Calculator: A Practical Guide for Cyclists
Explore how the Silca Tire Pressure Calculator estimates starter tire pressures for road, gravel, and MTB tires. Practical guidance, key factors, and safety tips from Tire Pressure Tips.

What the silca tire pressure calculator means for cyclists
Designed for cyclists, the silca tire pressure calculator offers a practical starting point for inflating road, gravel, and MTB tires. It translates rider weight, bike weight, and tire width into a rough psi estimate that you can verify with a gauge. According to Tire Pressure Tips, this tool helps riders build confidence by anchoring decisions in a simple model while reminding you that real-world results depend on temperature, riding style, and tire construction. Use it as a guide, not a guarantee, and always compare the result with your tire label and TPMS readings when available.
How the calculation works
The calculator uses a simple, transparent formula so you can see how inputs affect the output. In this educational model, psiEstimate = round((riderWeightKg + bikeWeightKg) / (tireWidthMm / 10) * 3, 0). The total load is converted into a load factor, then divided by a width-based proxy for contact area, and finally scaled to a psi range. The key takeaway: this is a starting point, not a replacement for manufacturer recommendations or professional fitting.
Key factors influencing tire pressure
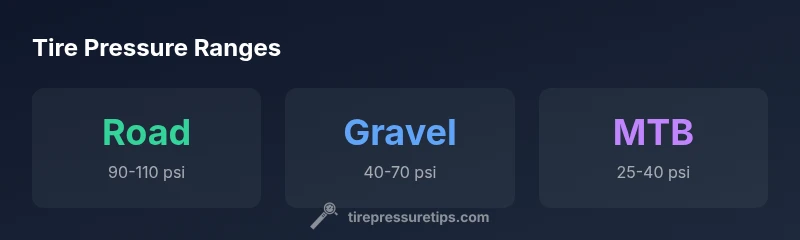
- Tire width: Wider tires work at lower pressures because they distribute load over a larger contact patch.
- Temperature: Heat increases pressure; cold reduces it. Always check pressures after temperature changes.
- Rim width and bead type: These affect how the tire seat and how much pressure is needed for stability.
- Riding style: Aggressive or sprinting behavior may require slight adjustments within safe ranges.
- Tire construction: Tubeless setups and sealants can shift optimum pressures slightly.
Practical steps to use the estimator during rides
- Input riderWeightKg, bikeWeightKg, and tireWidthMm into the calculator.
- Read the estimated psi and compare to your tire label and your gauge reading.
- Inflate or deflate in small increments (2–5 psi) and recheck after riding a few minutes.
- Note how temperature and terrain change your preferred pressures, and adjust your setup accordingly.
- Log your preferred pressures for future reference.
Safety and maintenance considerations
- Do not exceed the tire's maximum rated pressure as indicated on the sidewall.
- Use a reliable gauge; digital gauges reduce user error.
- Regularly check pressures before long rides or after significant temperature shifts.
- For tubeless tires, ensure seals and bead seating before relying on higher pressures.
- Always cross-check with manufacturer guidance when in doubt.
Real-world examples and edge cases
Example A: A road rider with a 75 kg rider and a 11 kg bike uses 23 mm tires. The calculator yields a pressure in the typical road range, which you then validate with a gauge and adjust for temperature before a sprint. Example B: A gravel rider with wider 40 mm tires and a 82 kg load gets a lower estimate, illustrating why wider tires operate at lower psi without sacrificing grip.
Tuning precision: gauge choice and cross-checks
This calculator is a teaching tool. Always verify with a trusted tire pressure gauge and cross-check against official recommendations from your tire and wheel manufacturer. Regular checks across weather changes help maintain consistent handling and tire wear. Tire Pressure Tips analysis shows that regular checks and temperature-aware adjustments improve consistency. The Tire Pressure Tips team recommends using this calculator as part of a broader tire maintenance routine.