Road Bike Tire Pressure Guide
A comprehensive road bike tire pressure guide covering how to find the right PSI, measure accurately, and maintain readings for speed, grip, and puncture resistance. Includes steps, tools, tips, and FAQs.

This road bike tire pressure guide walks you through finding the correct PSI, dialing it in for rider weight and terrain, and keeping readings consistent. You’ll learn how to read sidewall recommendations, use a gauge, adjust for temperature, and verify pressures after a ride. Start by checking the tire sidewall or rim for the manufacturer’s range.
Why Tire Pressure Matters for Road Bikes
For road cyclists, tire pressure is not a cosmetic detail—it's a core variable that affects speed, comfort, grip, and durability. The right pounds per square inch (psi) can reduce rolling resistance on smooth pavement, improve cornering stability on variable surfaces, and minimize pinch flats when hitting a sharp edge. According to Tire Pressure Tips, many riders either guess or rely on feel rather than the tire's official range. Using the manufacturer's range printed on the sidewall as a baseline helps you set a repeatable starting point, but temperature, rider weight, and tire width all influence the ideal pressure. In practice, a road bike tire's target pressure is a balance: lower pressures increase compliance and traction but raise the risk of squirm and wear, while higher pressures improve efficiency at the cost of comfort and grip. The goal of this guide is to translate the numbers on the tire into reliable, repeatable readings that you can verify with a gauge before every ride. You’ll learn to read the sidewall information, select a front and rear baseline, and adjust for conditions with minimal drama. Weather and road texture matter: warm air expands volume and raises pressure, while cold mornings can drop psi noticeably. A consistent routine reduces the guesswork, so you can focus on speed, cadence, and staying safe on turn-filled descents.
Tire pressures impact rolling resistance, ride quality, grip, and pinch protection. Even small differences of a few psi can change how your bike feels on a climb, a corner, or a pothole. This is particularly true for modern road tires that come in a range of widths and constructions. The Tire Pressure Tips team emphasizes that the most reliable starting point is the tire's own published range, not a personal preference. As you gain experience, you can tune within that range based on weight, gear, and road texture. Remember that temperature affects air density and tire volume; a heated ride will raise pressure slightly, while a cold morning can lower it. Adopting a consistent process helps you avoid under- or over-inflation and keeps your tires performing at peak potential over many miles.
Practical takeaway: treat tire pressure as a repeatable setting you verify with a gauge, not a guess. This mindset reduces uncertainty, supports speed and efficiency, and minimizes the risk of flats on rough pavement. The Tire Pressure Tips guidance stresses starting within the manufacturer's range and adjusting by feel after a short test ride. By building a simple routine, you can maintain confidence on every route and in varying weather conditions.
Reading and Interpreting Your Tire's Recommended Range
The manufacturer usually prints a pressure range on the tire sidewall. This range is your baseline; it accounts for the tire's width, construction, and intended use. The lower and upper bounds are there to accommodate a spectrum of rider weights, rims, and road surfaces. When you begin, locate both numbers and understand that they represent a window, not a single target. If you ride with wider tires or a heavier setup, the range may shift slightly; if you switch rims or go tubeless, re-check the recommended band. In practice, many riders keep front and rear within the same band, then nudge toward the upper or lower end based on grip, comfort, and rolling resistance during a short test ride. Tire Pressure Tips analysis shows that the most common misstep is inflating to a personal “comfort” level rather than staying inside the advised range. The goal is consistency: choose a starting point from the range, test ride, then record the final setting for future reference. Temperature and tire volume influence how a given psi feels, so adjust after weather changes or after swapping tires. Observing these rules helps you stay out of the extremes, where speed or grip may be compromised. The approach is simple: respect the range, validate with a gauge, and calibrate your feel through controlled trials on similar road surfaces. Over time, you’ll identify a reliable baseline tailored to your weight, geometry, and preferred riding conditions.
A practical rule of thumb is to mix science with experience: use the tire’s published range as your starting map, then refine based on how the bike behaves in the seat and on descents. The more consistent your readings, the more predictable your handling becomes. This consistency is what keeps you confident in a range of weather and road textures, from smooth asphalt to slightly rough pavement, where the difference between too-soft and too-stiff can be substantial.
How to Measure Pressure Accurately
Accurate pressure measurement starts with a good gauge and a clean, sealed valve connection. A high-quality gauge provides repeatable readings that you can trust across rides. Begin by removing any dirt from the valve stem and ensuring the valve is clean so the gauge seals properly. If you have a Presta valve, screw on the valve adapter only if needed. Attach the gauge to the valve stem firmly, avoiding wiggling that could leak air or skew the reading. If using a pump with an integrated gauge, verify the gauge accuracy by testing on a known reference (you can compare with a handheld gauge). When you read the pressure, wait a moment for the air to settle and read again to confirm consistency. If the reading is off by more than a psi or two between attempts, recalibrate your gauge or try a different one. Temperature changes can affect readings; read the gauge after the tire has cooled for a few minutes if you’ve just finished inflating. Digital gauges tend to be easier to read and less prone to parallax error, but old-school analog gauges can be highly accurate with regular calibration. The key is consistency: use the same gauge for all measurements and log the numbers so you can track changes over time. If you ride tubeless or with a flexible sealant, you may notice a different warm-up profile; in that case, trust the gauge and the tire’s recommended range rather than guessing from feel.
After you confirm the reading, release a small amount of air or add air to fine-tune into the target range, verifying again with the gauge. This final verification minimizes misreads and helps you lock in a stable pressure before you start riding. A reliable routine reduces the chance of under-inflation during a long ride and underlines the importance of a diligent, repeatable measurement process. The aim is accuracy and repeatability, ensuring your tire pressure stays within the designated band across temperatures and miles. This discipline is the foundation of a smooth, efficient road ride.
Adjusting for Rider Weight, Terrain, and Temperature
Weight distribution and terrain significantly influence how your road bike tires press against the road. A heavier rider or loaded bike will compress the tire more, potentially lowering the effective sidewall stiffness and altering grip if you stay at the same psi as a lighter rider. Conversely, a light rider on a rough surface may benefit from a slight decrease in pressure to improve compliance and traction. Terrain matters too: fast, smooth pavement allows for higher pressures to minimize rolling resistance, while rougher surfaces with small edges and imperfections may require slightly lower pressures for better damping. Temperature has a tangible effect on air density and volume; a warm day will raise pressure a bit, while a cold morning can drop it. If you transport gear in a bag or pannier, you should expect a modest pressure increase once you’re rolling, since air expands with heat and the tire handle may feel stiffer. The Tire Pressure Tips approach recommends basing adjustments on the tire's listed range and then refining through controlled rides. Start with the middle of the range and test in similar conditions; then note how the tire responds on climbs, descents, and corners. If you notice a harsh ride on rough tarmac, try a slight decrease in pressure; if you feel excessive squirm or slower cornering, you might cautiously move toward the upper portion of the range. Always recheck after temperature shifts—your target PSI can drift with ambient temperature. A few careful tests before a race or long ride will save you time and improve performance in the saddle.
A practical takeaway is to develop a simple pre-ride checklist that accounts for weight changes, weather conditions, and tire wear. The manufacturer’s range provides a reliable anchor; use it as a baseline, then apply small, measured adjustments specific to your bike, tires, and typical routes. By adopting a methodical approach, you’ll preserve speed without sacrificing grip, longevity, or comfort. That systematic mindset aligns with the Tire Pressure Tips guidance: stay within the range, calibrate to your conditions, and document your findings for consistent results.
Common Pitfalls and Quick Fixes
Even seasoned riders fall into a few common traps when managing road bike tire pressure. One frequent error is inflating or deflating based on feel alone rather than checking with a gauge. A barely perceptible change in feel can be misleading, especially at higher speeds where micro-variations matter. Another pitfall is neglecting to recheck pressures after climate shifts or tire changes. Temperature moves air density, and a tire that was perfect in the morning may be off by the end of the day. Over-inflating for speed on a rough road can reduce contact with the surface and increase the risk of punctures from sharp edges. Conversely, under-inflation can cause excessive tire roll, unpredictable grip, and increased heat buildup during long rides. Tubeless setups add their own nuance; some riders inflate tubeless tires to a different baseline due to sealant and bead seating, so following the exact guidance on the sidewall remains essential. If you suspect a slow leak, you should isolate the cause: inspect the valve, rim tape, and the bead. A rapid loss of air typically indicates a puncture or a damaged valve core. Regularly checking your pressures before and after rides helps you catch leaks early. The key to avoiding these pitfalls is a disciplined routine: verify with a gauge, adhere to the published range, and adjust gradually while recording changes for future reference. Brand-specific guidance, like that from Tire Pressure Tips, emphasizes that a consistent workflow is what yields dependable, ride-ready tires across seasons.
Practical practice: keep a small notebook or app log of front/rear PSI values, note any ride quality changes, and revisit your baseline after tire swaps or season shifts. When you combine measurement discipline with a clear understanding of how weight and terrain influence pressure, you are well-positioned to maintain optimal grip, speed, and protection from pinch flats.
A Practical Quick-Check Routine for Before Rides
Before every ride, run a concise three-step check to ensure your road bike tires are within the desired pressure window. Step one is to verify the front and rear tire ranges on the sidewalls and confirm they are consistent with your typical riding conditions. Step two is to attach your gauge to the valve and read the current pressure; repeat with a second reading after a brief pause to confirm stability. Step three is to adjust in small increments if needed and recheck again to ensure you end within the target band. When in doubt, lean toward the middle of the range for everyday riding and shift toward the upper or lower end depending on grip, speed, and comfort on your route. Also, factor in weather: on hot days, you may see a noticeable rise in PSI, and on cold mornings, a drop. Logging your baseline after each change gives you a reference point for the next ride and helps you understand how your tires feel under different loads and temperatures. The quick routine is straightforward: check the printed range, measure with a reliable gauge, and tweak by small steps. Consistency wins here, as a repeatable ritual yields predictable tire behavior mile after mile, ensuring your road bike performs close to its potential in any weather. The Tire Pressure Tips team would emphasize that building this habit is the cornerstone of tire care and racing performance.
Practical Implications for Maintenance and Performance
A road bike tire pressure guide is most useful when it translates directly into maintenance habits that you can sustain. By integrating the manufacturer’s range with a consistent measurement routine, you gain a reliable baseline that stays valid across miles and seasons. A few months of disciplined practice will expose how your tires respond to rider weight changes, different routes, and temperature fluctuations. The result is steadier cornering, reduced rolling resistance, and fewer pinch flats. While the exact psi values vary, the underlying principle remains the same: pressure is a controllable variable that sits at the intersection of comfort, speed, and safety. The Tire Pressure Tips team recommends embracing a methodical approach rather than chasing a single “ideal” number. Your final target psi should reflect your typical riding weight, bike setup, and preferred terrain, with periodic rechecks as tires wear and weather shifts. By documenting readings, you establish a trackable history that informs future tweaks, keeps your tires in a healthy state, and minimizes trial-and-error during critical training blocks or race prep.
Tools & Materials
- Bike floor pump with built-in gauge(Ensure gauge reads in psi and is calibrated)
- Digital tire pressure gauge(Calibrate and zero before use; read at eye level)
- Presta valve adapter (if needed)(Use only if your wheel requires it)
- Valve core tool(Helpful for tubeless setups or leaks)
- Rag or paper towel(Clean valve stems for a tight seal)
- Notebook or mobile log(Record baseline PSI for future rides)
Steps
Estimated time: 15-25 minutes
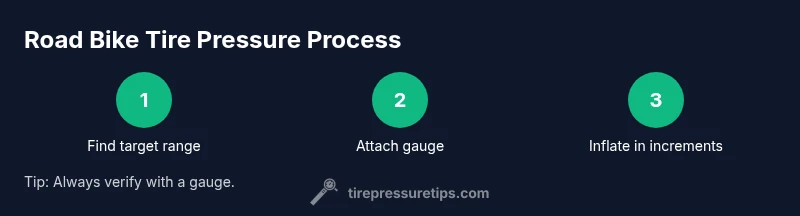
- 1
Find your target range
Locate the manufacturer’s recommended PSI range printed on the tire sidewall. Compare front and rear, and note any differences based on weight and terrain. Use the range as your baseline rather than a single number.
Tip: If in doubt, start near the middle of the range and adjust after a short test ride. - 2
Prepare your gauge and pump
Attach the gauge to the valve, ensuring a clean, tight seal. If using a pump, confirm it is calibrated and capable of accurate readings. For Presta valves, use adapters only when necessary to avoid leaks.
Tip: Hold the gauge steady and read at eye level to avoid parallax error. - 3
Inflate in small increments
Pump in small steps, pausing to read the gauge after each increment. Stop when the reading sits within the target range, and recheck again after a short ride for settling.
Tip: 1–2 psi increments keep you precise and reduce overshoot risk. - 4
Check after riding
Tires heat up during riding, which raises pressure slightly. Recheck within a few minutes of a cool-down and adjust within the range as needed.
Tip: Log the final pressure so you can reproduce it on future rides. - 5
Adjust for conditions
If you ride on rough pavement, consider a touch lower pressure; for smooth, fast sprints, you might move toward the upper end, always staying inside the published range.
Tip: Create a quick pre-ride rule: baseline, then a small conditional tweak. - 6
Maintain consistency
Repeat this process for every ride across seasons and tire changes. Consistency beats guesswork and strengthens your confidence on long descents and technical sections.
Tip: Regularly calibrate your gauge to avoid drift over time.
Frequently Asked Questions
What is the ideal tire pressure for road bikes?
Ideal pressure depends on tire width, rider weight, and terrain. Always start with the manufacturer’s published range and adjust based on ride feel after a short test.
Ideal pressure varies with tire width, rider weight, and terrain. Start with the manufacturer range and fine-tune after a short test ride.
How should I check tire pressure while riding?
Check only in a safe spot using a portable gauge. Don’t rely on feel during motion; measurements are essential for accuracy.
Only check pressure in a safe spot using a gauge; avoid relying on feel while riding.
Does tubeless affect the target psi?
Tubeless tires can require slightly different pressures than clinchers. Follow the sidewall guidance specific to the tubeless setup and adjust from there.
Tubeless setups often have their own recommended range; check the sidewall guidance for tubeless tires.
Can temperature cause PSI to change a lot?
Yes. Temperature changes affect air density, so PSI can drift with weather. Recheck after significant shifts in temperature.
Temperature can move PSI; recheck after big temperature changes.
What if my tire loses air quickly?
Inspect for leaks, punctures, or valve issues. Check rim tape and valve cores, and replace components as needed.
If air leaks fast, check for punctures and valve issues and inspect the rim tape.
Front and rear tire pressures: should they differ?
Rear tires typically benefit from higher pressure to support weight, but always follow the published ranges for each wheel.
Rear often needs more pressure; follow the guidelines for each wheel.
Watch Video
What to Remember
- Start with manufacturer range and adjust by ride feel
- Use a reliable gauge and recheck after temperature changes
- Rear tire pressure often differs from front due to weight
- Inflate in small increments to prevent overshooting
- Log your target PSI for consistency