Ninja 500 Tire Pressure: How to Check and Maintain
A practical, expert guide to checking and maintaining proper Ninja 500 tire pressure for optimal handling, safety, and tire life.

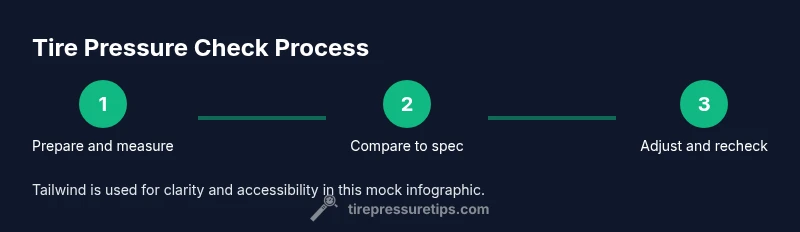
By learning ninja 500 tire pressure basics, you’ll ensure safer handling, better tire wear, and consistent performance. You’ll need a cold-when-measured pressure reference (check the owner’s manual or tire sidewall), a reliable gauge, and a pump to adjust. Follow these quick steps to measure, verify, and set the correct pressures for calm, predictable riding.
Why tire pressure matters for the Ninja 500
Maintaining the correct ninja 500 tire pressure is essential for safety and performance. The ninja 500 tire pressure you run influences how the front end responds, how the rear sits under power, and how evenly the tread wears. Correct pressure improves grip in corners, steady braking, and ride comfort, while also extending tire life. Overinflation creates a harsher ride and a smaller contact patch, which can reduce grip in cold or wet conditions. Underinflation increases heat buildup and wear on the shoulders, potentially causing instability at highway speeds. For riders, small pressure changes can alter feel significantly, so start with the manufacturer’s baseline from the manual or label and adjust for luggage, rider weight, and riding style. Temperature shifts also move readings, so always measure when tires are cold. By mastering ninja 500 tire pressure, you get predictable handling on mountain passes and calmer highway stability.
How to locate the official specs for your Ninja 500
tire pressures for the Ninja 500 are listed by the manufacturer and can differ by tire type and load. The best source is your Kawasaki Ninja 500 owner's manual, which provides front and rear pressures and notes about loading scenarios. If the manual is unavailable, check the tire sidewall for the recommended pressures and refer to the manufacturer’s guidelines for sport motorcycles. Distinctions exist between cold and hot readings, so ensure you measure when tires are cold to get an accurate baseline. When you find the official numbers, keep them handy in a note or photo for quick reference. Remember that heavier luggage or a passenger may require slight adjustments to maintain handling balance. Always ensure you’re using the correct pressures for the tire type installed on your Ninja 500.
Tools and materials you’ll need to check ninja 500 tire pressure
Before starting, assemble the essentials. A reliable digital tire pressure gauge is the single most important tool; look for accuracy within ±1 psi and a rubberized grip for damp weather. You’ll also need the Ninja 500 owner’s manual or a printed spec sheet showing the recommended front and rear pressures. A pump or compressor compatible with motorcycle valves helps for adjustments, especially when readings are far from spec. A clean rag keeps stems dry and readings clear, and a valve-stem brush helps remove debris to improve seal. If you ride with a spare tube or kit, keep it nearby. With these tools, you’re prepared to measure accurately and adjust as needed.
How to perform a cold-pressure check: practical steps
Cold-pressure checks yield the most accurate readings. Park the Ninja 500 on a level surface away from direct sun or heat sources. Wait at least 3 hours after riding, or check first thing in the morning, to ensure tires are cold. Remove the valve caps from both wheels and wipe the stems clean. Attach the digital pressure gauge squarely to the valve stem and take a reading for the front and rear tires. Compare each reading to the manufacturer’s recommended pressures in your manual. If a reading is below target, add air slowly until you reach the spec. If you’re above target, release air in small increments until it matches. Recheck both tires after any adjustment, then snug the valve caps back on. Store your gauge so it’s ready for the next check. This procedure yields reliable ninja 500 tire pressure and a safer ride.
Interpreting readings and making adjustments safely
Pressure readings bridge your attention to detail and safe riding. The accuracy of the gauge matters; a low-quality gauge can give inconsistent numbers, leading to misadjustments. If readings drift with temperature, adapt your check schedule—monitor in cooler parts of the day, or after parking in shade. Changes in ride feel—head shake, squatting under acceleration, or soft braking—can indicate pressures require adjustment. Make small changes (1–2 psi) and recheck after a short ride to confirm stability. If you’re unsure or the readings are inconsistent, seek professional guidance rather than riding with uncertain pressures. Consistent ninja 500 tire pressure is a foundation of safe, confident handling.
Seasonal and load considerations for riding a Ninja 500
Temperature swings affect tire pressure; hot days raise the reading, while cold mornings lower it. When adding luggage or riding with a passenger, pressures may need slight adjustment to preserve handling balance. If you ride aggressively on twisty roads, you might prefer a marginally higher front pressure to reduce head shake; for long highway miles, a touch higher rear pressure can improve stability. Always measure with cold tires and re-check after a short ride, then document changes to refine your setup. Seasonal shifts may require minor tweaks, so revisit your targets at the start of each season and adjust accordingly for consistent performance.
Safety, wear, and maintenance reminders
Tire pressure is a cornerstone of motorcycle safety. Over-inflated tires wear in the center, under-inflated tires wear on the shoulders and can overheat. The ninja 500 tire pressure should align with the manufacturer’s recommendations, not with guesswork. Always verify pressure when tires are cold and before you ride, especially after heat exposure or long trips with luggage. Check both tires regularly—at least once a month or every 750–1000 miles—whichever comes first. Inspect tires for wear, cracks, and embedded objects during each check, and replace tires showing aging signs. Good tire pressure practice can marginally improve fuel economy and tire life, while preserving performance on both daily commutes and spirited rides.
Authoritative sources and further reading
For deeper understanding, consult several credible sources that discuss tire pressure concepts and safety guidelines:
- https://www.nhtsa.gov/road-safety/tyre-pressure
- https://www.nhtsa.gov/equipment/tire-pressure-monitoring-system-tpms
- https://www.michelinman.com/auto/tire-safety.html
- https://www.sae.org/standards/
Tools & Materials
- Digital tire pressure gauge(Choose ±1 psi accuracy; prefer a gauge with a bleed/deflate button for exact adjustments)
- Ninja 500 owner’s manual or official spec sheet(Front and rear tire pressures; load-based adjustments if applicable)
- Inflation pump or air compressor compatible with motorcycle valves(Manual pumps are fine; ensure user-friendly nozzle and gauge compatibility)
- Clean rag and valve-stem brush(Wipe stems clean; remove debris to improve seal)
Steps
Estimated time: 20-25 minutes
- 1
Prepare the bike and gauge
Park on a level surface away from heat. Ensure the bike is cool, with both tires off the ground if possible. Remove valve caps and inspect for damage. Keep the gauge within reach for quick access.
Tip: Check gauge battery and ensure the nozzle fits your valve stem. - 2
Find the target pressure
Consult the owner’s manual or the tire label on the swingarm. Note separate targets for front and rear tires and any load-based adjustments.
Tip: If you ride with a passenger or luggage, document the adjusted targets for future checks. - 3
Measure cold pressures
Attach the gauge firmly to each valve stem and record front and rear readings. Do this before riding to avoid heat-inflated numbers.
Tip: Take two readings for each tire to verify consistency. - 4
Adjust as needed
If readings are low, add air slowly in small increments; if high, release air little by little. Recheck after each adjustment.
Tip: Avoid overcorrection; aim for exact target values. - 5
Recheck and reseal
Once targets are met, recheck both tires, then screw the valve caps back on securely. Wipe away any moisture or dust.
Tip: Keep a brief note of adjustments and the ambient temperature for future reference. - 6
Store and maintain
Store gauge properly. Schedule regular checks, especially after seasonal changes or trips with luggage.
Tip: Inconsistent readings may indicate a faulty gauge or a valve stem issue; test with a second gauge to confirm.
Frequently Asked Questions
What is the correct ninja 500 tire pressure for front and rear?
The exact numbers depend on your tire type and load. Refer to the Ninja 500 owner’s manual or the tire sidewall label for the official front and rear pressures and adjust if carrying luggage or a passenger.
Check the owner’s manual for the front and rear pressures and adjust according to load. If in doubt, consult a technician.
Can I ride if my tire pressure is slightly low?
Riding with slightly low pressure can be done temporarily, but it increases wear and can affect handling. Inflate to spec before riding long distances or aggressive corners.
You should inflate to the recommended pressure before riding long distances or aggressive riding.
Does a TPMS exist on the Ninja 500 and help with tire pressure?
Many Ninja 500 models don’t come with TPMS from the factory. If your bike has one, it can help monitor pressure, but always verify readings manually to ensure accuracy.
TPMS can help, but always cross-check with a manual gauge for accuracy.
How often should I check Ninja 500 tire pressure?
Check at least once a month and before long trips. After seasonal changes or changes in luggage, re-check and adjust as needed.
Check monthly and before long trips, plus after any season or load changes.
Do temperature changes affect tire pressure readings?
Yes. Temperature shifts cause readings to change. Measure and adjust at similar temperatures, or recheck after a few hours of temperature stabilization.
Temperature changes can alter readings; recheck after temperature stabilization.
What if I don’t know the tire type installed on my Ninja 500?
Check the tire’s sidewall for the tire model and speed rating, then consult the owner’s manual for the recommended pressures specific to that tire type.
Look at the tire sidewall for model details and check the manual for the recommended pressures.
Watch Video
What to Remember
- Check ninja 500 tire pressure when tires are cold.
- Use a reliable gauge and confirm front/rear targets from the manual.
- Make small adjustments and recheck after a test ride.
- Seasonal and load changes require periodic recalibration.
- Regular checks improve safety, tire life, and ride confidence.