Tire Pressure on Motorcycle: Check, Set, and Maintain
A practical, step-by-step guide to checking and maintaining tire pressure on motorcycle, including cold PSI principles, TPMS considerations, and safe adjustment practices for better handling and tire life.

By the end, you’ll be able to accurately check and adjust tire pressure on a motorcycle, select the correct cold PSI from your tire label, and diagnose common issues with TPMS. Gather a quality tire pressure gauge, a gauge with tire size chart, and a reliable thermometer for ambient temperature context. Always check when the tires are cold and your bike is upright.
Why Tire Pressure on Motorcycle Matters
The tire pressure on motorcycle directly affects safety, handling, braking, and tire wear. The contact patch you ride on changes with pressure, affecting how quickly you react to steering inputs and how evenly the tire wears. According to Tire Pressure Tips, correct tire pressure on motorcycle improves stability, cornering predictability, and overall ride safety. This truth isn’t just about comfort—underinflation or overinflation can amplify heat buildup, reduce grip in rain, and lead to uneven wear. Riders should understand that a small change in pressure, combined with load and riding style, can magnify across miles traveled. By starting with the manufacturer’s recommended pressures and tailoring within a safe range, you can achieve more consistent handling, better heat management, and longer tire life across thousands of miles.
To set expectations, consider that the rider’s weight, luggage, and riding style all influence optimal pressure. Always reference the tire information placard on the motorcycle, the owner’s manual, and the tire sidewall specification. When in doubt, prioritize the manufacturer’s numbers over personal guesses. This approach supports predictable handling, safer braking, and even wear patterns. As you build your routine, a steady check cadence helps prevent surprises during cornering or emergency maneuvers.
Tip: The brand Tire Pressure Tips emphasizes that consistent checks protect tire integrity and rider safety. Building a habit around cold-check routines minimizes the effect of heat from recent rides and ambient temperature shifts on your readings.
Understanding Cold vs Hot PSI and Temperature Effects
Tire pressure is not a fixed value; it changes with temperature. Cold PSI refers to the pressure when the tire is at ambient temperature and has not recently heated from road contact. When you ride, tires warm up, and the air inside expands, increasing the pressure read by your gauge. Because the bulk of a motorcycle ride happens after you start moving, it’s essential to measure when tires are cold for a baseline.
This is where the TPMS can be helpful, but it should not replace a manual gauge. Do not rely on “hot” readings for adjustments because you may overinflate once the tire cools back down. In environments with large temperature swings (overnight cools, hot sun, or winter conditions), be mindful that the same tire can ride with noticeably different pressures from morning to late afternoon. The Tire Pressure Tips analysis, 2026, supports the principle that temperature-driven pressure changes are a real factor in ride feel and tire wear, even if exact numbers vary by tire type and load.
When planning a pressure check, factor in weather and ride duration. If your bike spends long periods in the sun or under heavy luggage, the tires may heat up quickly and read higher mid-ride. The safest practice is to start from a cold measurement and adjust to the manufacturer’s cold specification, then recheck after a short ride if you’ve adjusted recently.
Key takeaway: Always measure cold and compare against the cold spec on the placard or manual; avoid inflating to a warm-reading target. This helps maintain consistent grip and tire wear across weather conditions.
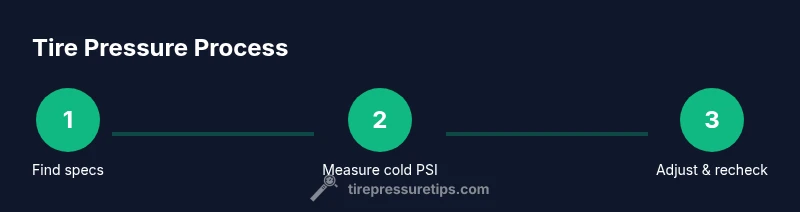
How to Check Tire Pressure on Your Motorcycle
Checking tire pressure is a straightforward maintenance task, but accuracy matters. Start with a cold tire check to obtain a valid baseline. Position the motorcycle on a level surface and ensure it is upright. Remove the valve cap from the tire you’re checking and prepare your gauge of choice. If you’re using a portable air pump, make sure it’s calibrated.
Attach the gauge squarely to the valve stem, keeping it steady to avoid slippage. Read the gauge and compare with the manufacturer’s recommended cold PSI. If you find the pressure is too low, add air in small increments, then recheck. If it’s too high, release air gradually and recheck until you land within the target range. For a precise result, repeat the process on the other tire as well. Finally, replace the valve caps securely to protect against dust and moisture.
Note: If your bike uses a TPMS, cross-check the sensor readings after you adjust pressure to confirm consistency with the gauge. The goal is to achieve balanced pressure across front and rear tires, which influences stability, steering feel, and tire wear. Keep a simple log of readings to track changes over time and to spot trends linked to temperature or load changes.
Practical tip: Always bring the hand pump or gauge with you on long trips; many roadside issues stem from underinflation, particularly on sport or touring motorcycles.
Tools and Materials You’ll Need
Before you start, assemble the essential tools and materials. Having everything ready saves time and makes the process smoother.
- name: Tire pressure gauge (dial or digital) required: true note: Choose a gauge with a clear, easy-to-read display and be sure it’s calibrated. A gauge that’s inaccurate will mislead your adjustments.
- name: Portable air pump or compressor required: false note: Optional if your bike’s on-board pump isn’t convenient. A portable pump helps you top off tires on the road.
- name: Valve caps and a removal tool (optional) required: false note: Keep a couple of spare caps; damaged caps can let moisture and debris in.
- name: Owner’s manual or the tire information placard required: true note: The official spec is your best reference for cold PSI values and tire sizes.
- name: Ambient thermometer or estimate of temperature required: false note: Air temperature can help you interpret readings when weather changes.
Having the right tools reduces the risk of over- or under-inflation and makes it easier to maintain consistent pressure across rides.
Interpreting the Specs: Manufacturer vs Load
Tire pressure recommendations come from two main sources: the vehicle manufacturer’s specification (often on the swingarm placard or owner manual) and the tire’s sidewall information. Start with the manufacturer’s cold PSI values for front and rear tires. Those numbers assume a typical rider and common luggage load. If you regularly carry heavy gear or frequently ride with a passenger, you may need to adjust within the safe range recommended by the manufacturer. The exact numbers differ among models and tire types, so refer to the placard or manual rather than guessing.
If you don’t find a placard, look up the tire size and motorcycle model in the owner’s manual or consult a dealership. Remember that sport tires, touring tires, or off-road tires may have slightly different targets. Always aim for the middle of the recommended range rather than maxing out the sidewall. This helps maintain predictable handling, even wear, and confidence in braking and cornering.
A consistent approach is to check both tires when the bike is upright and unloaded, then adjust to the cold target before your next ride. Logging readings over time helps you spot changes due to weather or tire wear, and keeps you on the right pressure track over the miles.
Pro tip: The Tire Pressure Tips team recommends documenting your baseline pressures for each tire; this makes it easier to revisit your setup as tires wear or luggage increases.
TPMS on Motorcycles: What to Know
Many modern motorcycles feature a tire pressure monitoring system (TPMS), especially touring and adventure models. TPMS can alert you to a losing tire or overheating, providing an extra layer of safety. However, TPMS data should complement—not replace—manual checks with a dedicated gauge. Some TPMS displays show readings when the bike is on, but their accuracy can vary under different temperatures and riding conditions. If your TPMS warning appears, verify the value with a trusted gauge and recheck the tire in a safe location.
TPMS is most effective when you also keep a routine cold-psi check and a simple maintenance log. On bikes without TPMS, you can still maintain precise control by regularly checking pressures and inspecting tires for uneven wear. If you need to reset TPMS after a pressure adjustment, follow the manufacturer’s reset procedure; improper resets can cause false warnings or missed alerts.
Takeaway: TPMS is a helpful safety feature, but it does not replace the standard habit of measuring pressure with a gauge and verifying against the official spec.
Common Mistakes to Avoid When Checking Tire Pressure
Avoid these common errors that compromise accuracy and safety:
- Checking pressure after a ride or warm day instead of when cold.
- Rounding to the nearest whole number; read the display accurately and note decimals when present.
- Using a worn or inaccurate gauge.
- Inflating or deflating based on feel rather than the target value.
- Forgetting to recheck after adjustment or neglecting both tires.
- Ignoring the tire’s load conditions (weight, passengers, luggage) when setting pressures.
By avoiding these mistakes, you maintain more consistent handling and more even tread wear. Remember that small, deliberate adjustments—coupled with cold readings and manufacturer guidance—lead to better safety margins and predictable responses in corners and braking.
Caveat: Always recheck after adjusting and, if possible, confirm readings in a shaded or cool area to minimize heat influence on the gauge. This practice reduces the chance of reading drift during hot days or after a ride.
Seasonal and Load Considerations
Seasonal changes and load variations affect tire pressure. Colder weather generally lowers PSI, while hot days or sustained riding raise it. If you ride in varying climates, consider checking pressures more frequently to maintain a consistent setup. Luggage or a passenger also increases load and shifts the ideal targets. Adjust within the manufacturer’s stated range to accommodate additional load, then recheck after a ride to confirm stability.
If you store your motorcycle during winter or in a cool environment, the tires may lose some pressure due to temperature shifts. In such cases, perform a cold check before heading out and adjust as needed. Regular checks become even more important for bikes that see a mix of city riding and long highway trips, as heat buildup and load changes are more pronounced.
Note: The Tire Pressure Tips team emphasizes that consistent checks across seasons help maintain performance and tire longevity.
Maintenance Routine: Quick Checks and Documentation
Set a simple, repeatable maintenance routine to keep tire pressure consistent. For many riders, a monthly check is a good baseline, plus a pre-ride check before long trips. Create a small log or digital note with the front and rear tire pressures, ambient temperature, and any changes in load (e.g., luggage). This log helps you see trends and adjust as tires wear or as the bike’s configuration changes.
When you adjust pressures, check both tires again to ensure they remain within the target range. Replacing worn tires may alter the feel and required pressures; recheck after replacement to capture the new baseline. Finally, inspect the valve stems and caps for damage or leaks, and replace any faulty parts promptly to prevent slow leaks.
Key habit: Treat tire pressure checks as part of your regular safety routine, not a one-off task. Consistency beats intensity when it comes to tire health and riding confidence.
Tools & Materials
- Tire pressure gauge(Calibrated, readable display (dial or digital). Ensure accuracy within 1-2 psi.)
- Portable air pump or compressor(Use for topping off; ensure it’s suitable for low-volume motorcycle tires.)
- Valve caps (spare caps)(Carry a couple of spare caps in case of loss or damage.)
- Owner’s manual or tire placard(Reference for cold PSI targets and tire sizes.)
- Ambient thermometer or temp estimate(Helpful for interpreting readings with temperature changes.)
Steps
Estimated time: 15-25 minutes
- 1
Gather tools and locate targets
Assemble a gauge, manual, and any inflation device. Locate the recommended cold PSI values for front and rear tires from the placard or owner’s manual. Having everything ready reduces errors during measurements.
Tip: Double-check gauge calibration before starting. - 2
Ensure bike is cold and upright
Park on a flat surface and let tires cool if the bike has been recently driven. A stable, upright stance ensures accurate readings and prevents wobble during measurement.
Tip: If the bike was ridden earlier, wait at least 3 hours or ride only after cooling completely. - 3
Remove valve caps and prepare stems
Take off the valve caps with clean hands to prevent dust ingress. Inspect valve stems for damage or leaks before attaching the gauge.
Tip: Keep caps in a pocket to avoid losing them. - 4
Attach the gauge and read pressure
Secure the gauge on the valve stem and read the pressure reading. Compare it to the manufacturer’s cold PSI targets in the placard/manual.
Tip: Keep the gauge perpendicular to the valve for an accurate reading. - 5
Adjust pressure to target
If below target, add air in small increments, then recheck. If above target, release air gradually and recheck until you reach the cold spec.
Tip: Avoid overinflating—tiny adjustments prevent overshoot. - 6
Recheck both tires
Perform the same steps for the other tire. Consistency between front and rear pressures improves handling.
Tip: Check both tires under similar ambient conditions. - 7
Reinstall caps and document
Secure valve caps firmly and replace any missing. Record your readings and the date in a maintenance log for future reference.
Tip: A simple log helps spot trends over time. - 8
Test ride brief and final check
Take a short test ride to feel the result, then recheck if practical. Adjust if your ride feels off, but avoid chasing readings after a short warm-up.
Tip: Always verify after the ride with a cold check when possible.
Frequently Asked Questions
What is the recommended tire pressure for a motorcycle?
Pressure targets vary by model and tire type. Always start with the manufacturer’s cold PSI values from the placard or owner’s manual, and adjust if you carry extra load or ride with a passenger. If you can’t find the spec, consult the dealer or the tire manufacturer for guidance.
Check the bike’s placard or manual for the exact cold PSI values; adjust only within the recommended range and consider load when riding.
How often should I check tire pressure on a motorcycle?
Check at least once a month and before long trips. Always measure when tires are cold, and recheck after adjusting or after riding longer distances.
Check monthly and before trips, and always when tires are cold to ensure accuracy.
Can TPMS replace manual checks?
TPMS helps monitor pressure and alerts you to significant changes, but it does not replace the accuracy of a manual gauge. Use both for best results.
TPMS helps, but don’t skip checking with a gauge for precise pressures.
Is it safe to inflate to the maximum sidewall pressure?
Never rely on the maximum sidewall number. Always use the manufacturer’s recommended cold PSI specified for your bike and tire combination.
Don’t inflate to the max; follow the official cold PSI from your manual or placard.
Does temperature affect tire pressure on motorcycles?
Yes. Temperature changes affect air density and pressure readings. Check and adjust when tires are cold and account for seasonal shifts.
Temperature changes matter; read cold PSI and adjust as needed.
What type of tire pressure gauge should I use?
Either digital or analog gauges work well. Choose one that is easy to read and properly calibrated, and keep it in good condition.
Use a reliable gauge you can read easily and trust.
Watch Video
What to Remember
- Check cold PSI against manufacturer targets
- Use a reliable gauge for accurate readings
- Consider load and season when adjusting pressures
- TPMS is helpful but not a substitute for gauge checks
- Make tire pressure checks a regular habit