KLR650 Tire Pressure: Check, Adjust, and Maintain
Learn how to check and maintain optimal klr650 tire pressure for front and rear tires, including TPMS tips, load considerations, and off-road guidance.

You will learn how to check, adjust, and maintain klr650 tire pressure for front and rear tires, with guidance for load, off-road riding, and TPMS considerations. Ensure you use cold tires, a reliable gauge, and refer to the bike manual. This improves grip, tire life, and safety. Follow the steps in the article to complete the task quickly.
Why tire pressure matters for the KLR650
For riders of the KLR650, tire pressure significantly influences handling, traction, and tire wear. Getting it right matters whether you’re carving pavement, cruising dirt roads, or tackling rocky trails. According to Tire Pressure Tips, maintaining correct, cold tire pressure optimizes grip on both street and dirt, minimizes heat buildup, and extends tire life. Underinflation causes the tire to deform more and overheat, accelerating wear and increasing the risk of pinch flats when the rim hits rough terrain. Overinflation reduces the contact patch, can make the ride harsh, and increases the chance of a puncture from road hazards. Because dual-sport tires behave differently from street tires, you should start with the vehicle’s recommended cold pressure values printed on the swingarm sticker or in the owner’s manual, then adjust for load and terrain.
Riders often underestimate how load affects pressure. A full rider with luggage or camping gear shifts weight toward the front or rear and can require subtle adjustments within the manufacturer’s spec. Small changes in pressure can change traction, steering feel, and tire wear patterns for the KLR650. The goal is a balanced contact patch that remains predictable whether you’re riding on blacktop, gravel, or mud. Consistency matters: check pressures regularly, especially before long trips or trips with heavy loads. When you maintain tire pressure consistently, you improve handling confidence, fuel efficiency, and tire longevity, which is why this guide emphasizes a practical, field-tested approach to klr650 tire pressure.
Understanding tire structure and load on the KLR650
The KLR650 uses dual-sport tires designed to work across pavement and off-road surfaces. The front tire mainly contributes to steering control, while the rear tire handles propulsion and stability. Weight transfer from rider, passenger, and luggage changes how the tires contact the ground, which in turn affects grip and wear. Because different riding modes demand different contact patches, consult the owner’s manual or swingarm sticker for the manufacturer’s recommended cold pressures and adjust within that safe range for loads and terrain. The same tire can behave differently as temperatures change, so consistent checks matter for reliable handling. In short, klr650 tire pressure isn’t a one-time setting; it’s an ongoing balance between control, protection, and tire life.
Tools and preparation for checking cold tire pressure
Before you touch the valves, prepare a reliable setup. You’ll need a tire pressure gauge (dial or digital) and a suitable air source such as a portable pump or compressor that fits motorcycle valve stems. Locate the recommended cold pressures in the owner’s manual or on the swingarm sticker. Park the bike on a level surface, with the engine off and tires cold (ideally after the bike sat unused for several hours). Clean the valve stems to remove dust and debris, then remove the valve caps and take a reading on both tires. If the gauge reads low, add air in small increments and recheck until you reach the recommended range. Repeat for the rear tire, noting that load and riding style may warrant a slight adjustment within the spec. Keep a small notebook or app log to track readings over time, which helps identify leaks or slow air loss.
Front vs rear: check, adjust, and balance
Front and rear pressures are not always identical and should be treated as two separate settings. Start with the prescribed cold pressure for each tire, then consider load distribution and riding style. If you carry a heavy pack or plan a long off-road stint, a subtle rear tire adjustment can improve stability, while a heavier front load might make steering feel lighter than expected. After inflating, recheck both tires to ensure symmetry and even wear potential. A well-balanced pressure helps maintain predictable steering, even contact, and safer cornering on mixed surfaces.
Off-road vs street: adapting pressure for terrain
Off-road riding often benefits from lower pressures to increase the contact patch and improve traction on loose surfaces, rocks, and sand. Road riding typically requires higher pressures for stability and even wear on asphalt. The key is to stay within the manufacturer’s safe range and avoid going too low, which risks pinch flats, bead dislocation, or rim damage. If you ride regularly on mixed terrain, plan to check and adjust pressures at the start of each ride and after any significant change in load or temperature. Always recheck after a stop to confirm nothing shifted during the ride.
Common mistakes and troubleshooting
Common mistakes include checking when tires are hot, ignoring the manufacturer’s recommended ranges, and using an inaccurate gauge. A cheap gauge can give misleading readings, leading to under or over-inflation. Do not inflate beyond the max pressure listed on the tire sidewall, and always replace lost valve caps to prevent dirt entry. If you notice inconsistent readings, test the gauge with a known reference, inspect valve stems for leaks, and consider replacing aging stems or tires. Regular checks help catch slow leaks early and prevent ride surprises.
Seasonal maintenance and long-term plan
Tire pressure deserves regular attention as seasons change. Temperature fluctuations cause air to contract in cold air and expand when hot, altering readings. Plan monthly checks, especially before trips or after seasonal changes, and maintain a simple log of readings and adjustments. Pair pressure checks with tire tread inspections, looking for uneven wear, cracks, or embedded debris. A proactive schedule keeps klr650 tire pressure optimal, improves safety, and extends tire life.
Tools & Materials
- Tire pressure gauge (dial or digital)(Essential for accurate readings when tires are cold)
- Air compressor or portable pump(Must be compatible with motorcycle valve stems)
- Owner's manual or tire pressure sticker(Check recommended cold pressure values for front and rear tires)
- Valve cap wrench or valve core tool(Useful for valve maintenance or stem service)
- Clean rag(Wipe the valve stem and cap area before reading)
Steps
Estimated time: 15-25 minutes
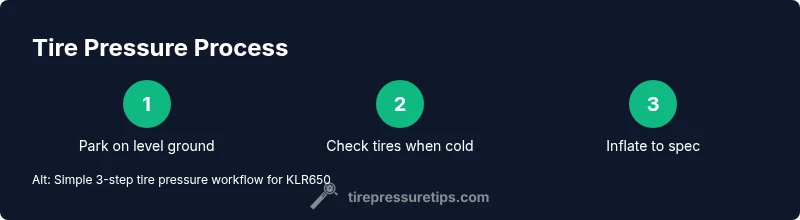
- 1
Park on level ground
Turn the bike off, level it on its side stand or center stand if possible, and ensure the tires are cold. This ensures the reading reflects the true cold pressure rather than heat buildup from start-up or riding.
Tip: Use a level surface and wait at least 2-3 hours since last ride for accurate cold readings. - 2
Remove valve caps and inspect
Take off both valve caps and inspect the valve stems for dirt, cracks, or damage. A compromised valve stem can cause slow leaks that skew readings.
Tip: Keep caps in your pocket or on the other goggles to avoid losing them. - 3
Measure current pressures
Attach the gauge to each valve stem and record the readings for both front and rear tires. Compare to the manufacturer recommended cold pressures found in the manual or sticker.
Tip: If the reading feels off, test the gauge on a known reference or another tire to confirm accuracy. - 4
Adjust to spec
If a tire is below the recommended cold pressure, add air in small increments and recheck. If above, release small amounts until within the specified range.
Tip: Make small adjustments and recheck; small changes can have noticeable effects on handling. - 5
Recheck both tires
Once your target pressures are set, remeasure both tires to ensure consistency and balance. Uneven pressures can affect steering and traction.
Tip: Take one final reading after you close the pump and replace valve caps securely. - 6
Note and store data
Record the final cold pressures, the ride load, and planned terrains. Regular records help identify leaks and justify adjustments over time.
Tip: Keep a simple log in a notebook or phone note for future reference. - 7
Inspect tires for wear
While you are at it, inspect tread depth and any irregular wear patterns. Address any issues before longer trips to prevent safety risks.
Tip: If you notice unusual wear, consult a professional about alignment or tire choice.
Frequently Asked Questions
Should I check tire pressure when tires are cold?
Yes. Cold readings reflect the true tire pressure and avoid inaccuracies caused by recent riding heat.
Yes, check when cold to get an accurate reading.
What is the recommended tire pressure for the KLR650?
Always refer to the owner's manual or swingarm sticker for the official cold pressure values for front and rear tires. Adjust within that safe range for load and terrain.
Check the manual for the official cold pressures and adjust within that range.
Does the KLR650 require TPMS to manage tire pressure?
Many KLR650 models do not come with TPMS. If your bike has TPMS, use it as a secondary reference and still rely on a trusted gauge and manual values.
TPMS can help, but rely on a gauge and manual values first.
Can I lower tire pressure for off-road riding?
Lower pressures can improve traction on loose surfaces, but stay within the safe range to avoid pinch flats and bead issues. Reinflate to spec after the ride.
Yes, within safe limits; reinflate after riding.
How often should I check tire pressure?
Check before long trips and at least monthly, especially when temperatures shift or you carry extra load.
Check before trips and monthly, especially with changes in load or temperature.
How does temperature affect tire pressure?
Temperature changes cause air to contract in cold conditions and expand in heat, so readings can shift with the weather. Re-check after temperature shifts.
Temperature changes can shift readings; recheck after shifts.
Watch Video
What to Remember
- Check cold pressures before each ride.
- Use the bike manual as the authority for target pressures.
- Balance front and rear for predictable handling.
- Document readings to spot slow leaks.
- Inspect tires for wear during pressure checks.