How to Fill Tire Pressure Without a Gauge
Learn practical steps to estimate and adjust tire pressure when a gauge isn’t available. Safe, actionable tips, visuals, and maintenance reminders from Tire Pressure Tips.

To fill tire pressure without a gauge, first locate the recommended PSI on the door placard or owner's manual. Use an air pump and inflate slowly until the tire feels firm and evenly rounded. Check visually from multiple angles to avoid overinflation, then recheck with a tire gauge as soon as you can. This method is a temporary measure; verify accuracy at your earliest opportunity.
Why proper tire pressure matters
Maintaining the correct tire pressure is essential for safety, fuel efficiency, handling, and tire longevity. Underinflation increases rolling resistance, heat buildup, and wear on the outer edges, while overinflation reduces the contact patch and can cause a harsher ride and uneven wear. Tire Pressure Tips emphasizes using your vehicle’s recommended cold PSI from the door placard or owner’s manual as the baseline. If a gauge isn’t available, this guide offers a practical approach to get you safely back on the road, with a plan to verify pressure with a proper gauge at the earliest opportunity. Regular checks, especially during temperature changes, are a cornerstone of tire maintenance and dependable driving performance.
Can you safely inflate without a gauge?
Yes, but it’s important to treat the process as temporary and use caution. Without a gauge, you sacrifice exact numbers for an approximate target. The main risks are underinflation, which can lead to overheating and poor fuel economy, and overinflation, which can cause a harsher ride and increased wear in the center of the tread. The method described here provides a repeatable, safety-conscious approach that minimizes risk while you obtain a proper gauge. Remember: accuracy matters most when temperatures change or you’re preparing for a long trip. This guidance aligns with Tire Pressure Tips’ recommendations for responsible tire maintenance.
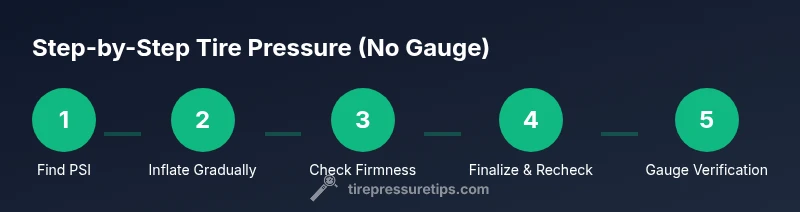
Step 1: Find the recommended PSI for your vehicle
The starting point for any inflation effort is your vehicle’s recommended PSI. Look for this on the driver’s door placard; if unavailable, consult the owner's manual or contact the manufacturer. Separate front and rear values may exist for some models. Use the lower of the two values as a baseline if you’re unsure and avoid inflating beyond the tire’s maximum rating printed on the sidewall. Establishing the correct baseline ensures your subsequent steps stay within a safe range and reduces guesswork during non-gauge inflation.
Step 2: Prepare your tools and environment
Choose a flat, shaded surface away from heat sources. Gather an air pump (manual or electric), the door placard or manual for PSI references, and a clean cloth to wipe the valve stem. Clear any dirt around the valve stem, as debris can cause leaks or misreadings. If you have a spare gauge, keep it accessible as a backup. Ensure you’re inflating cold tires for the most accurate future checks, and set aside enough time for careful inflation without rushing.
Step 3: Attach the pump and start inflating toward the target (no gauge present)
Firmly attach the pump nozzle to the valve stem and open the flow slowly. Add air in small increments, stopping to assess the tire’s firmness and shape. Without a gauge, rely on gradual inflation and stop when the tire begins to feel firm and evenly rounded. Avoid forcing air in too quickly or inflating beyond the tire’s maximum rating. If you notice the bead separating or the sidewall bulging, pause and reassess immediately.
Step 4: Visual checks to gauge firmness
After inflating briefly, step back and inspect the tire’s contour. A properly inflated tire should look round and have an even contact patch with the road. The sidewall should be firm, not overly rounded, and there should be no obvious irregularities around the rim. If the tire still appears soft or the tread edge sits high, it’s safer to stop and switch to a gauge for precise measurement rather than risk overinflation.
Step 5: Compare all tires and ensure uniform feel
Inflate tires in a balanced manner, particularly on vehicles with performance or staggered wheel setups. If one tire seems noticeably firmer or softer, address it first to maintain even handling. After initial inflation, take a short drive to settle the tires and recheck any large discrepancies once back in a cool state. Consistency across all tires helps with steering response, tire wear, and overall safety.
Step 6: When to switch to a gauge and why precision matters
If you’re unsure about the result or if conditions are unusual (extreme heat, altitude changes, or cold weather), use a tire gauge as soon as possible. A gauge provides a definitive measurement, ensuring you stay within the recommended range and avoid the risks of under- or overinflation. Once you have a gauge, recheck each tire and fine-tune to the exact PSI, then continue routine checks for ongoing safety.
Step 7: Long-termMaintenance and best practices
Make tire pressure a regular habit. Check all tires cold at least once a month, and before long trips or when temperatures shift significantly. Keep a small gauge in your glove box for quick readings and consider a digital gauge for faster results. Document the PSI values once verified so you have a personal reference for future inflations. These steps help you maximize tire life, fuel efficiency, and vehicle safety.
Tools & Materials
- Air pump or compressor(Choose a device you trust; a slow, controlled flow helps avoid overshoot)
- Door placard or owner's manual with recommended PSI(Cold PSI values are typically listed; use these as your baseline)
- Tire valve caps(Keep caps on to prevent debris from entering the valve)
- Clean cloth for valve stems(Wipe dirt to prevent leaks and ensure a good seal)
- Soapy water (optional) to check for leaks(If you suspect a leak or have a damaged valve)
Steps
Estimated time: 30-60 minutes
- 1
Find the recommended PSI
Locate the official cold PSI for your tires on the door placard or in the owner’s manual. If different tire sizes exist, use the base value from the placard. This establishes the target range for inflation.
Tip: If you’re unsure, start slightly below the higher value and adjust up as needed - 2
Prepare the inflating area and tools
Move to a flat, shaded area and assemble your pump, placard, and cloth. Clean the valve stem to prevent debris from causing a leak or reading error.
Tip: Have a backup gauge handy if available - 3
Attach pump and begin inflation
Securely connect the pump to the valve stem and open in small increments. Stop frequently to assess firmness and avoid overshooting the target.
Tip: Inflate slowly to maintain better control - 4
Make visual checks for shape and firmness
Inspect the tire for an even, rounded shape and a flat contact patch with the road. If the sidewall bulges or the bead appears misaligned, stop and reassess.
Tip: Use a level perspective; look at both sides of the tire - 5
Ensure uniform pressure across tires
Compare firmness across all tires; equalized feel helps predictable handling and wear patterns.
Tip: Address any outlier tire first - 6
Switch to a gauge for exact verification
If you haven’t used a gauge yet, obtain a reading now to confirm your non-gauge inflation aligns with the spec.
Tip: Even a quick 3- to 5-second check improves safety - 7
Document and maintain your tire pressures
Record the verified PSI for each tire and schedule monthly checks, especially with seasonal temperature shifts.
Tip: Keep a spare gauge in your glove box for quick future checks
Frequently Asked Questions
Is it safe to drive on underinflated tires?
Driving on underinflated tires can cause overheating, uneven wear, and reduced braking performance. If you suspect underinflation, pull over safely and check with a gauge as soon as possible.
Underinflated tires are unsafe; pull over safely and verify pressure with a gauge as soon as you can.
Can I rely on how the tire feels to judge pressure?
No. The tire’s feel is a rough indicator at best. Only a gauge provides an accurate measurement, especially before long trips or in extreme temperatures.
Feel isn’t a reliable way to judge pressure; use a gauge for accuracy.
Why should tires be cold before checking pressure?
Cold tires reflect true ambient pressure. Heat from driving raises the reading, leading to overestimation if you measure after a ride.
Check when cold so you read the real pressure.
What are the risks of overinflating without a gauge?
Overinflation can reduce traction, increase wear in the center of the tread, and raise the chance of a blowout on rough roads.
Overinflating can be dangerous; it wears the center of the tread and can cause a blowout.
What should I do if I can't locate the recommended PSI?
Look for the placard on the driver’s door or consult the owner's manual. If unavailable, avoid guessing and seek a gauge or professional help.
If you can’t find the PSI, don’t guess—consult the manual or a gauge.
How often should I check tire pressure?
Check at least monthly and before long trips, and always when temperatures shift significantly. Cold tires will give the most accurate baseline.
Check monthly and before trips, especially when weather changes.
Watch Video
What to Remember
- Know the recommended PSI for each tire
- Inflate gradually to avoid overshoot
- Use a gauge for accuracy when possible
- Check tires cold and recheck after driving
- Maintain monthly tire pressure checks