How to Lower Tire Pressure Without a Gauge: A Practical Guide
Learn safe, practical steps to lower tire pressure without a gauge when needed, with guidance on targets, risks, and how to verify later.

You can safely lower tire pressure without a gauge in an emergency by using a known reference from the door placard and making very small, felt-based adjustments. After each adjustment, re-check as soon as you can with a gauge to confirm you’re within the recommended range. According to Tire Pressure Tips, precision matters for safety.
Why lowering tire pressure without a gauge might be necessary
In rare situations you may need to reduce tire pressure without a gauge, such as when you’re temporarily loading a vehicle for a short trip or dealing with unusually stiff ride quality on rough roads. While this is not ideal and cannot replace a proper gauge, it can be a short-term option to preserve control when immediate re-check isn’t possible. According to Tire Pressure Tips, the priority is to avoid excessive underinflation and to return to the manufacturer’s recommended range using a gauge at the earliest opportunity, because accuracy matters for handling, tire wear, and fuel efficiency.
Understanding target ranges and gauges
Target tire pressures come from the vehicle’s door placard and often vary by axle. Front and rear tires can have different recommended psi, and some models specify different figures for the left and right sides. A gauge is the most reliable way to confirm you’re within the stated range. If you don’t have a gauge, use the placard as a reference point and adjust gradually while paying attention to how the car feels and handles. Temperature, load, and driving conditions all influence effective pressure, so plan to re-check with a gauge as soon as you can.
Methods to estimate without a gauge
There are practical, non-precise ways to estimate pressure when you can’t use a gauge right away. First, use a known reference: if you know a tire that is currently within the recommended range, you can approximate the others by matching ride feel. Second, use ride height and the tire’s dampening sensation as a rough guide: a tire that feels overly soft or squishy when pressed may indicate too little air, while a hard, overly stiff tire can suggest too much air. Third, monitor heat and wear after a short drive; if tires feel excessively warm or show unusual wear patterns, adjust with caution. These methods aren’t precise, but they help you stay within a safer range until you can verify with a gauge.
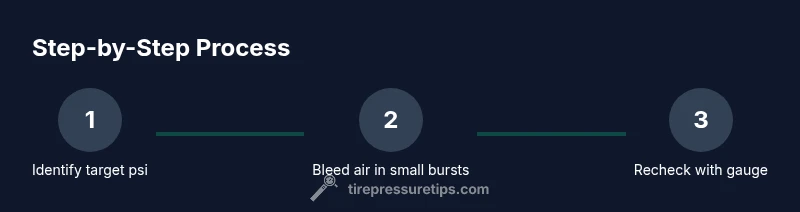
Practical steps to adjust safely (emergency lowering)
Step-by-step approach for emergency lowering without a gauge:
- Prepare by locating the placard values and ensuring you have a safe place to work. 2) Remove the valve cap and wipe around the stem to prevent contamination. 3) Press the valve stem gently with a clean tool or the tip of a small object to release air in small bursts. 4) After each burst, reassess the tire’s firmness and the vehicle’s behavior at low speed on a flat surface. 5) Repeat until the ride feels noticeably softer but still controlled; avoid overstating the change. 6) Refit the valve cap securely and plan a proper recheck with a gauge as soon as possible. 7) When you can, inflate to the exact spec using a gauge and recheck all tires.
Re-checking and safe re-inflation planning
Once you have access to a gauge, recheck all tires promptly and inflate to the manufacturer’s recommended specification. If a gauge isn’t immediately available, prioritize the tires most affected by load (e.g., the ones carrying more weight) and ensure even handling before continuing your drive. Long-term safety depends on restoring proper inflation and avoiding sustained underinflation.
Common mistakes to avoid
Don’t rely on guesswork alone for more than a very short distance. Never drive long distances on tires that are clearly underinflated, and avoid bleeding air to the point of significant softening that could compromise steering or heat build-up. Always attempt to verify with a gauge as soon as possible and revert to the exact spec.
Tools & Materials
- Tire pressure gauge(Digital or analog; ensure it covers 0-60 psi and is calibrated.)
- Vehicle door placard with recommended psi(Record front and rear values; some models differ by axle.)
- Valve-cap cap safety and cleaning cloth(Wipe before and after to prevent contamination.)
- Marker or notebook(Used to annotate any observed changes for later verification.)
- Gloves or protective hand gear(Keeps hands clean when handling valves and stems.)
- Valve-core tool (optional)(Helpful for controlled air bleed if a dedicated tool isn’t available.)
Steps
Estimated time: 30-45 minutes
- 1
Identify target psi from placard
Locate the driver’s door placard and note the recommended front and rear tire pressures. If the vehicle specifies separate values for each axle, record them. This gives you the safe reference point for any adjustments you make without a gauge.
Tip: Double-check if the placard shows a range or a single value per axle. - 2
Loosen the valve cap and prepare to bleed
Carefully remove the valve cap and set it aside in a clean spot. Inspect the valve stem for any damage or debris before bleeding air. A clean start reduces contamination and helps you maintain control over the bleed process.
Tip: Keep the cap nearby so you can reseal the stem after adjustments. - 3
Bleed air in small bursts
Gently press the valve stem with a clean tool (or the tip of a small object) to release a small amount of air. Pause, then assess the tire’s feel and the vehicle’s handling at a slow speed. Repeat in small bursts until you notice a softer ride, but avoid over-bleeding.
Tip: Aim for tiny bursts—think 1-2 psi per burst if you can gauge by feel, not by guesswork. - 4
Evaluate ride feel and repeat if needed
Drive slowly on a flat surface to assess how the tire loads and responds. If the ride is still too firm, bleed a little more air in gentle increments. Don’t push past a point where handling becomes uncertain or the tire looks visibly underinflated.
Tip: Take short test drives and give the tire a moment to settle after each burst. - 5
Repeat for all tires
Apply the same method to each tire, considering load distribution and wheel position. If one tire seems more affected by the adjustment, check that tire last to avoid skewed handling.
Tip: Keep notes on which tire you adjusted and how much you bled from each. - 6
Re-check with a gauge as soon as possible
Once you have access to a gauge, verify that all tires are within the manufacturer’s recommended range. Use the gauge’s bleed function to fine-tune if needed and ensure uniform inflation across all tires.
Tip: Seal valve caps tightly after re-checking to prevent dust and moisture ingress. - 7
Plan for proper inflation later
Create a plan to re-inflate to exact specs with a gauge at the earliest opportunity, such as at a service station or with a portable pump. Proper inflation protects tire wear, fuel efficiency, and handling.
Tip: Store a compact gauge in the glove box for quick checks on the road.
Frequently Asked Questions
Is it safe to drive on underinflated tires after lowering without a gauge?
Only for a short distance and at slow speeds. Recheck with a gauge as soon as you can and re-inflate to the recommended range.
It's safe only for a short trip; get to a gauge soon and re-inflate to the recommended pressure.
How much should I lower air without measuring?
There is no fixed safe amount. Use the placard as a reference and adjust by feel, then verify with a gauge as soon as possible.
There isn't a fixed amount; use the placard and feel, then verify with a gauge soon.
Will lowering pressure affect tire wear?
Prolonged underinflation can cause uneven wear and heat buildup. Use only short-term adjustments and re-check with a gauge.
Underinflation can cause uneven wear; adjust only temporarily and verify later.
Do temperature changes affect tire pressure?
Yes. Colder temperatures lower PSI; retest and re-inflate to the correct range when possible.
Yes, temperature lowers pressure; recheck when you can.
Can I use soap to detect leaks while lowering?
Soap solution helps detect leaks, but it doesn't help with the measurement task. Use a gauge for accurate inflation.
Soap detects leaks, but you still need a gauge for accurate pressure.
What should I do once I have access to a gauge?
Inflate each tire to the recommended spec using the gauge, then recheck all tires to ensure even inflation.
Inflate to the manufacturer spec with a gauge and recheck all tires.
Watch Video
What to Remember
- Identify target psi from placard.
- Adjust in small increments by feel.
- Re-check with a gauge when available.
- Monitor ride quality and handling.
- Avoid long-distance driving on underinflated tires.